Part 1 of 2
This past year I sold all but one of my springers and moved to PCP rifles. My 30 and 50 yard shooting had moved to 100 yards with the quest for tiny groups at that distance. While I really do like PCP rifles, I also missed the spring piston rifles that I sold. I missed the craftsmanship and mechanics that were the lifeblood of my springers. I missed the hefty feel, the slight recoil on the shot, and the challenge of shooting them. I also missed tearing into each new rifle, then evaluating each part, polishing and tuning until the rifle was customized just the way I wanted it.
Any other PCP shooters ever had this same feeling? I know some have left for PCP and never came back to springers. But for me, I never lost my appreciation for fine springers such as the TX200, HW97, HW98, etc.
I recently sold my .22 PCP rifles in order to get a larger caliber for my 100 yard shooting. I then picked up my only remaining springer...the HW98 and started target shooting at 30-50 yards. It didn't take long for me to realize what I had been missing!!! Shooting this springer at 30 and 50 yards was every bit as much fun as my PCP rifles. After a few weeks of shooting the 98, I decided to get another springer for a project. Out of all my rifles, the TX200 Hunter Carbine was probably my overall favorite. It had the accuracy of the Pro-Sport, but had a stock design that fit me better. It also had the same 9.5" LW barrel that I really liked. Hunters may like the Pro-Sports and Hunter Carbines because they are lighter, shorter and easier to maneuver in the field, but I actually prefer them over the full length TX for target shooting. I don't know what it is, but they just seem to shoot better. Tighter groups and not quite as finicky....just my personal opinion.
So.....I went to Pyramyd Air and saw they had only one Hunter Carbine .177 Walnut right hand remaining. I finally dropped it in my cart and bought it. I was apprehensive at first because my history with the Air Arms Springers was hit or miss as far as quality goes. If you read through my project reviews you will see that I have encountered numerous QC issues with the Air Arms springers.
Blemished bluing
Chipped trigger sears
Debris in compression tubes
Poor machining on outside of compression tube
Cracked stock
just to name a few.......
I was able to resolve all problems previously, and Pyramyd Air was always top notch in handling any warranty replacements.
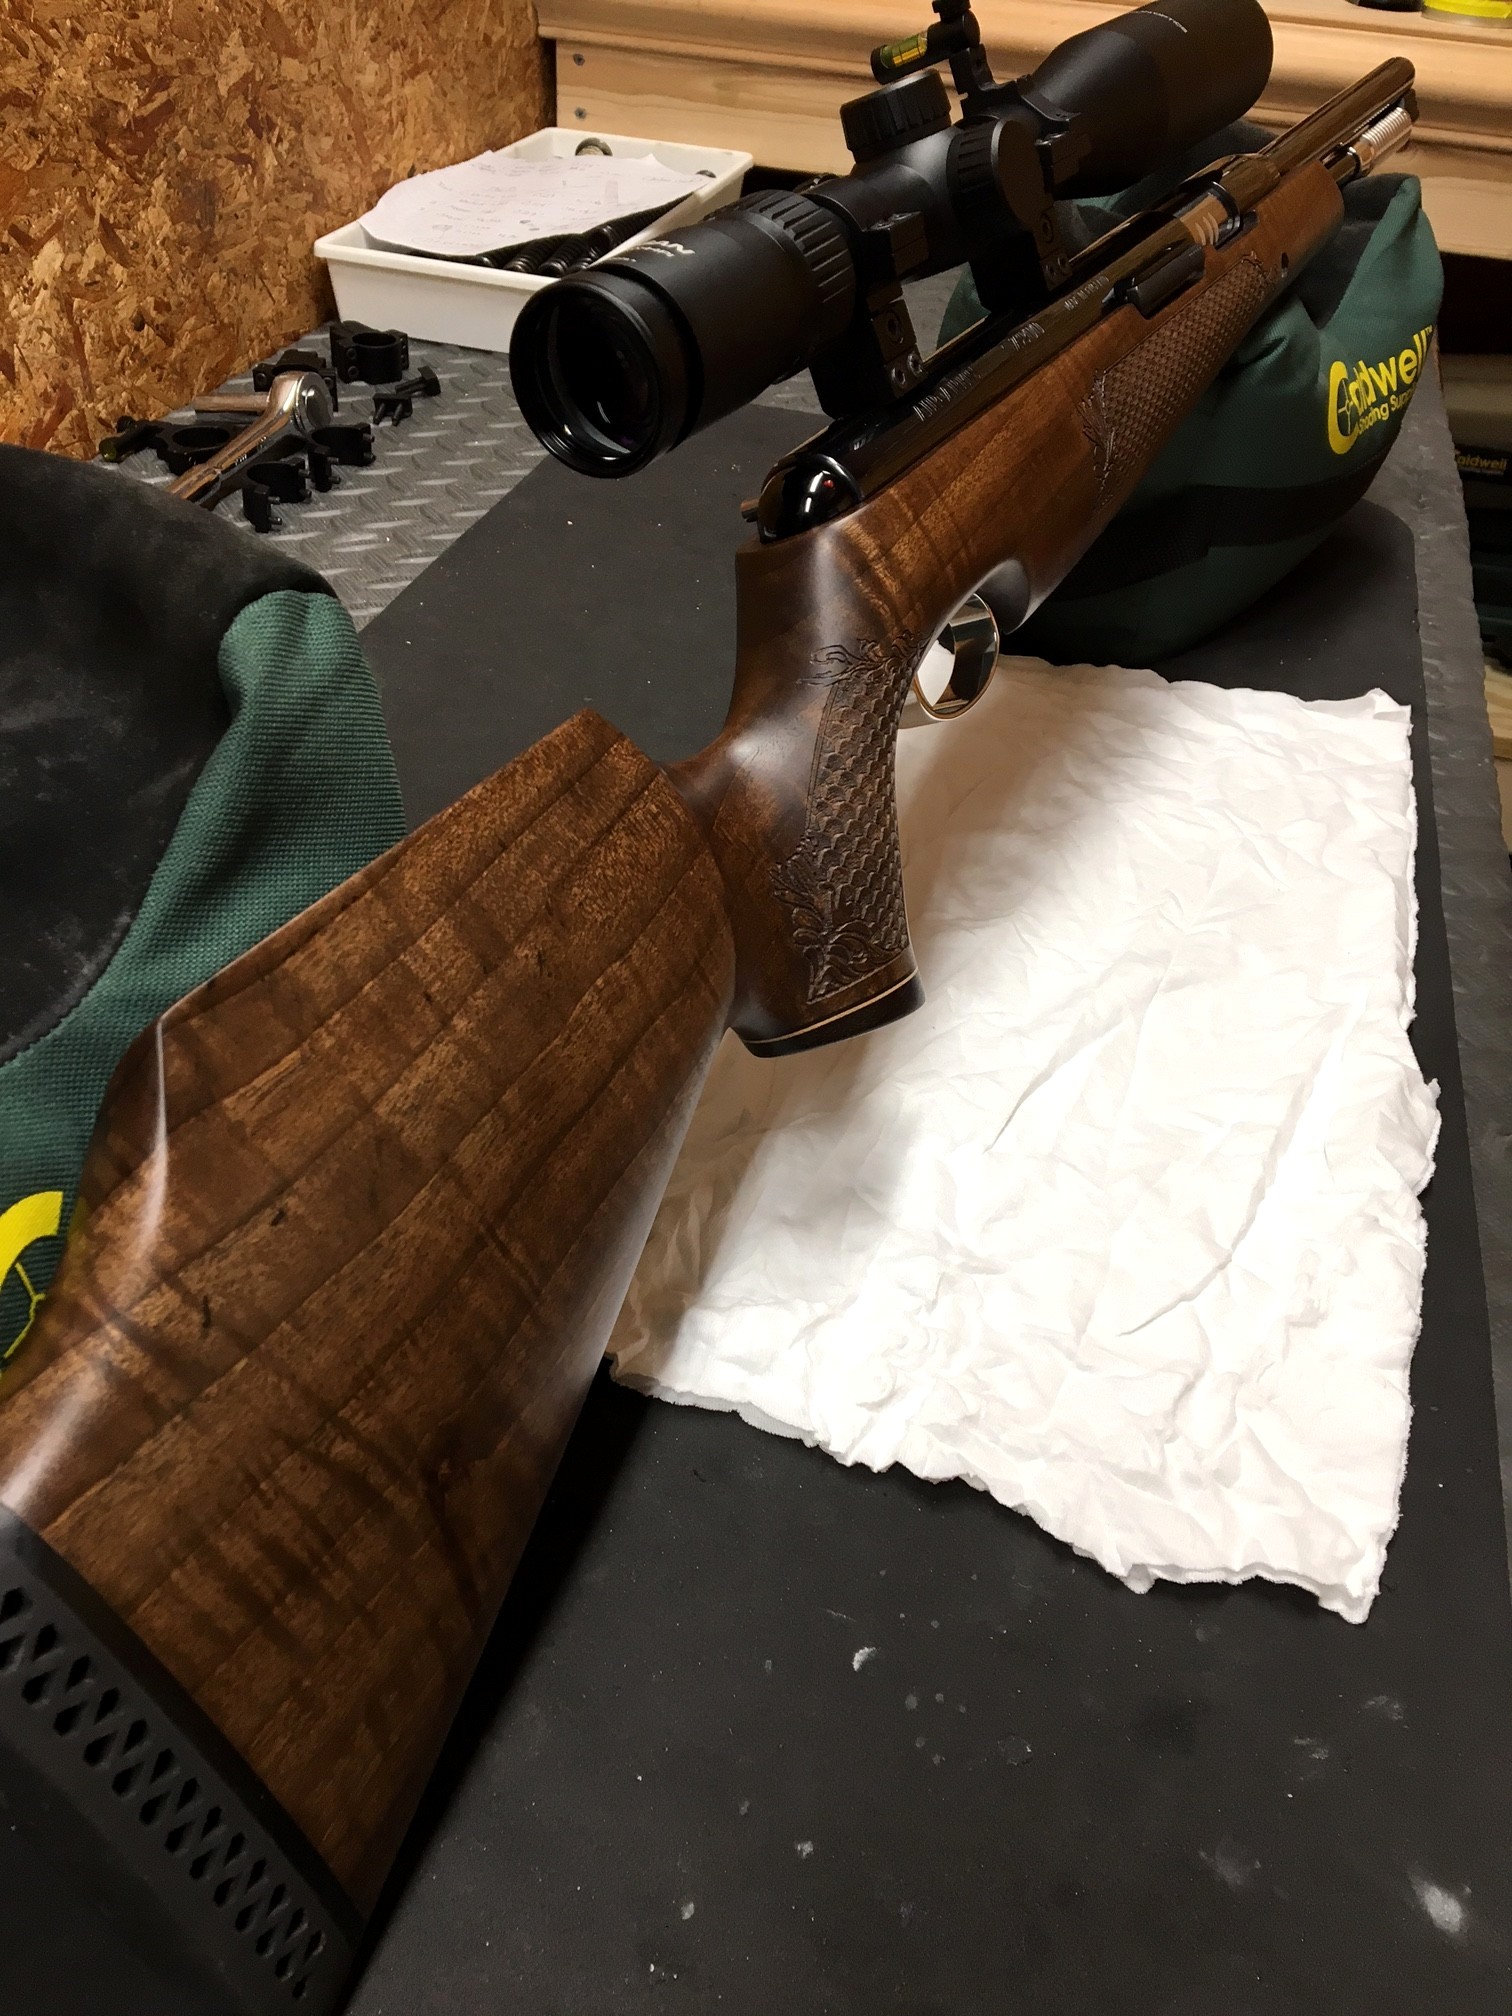
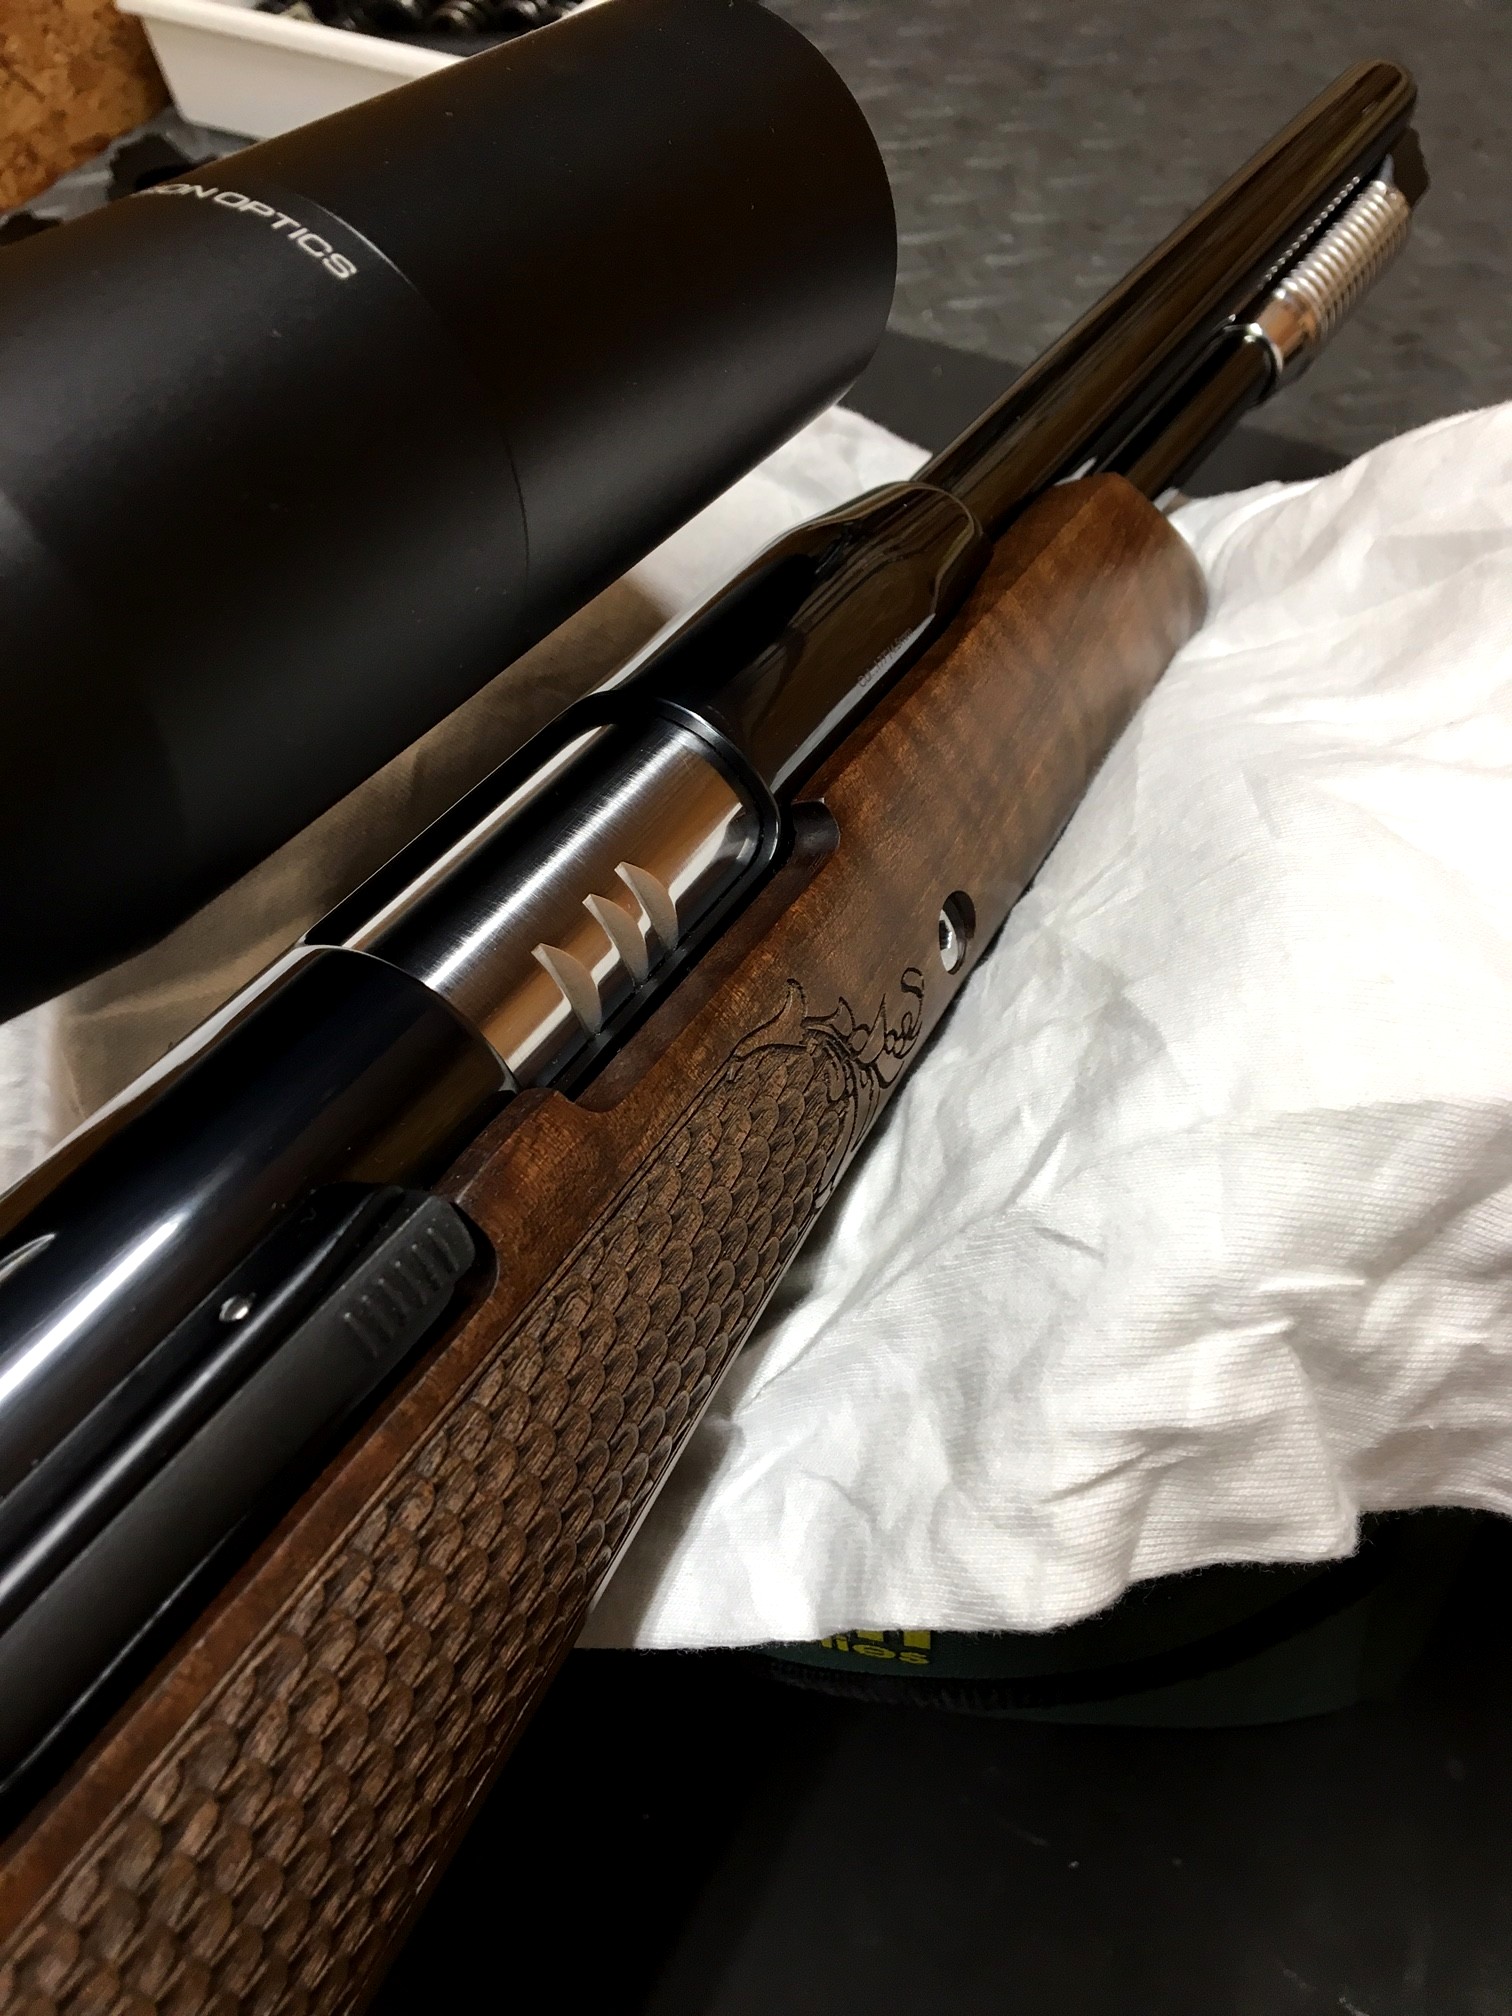
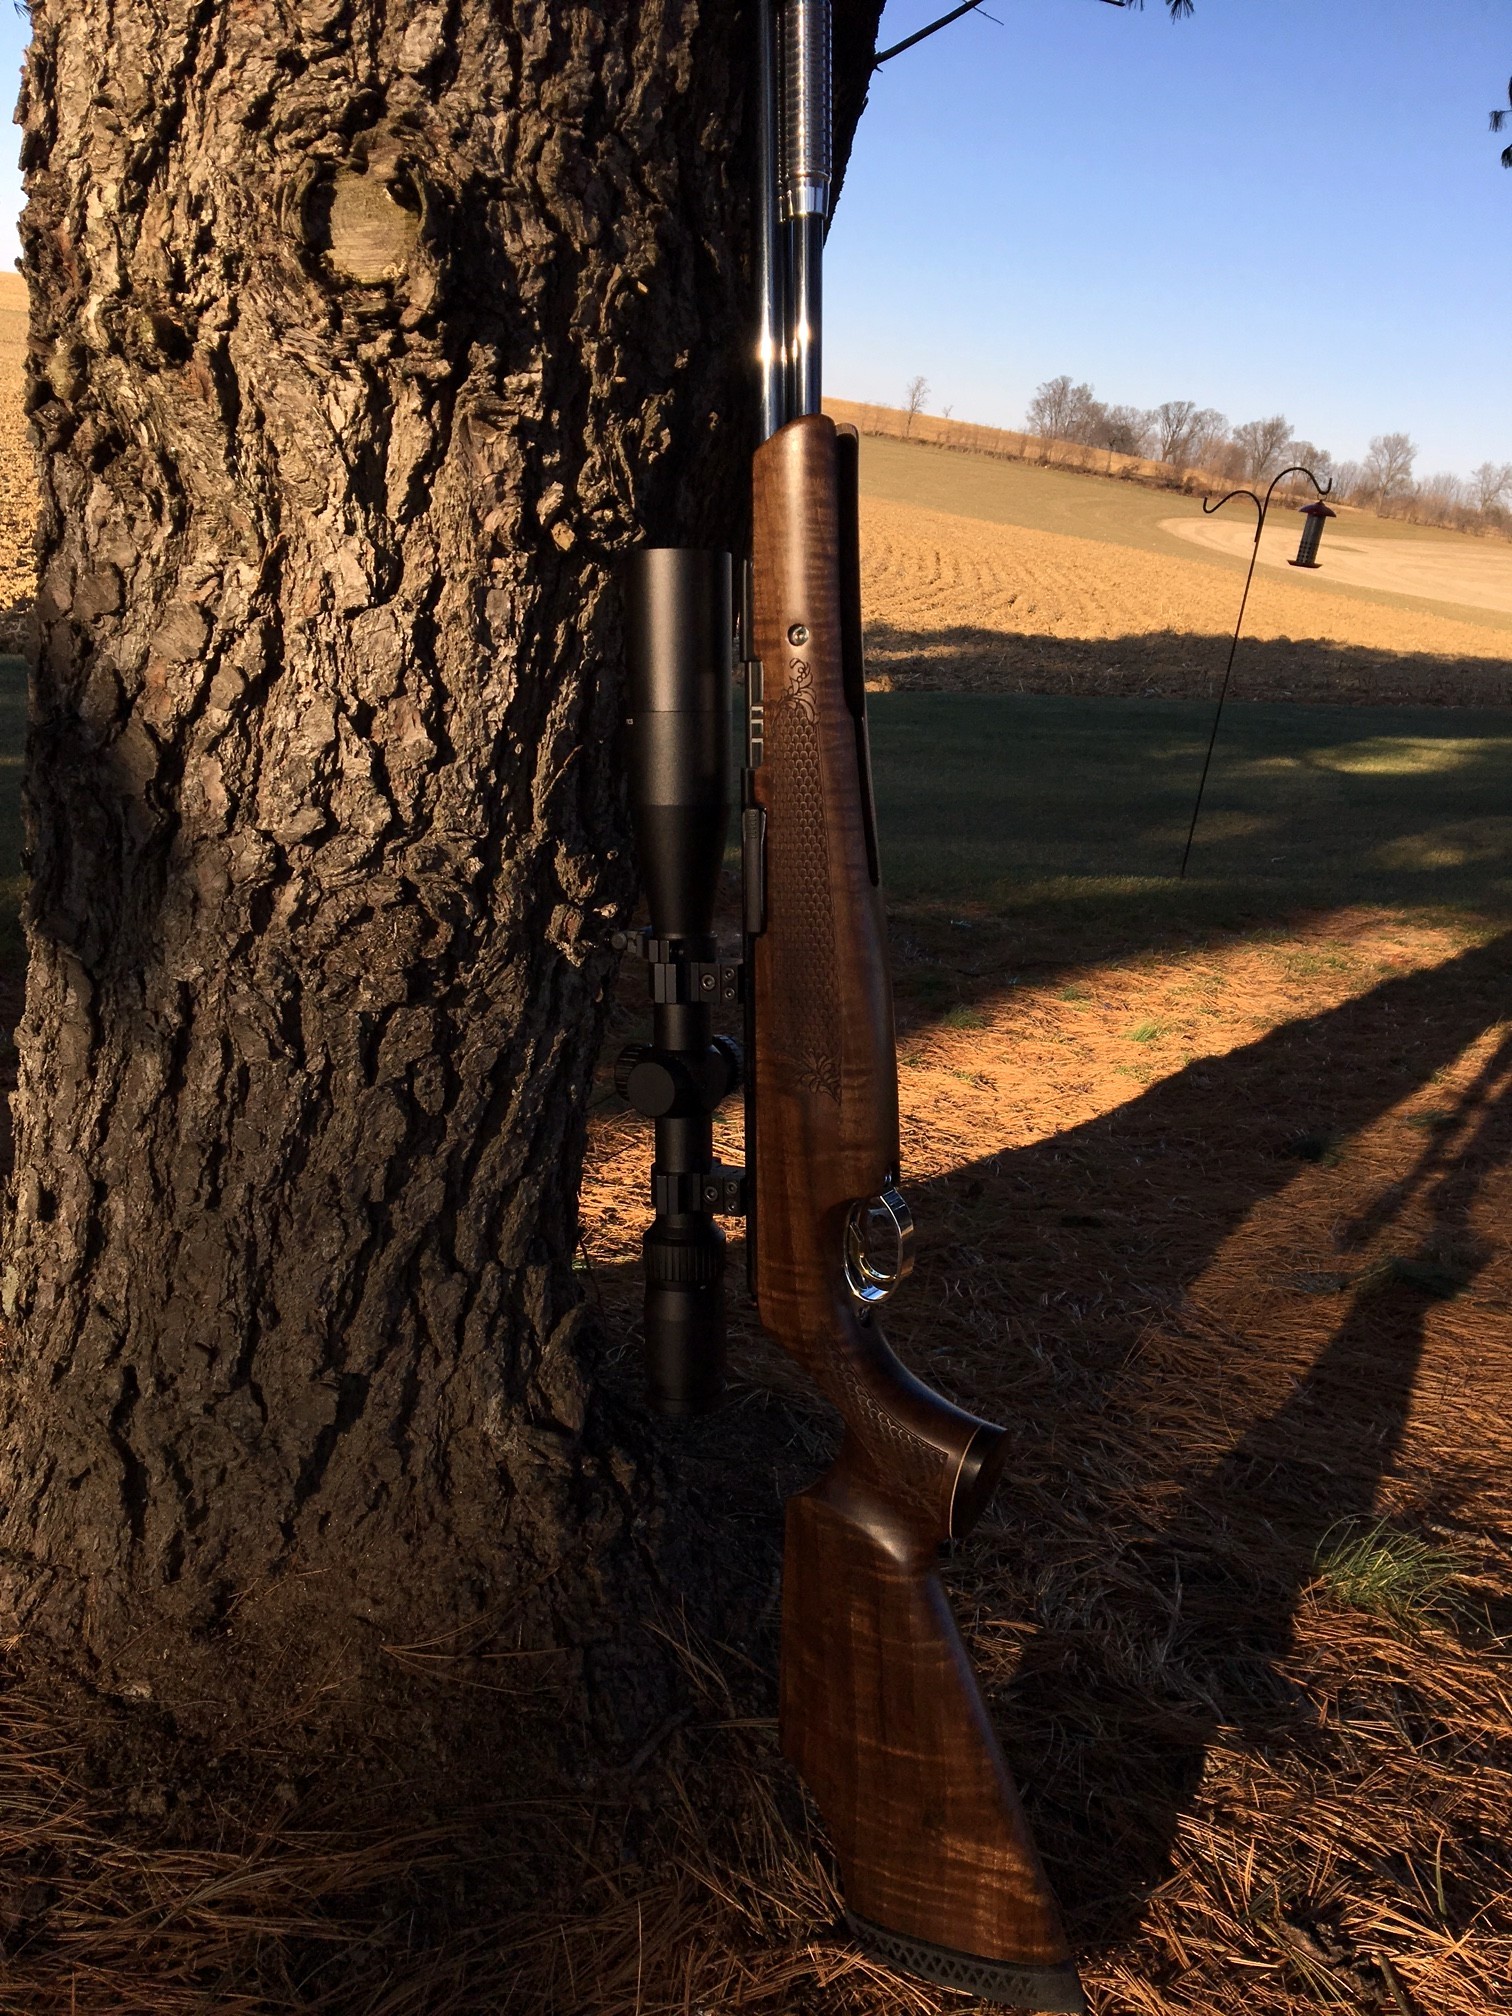
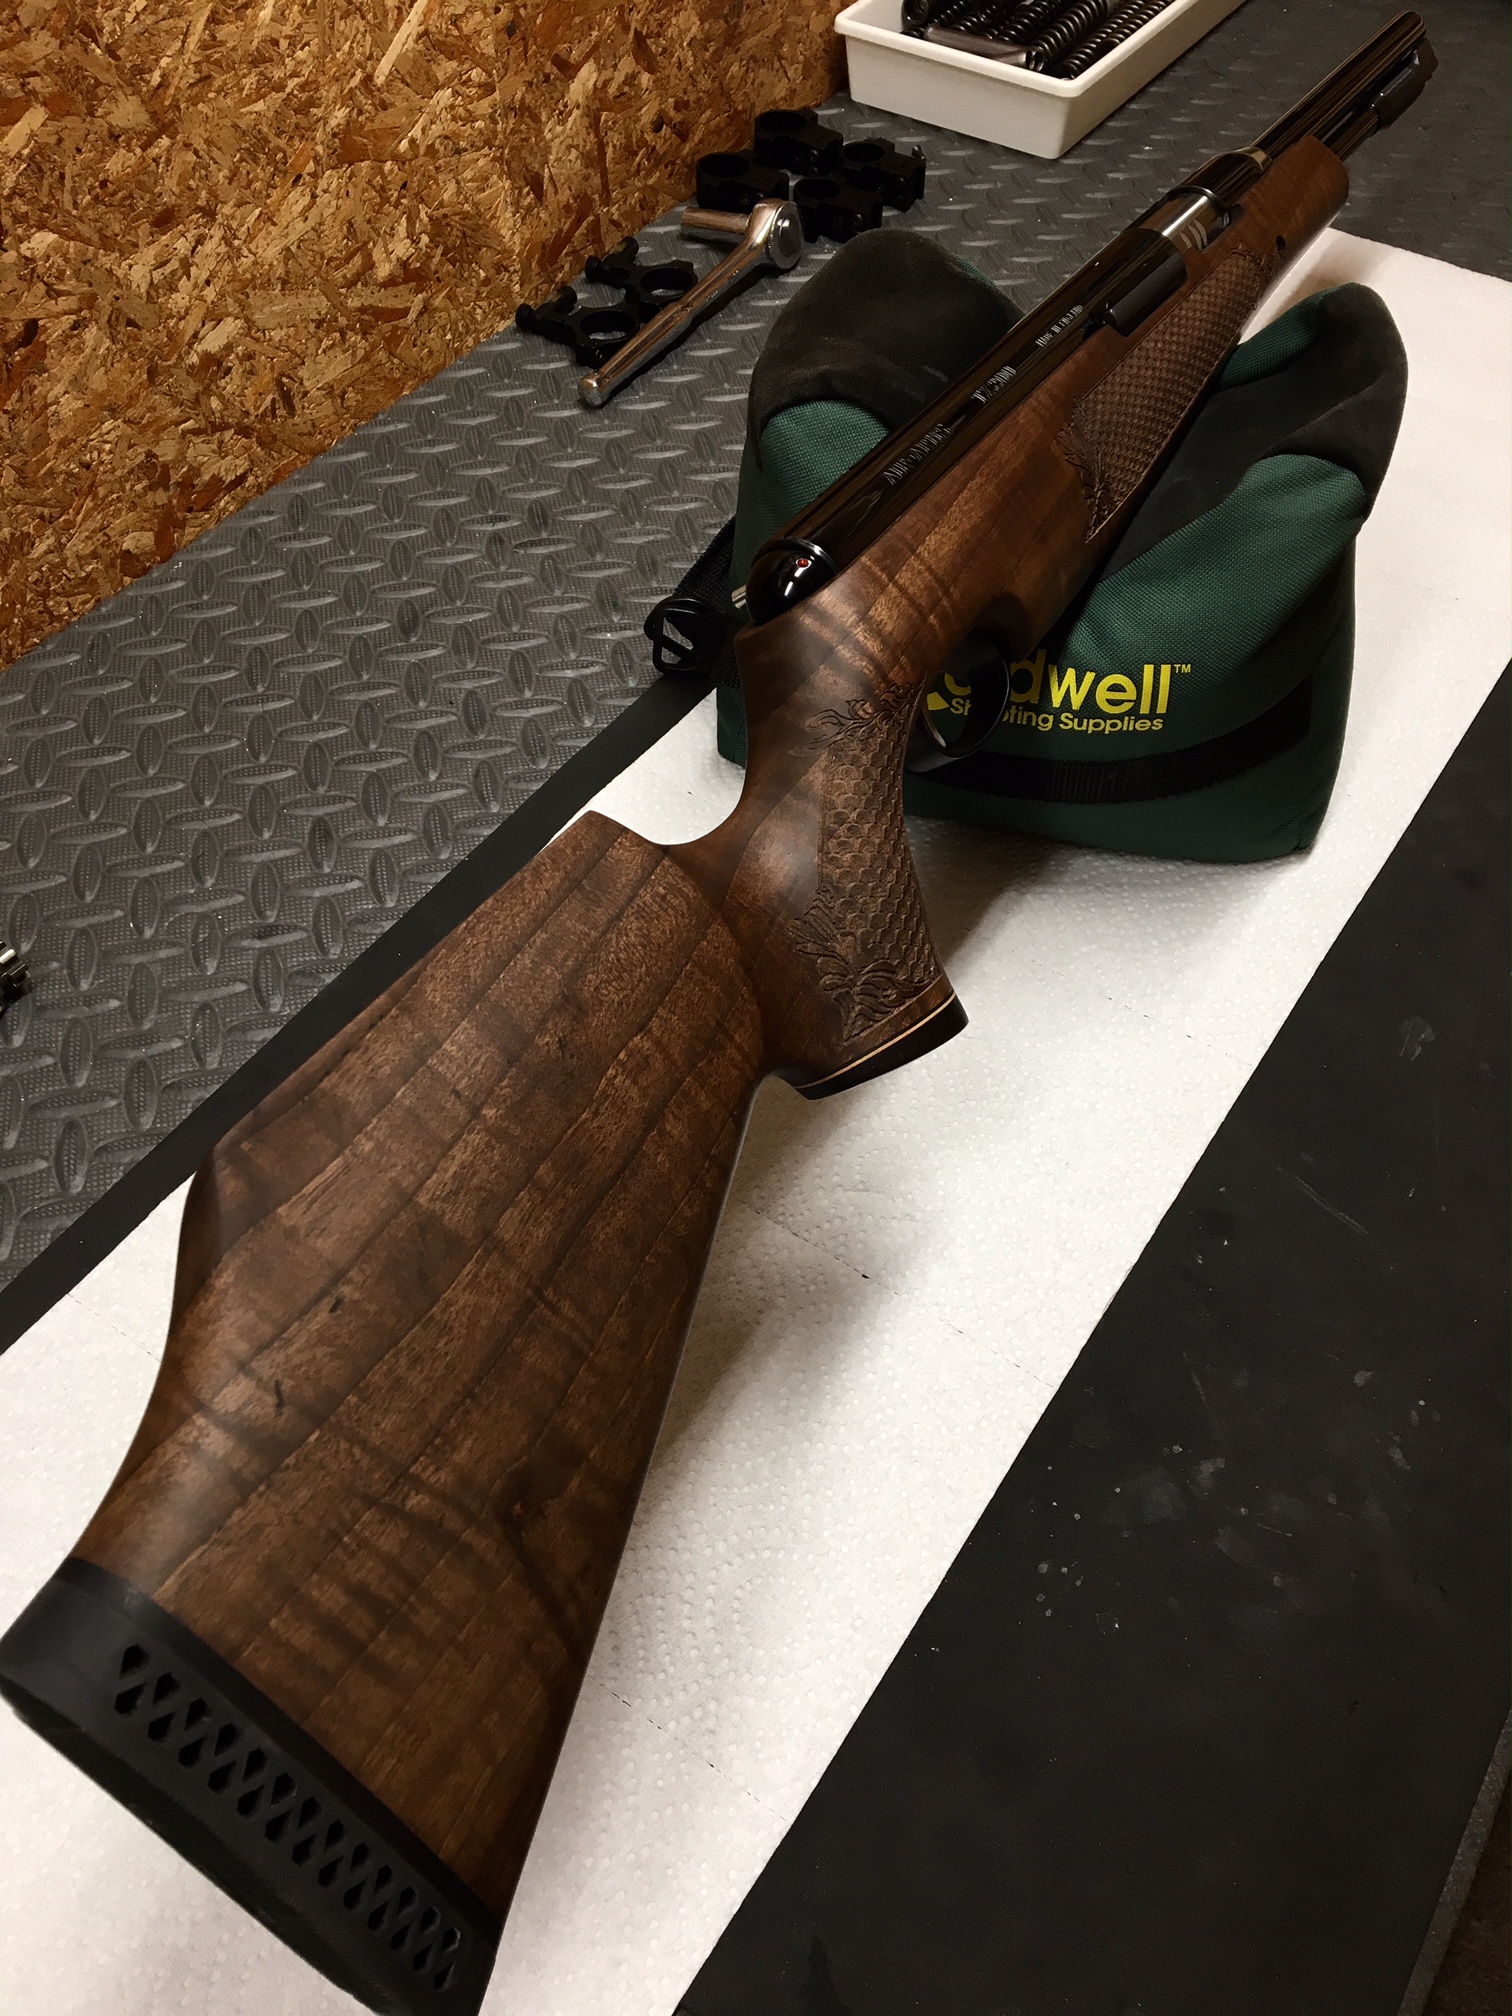
A few days later my new Hunter Carbine had arrived....with a deep breath and slow exhale I opened the box to see what it looked like. Well, it was absolutely STUNNING!!!! It had perfect bluing and the most gorgeously detailed walnut stock that I had received to date. This stock has defined grain, stiping from front to back on both sides, and various contrasting colors that change as you move to different angles. It also had an almost checkerboard appearance at certain angles, first time I had seen that on the AA walnut stocks. Just beautiful. Ok, so it passed the first test...cosmetic appearance. The next and much larger step was to tear into the rifle to see what all the internals were like.
And so begins my project overview......
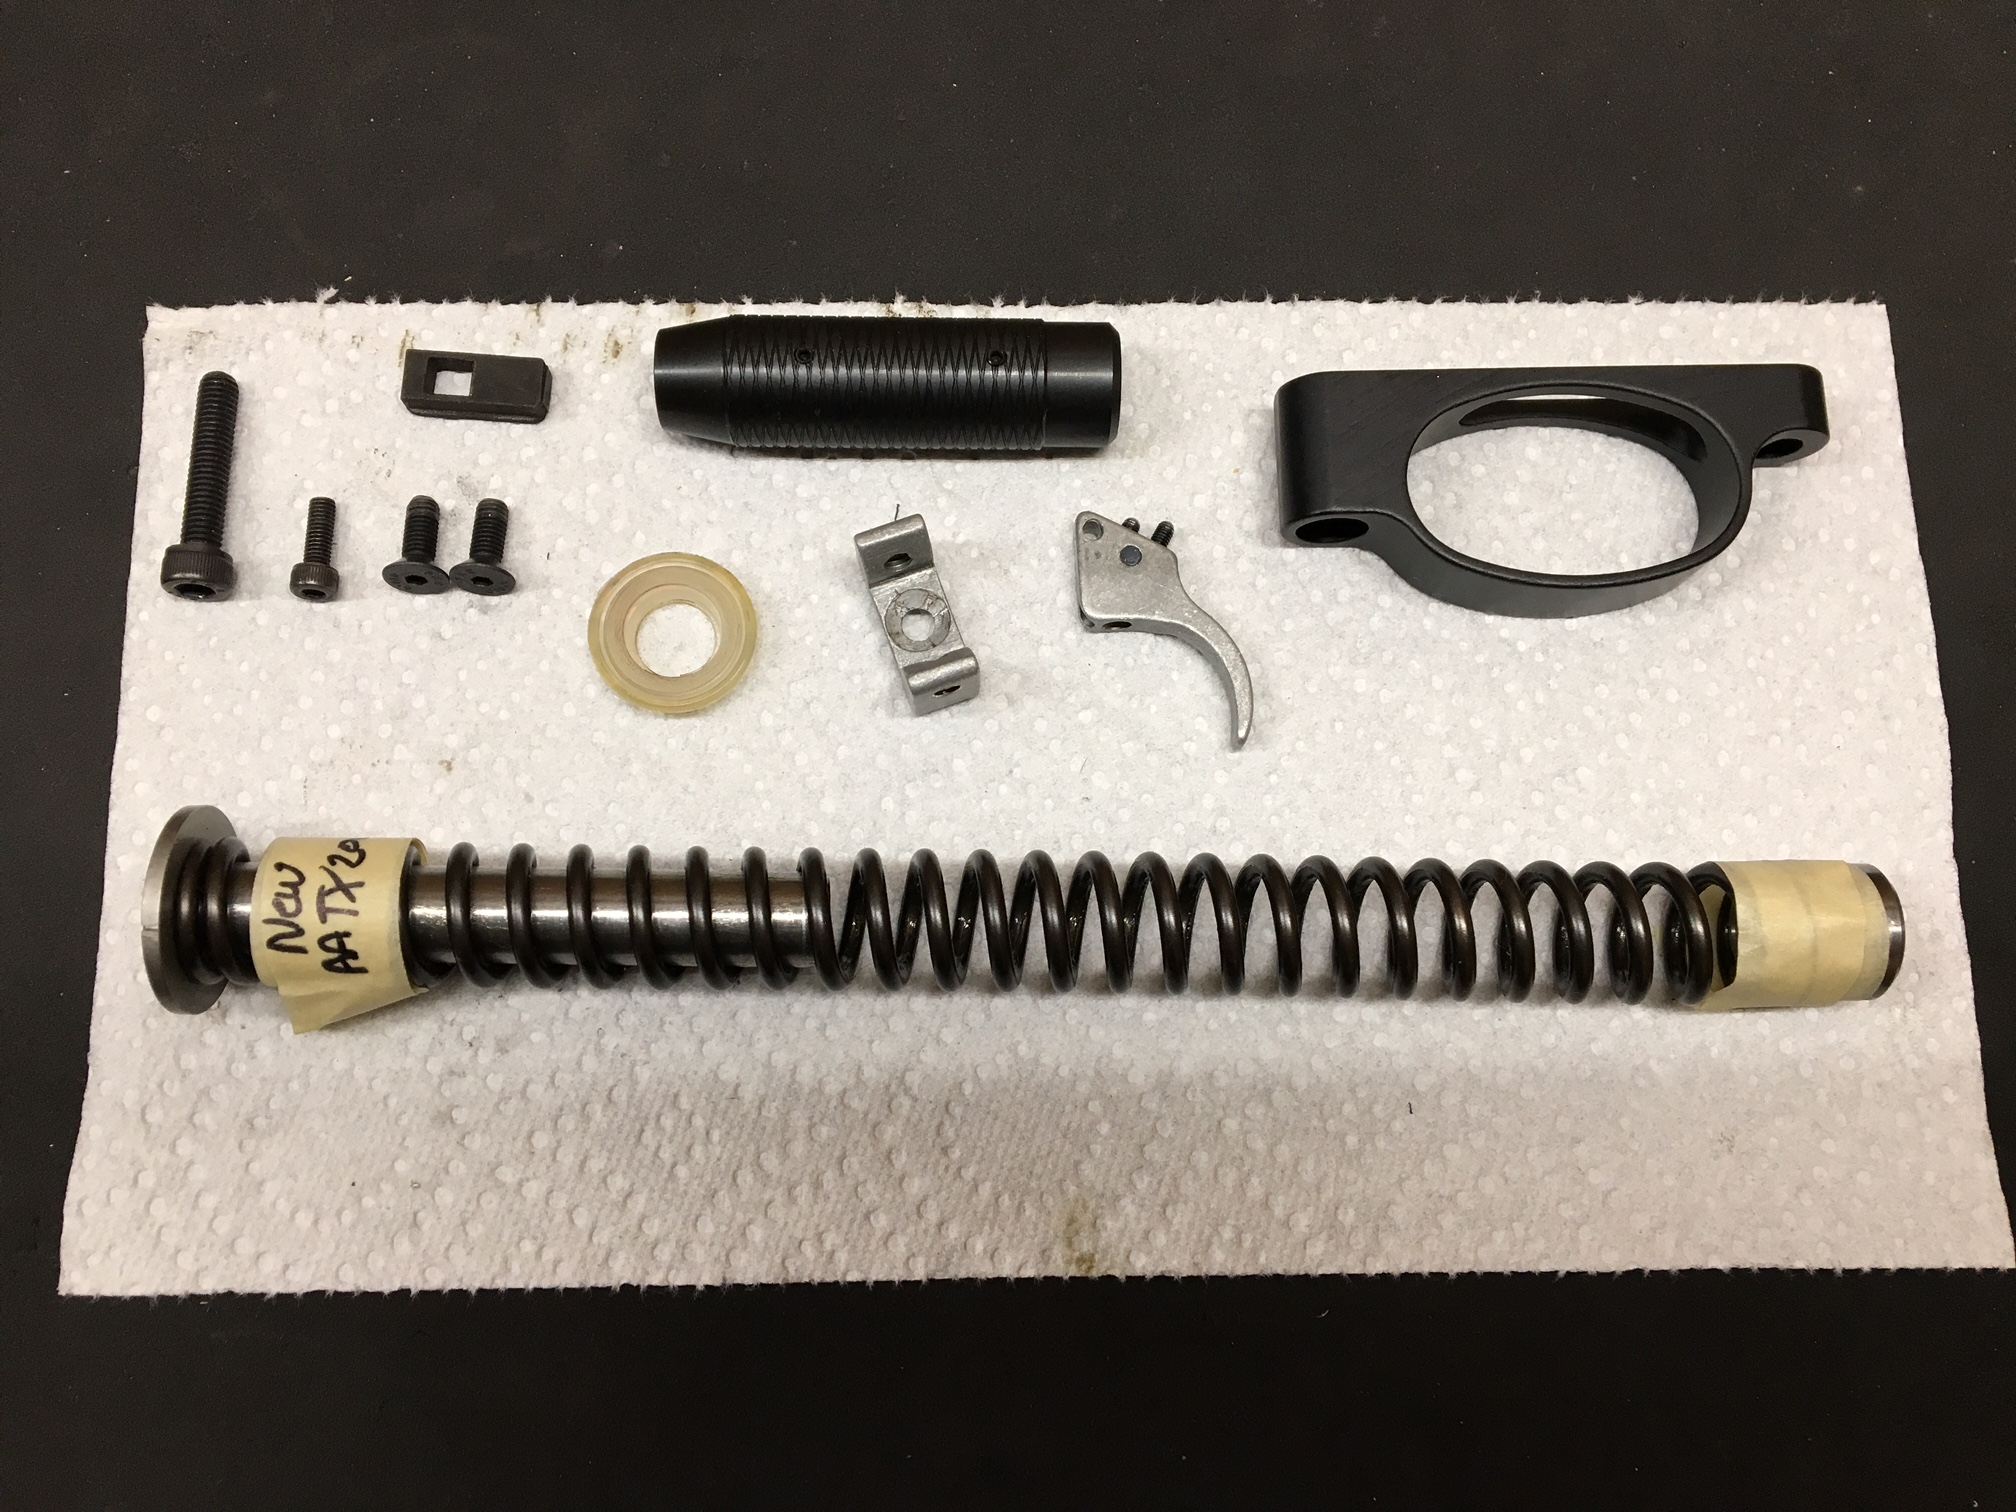
I had this week off on vacation and since I didn't leave myself much time for everything to come together in time for the Christmas Holiday. I quickly ordered the following supplies;
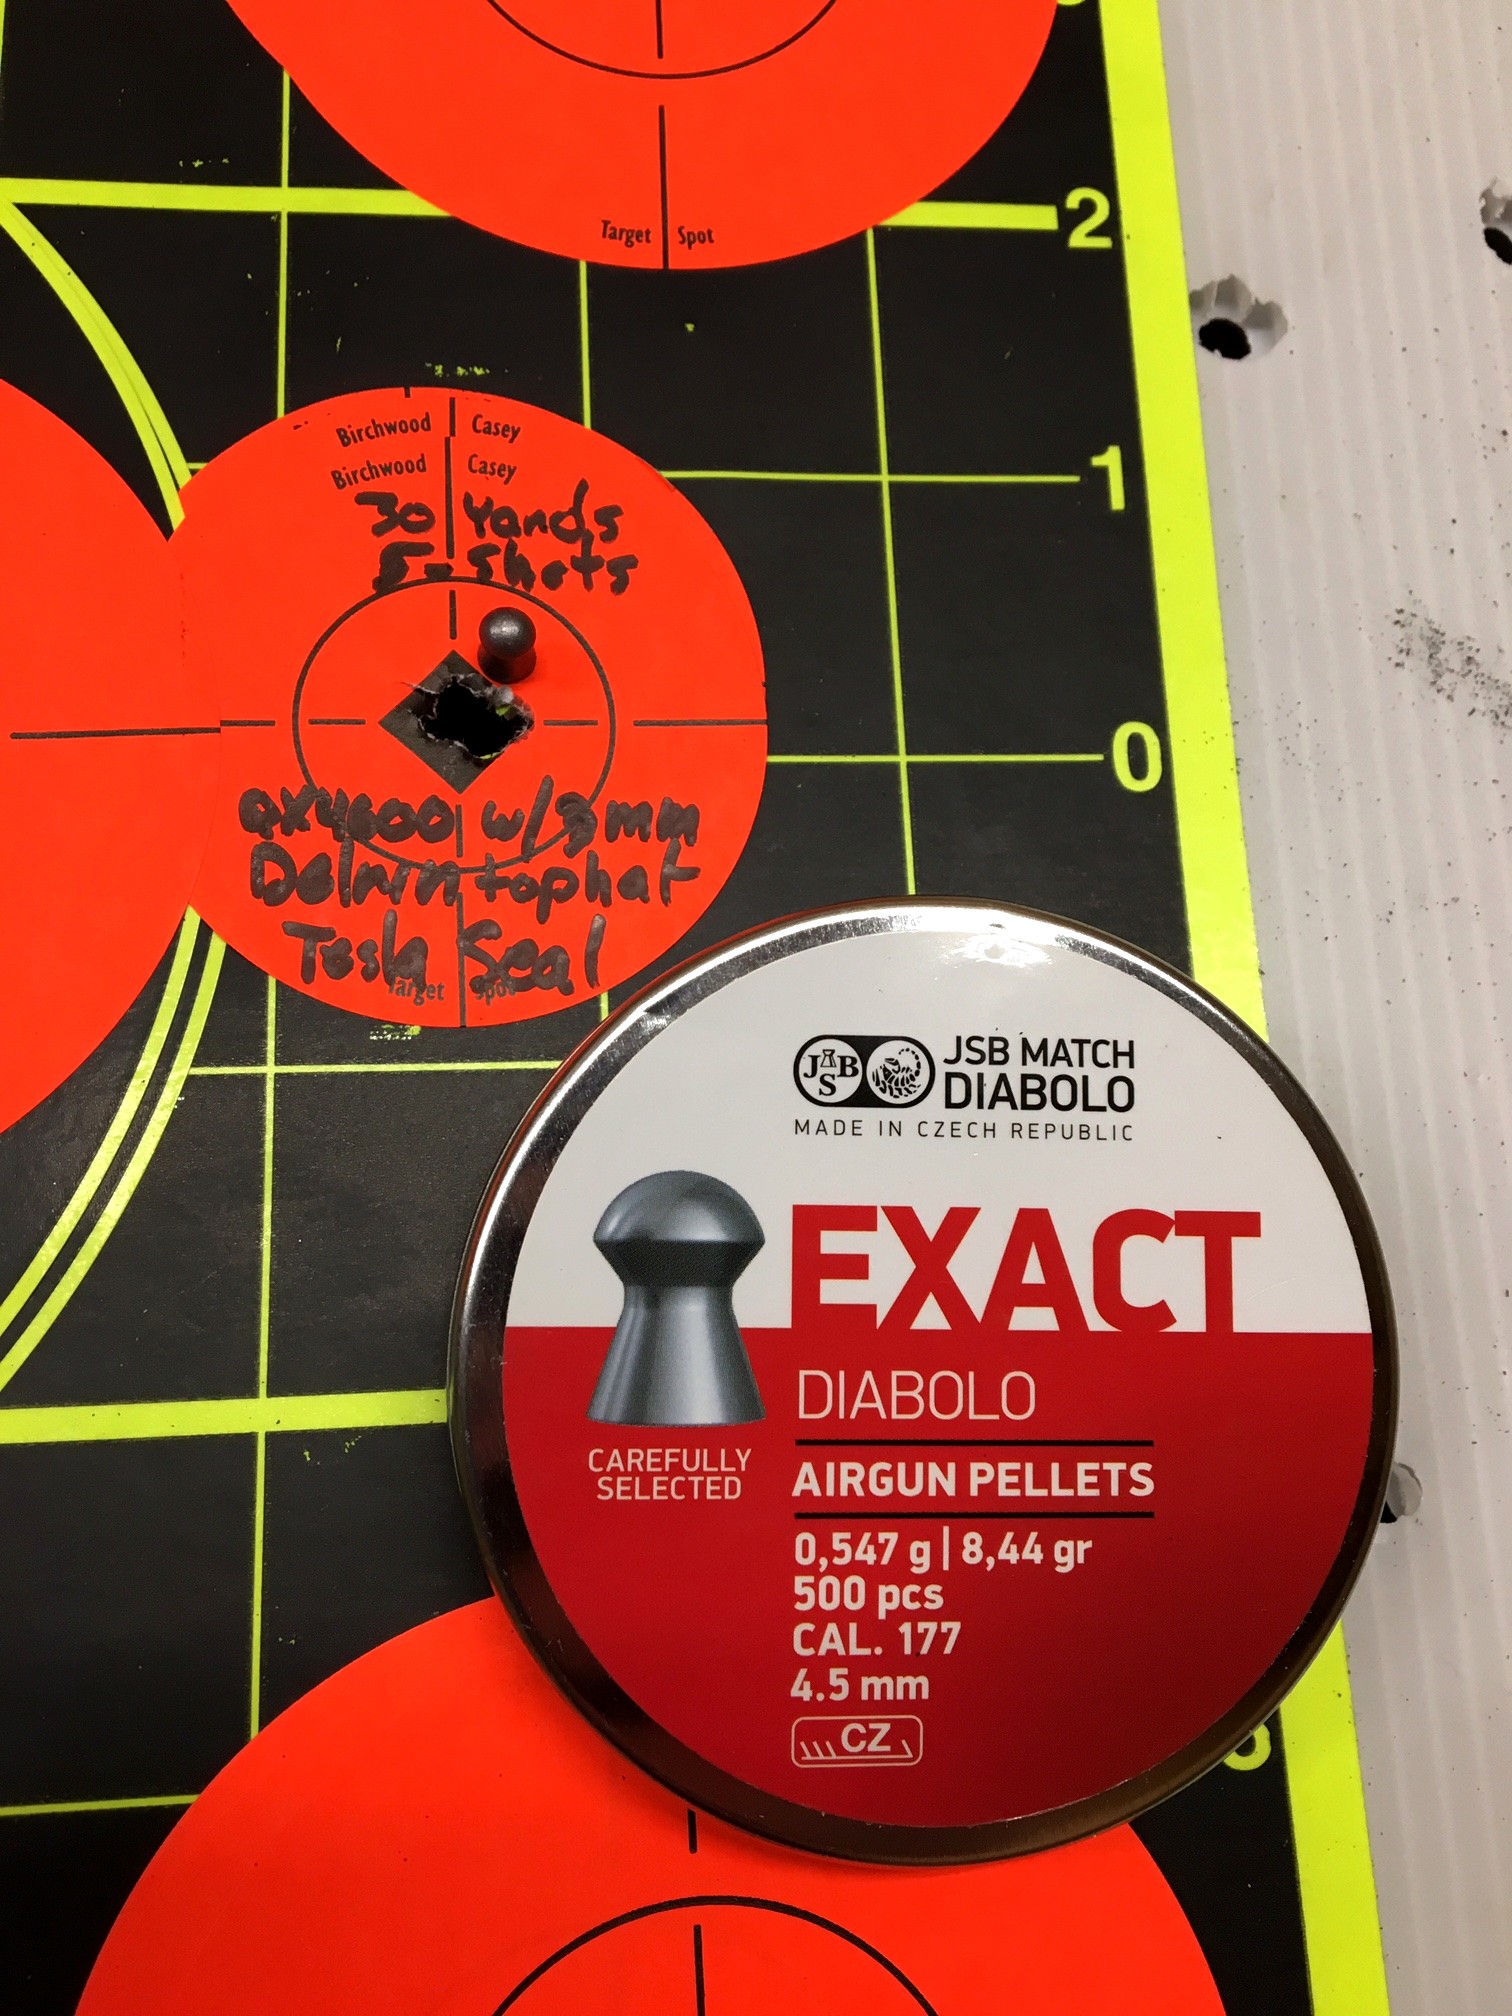
Maccari QX4600 spring (.120") - ordered preset from James Maccari
Maccari FAC spring (.125") - ordered preset from James Maccari
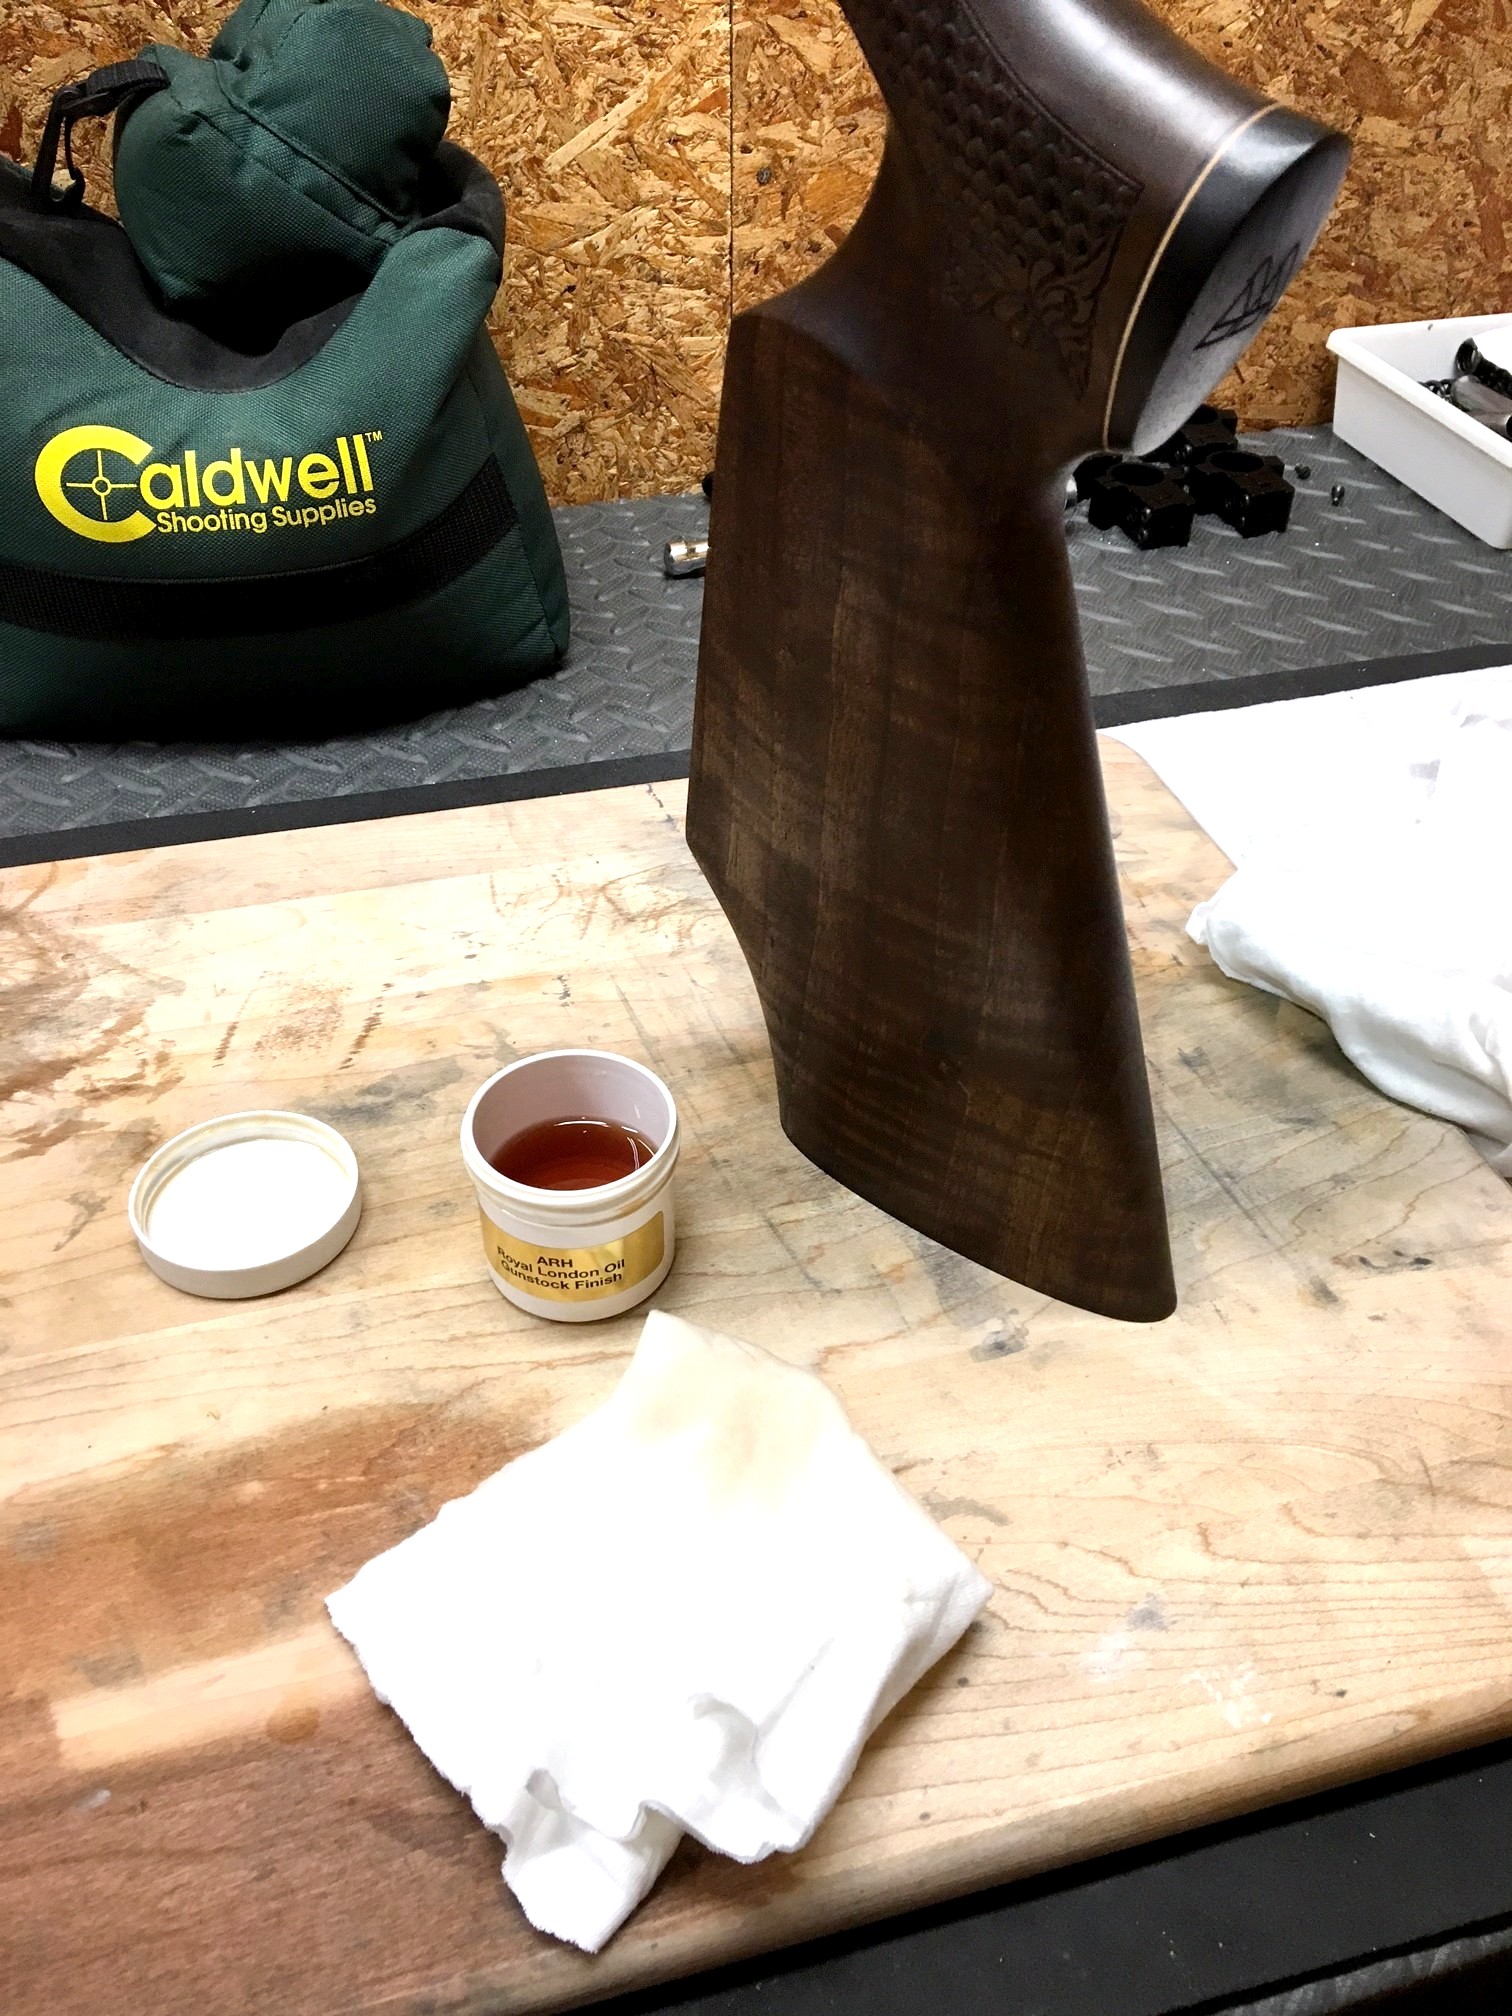
Royal London Oil
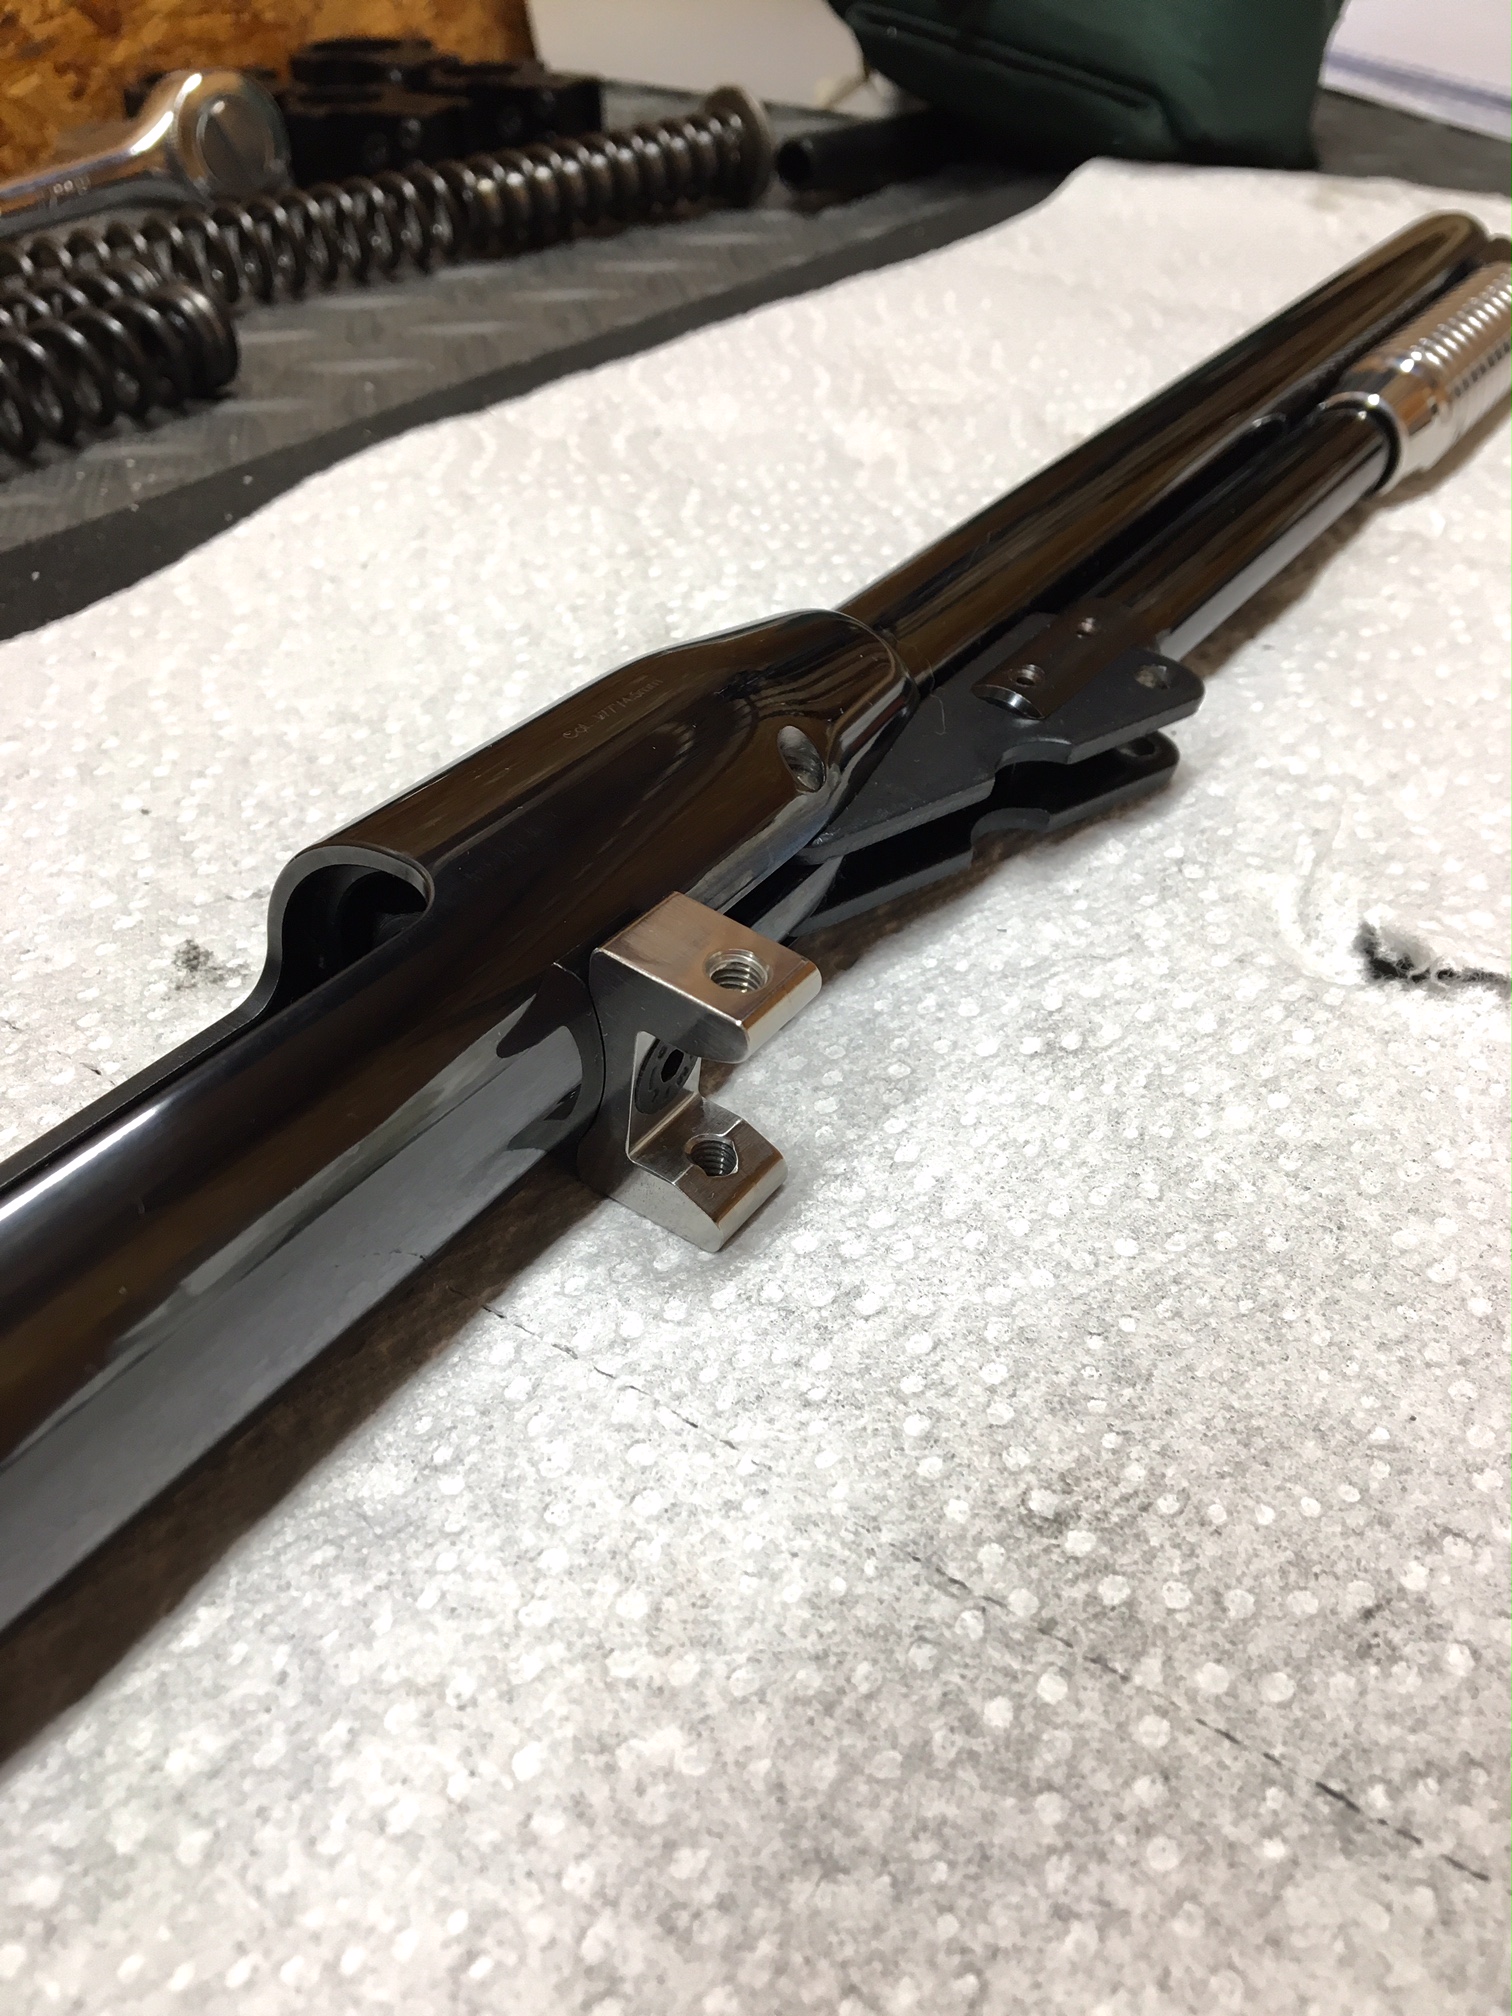
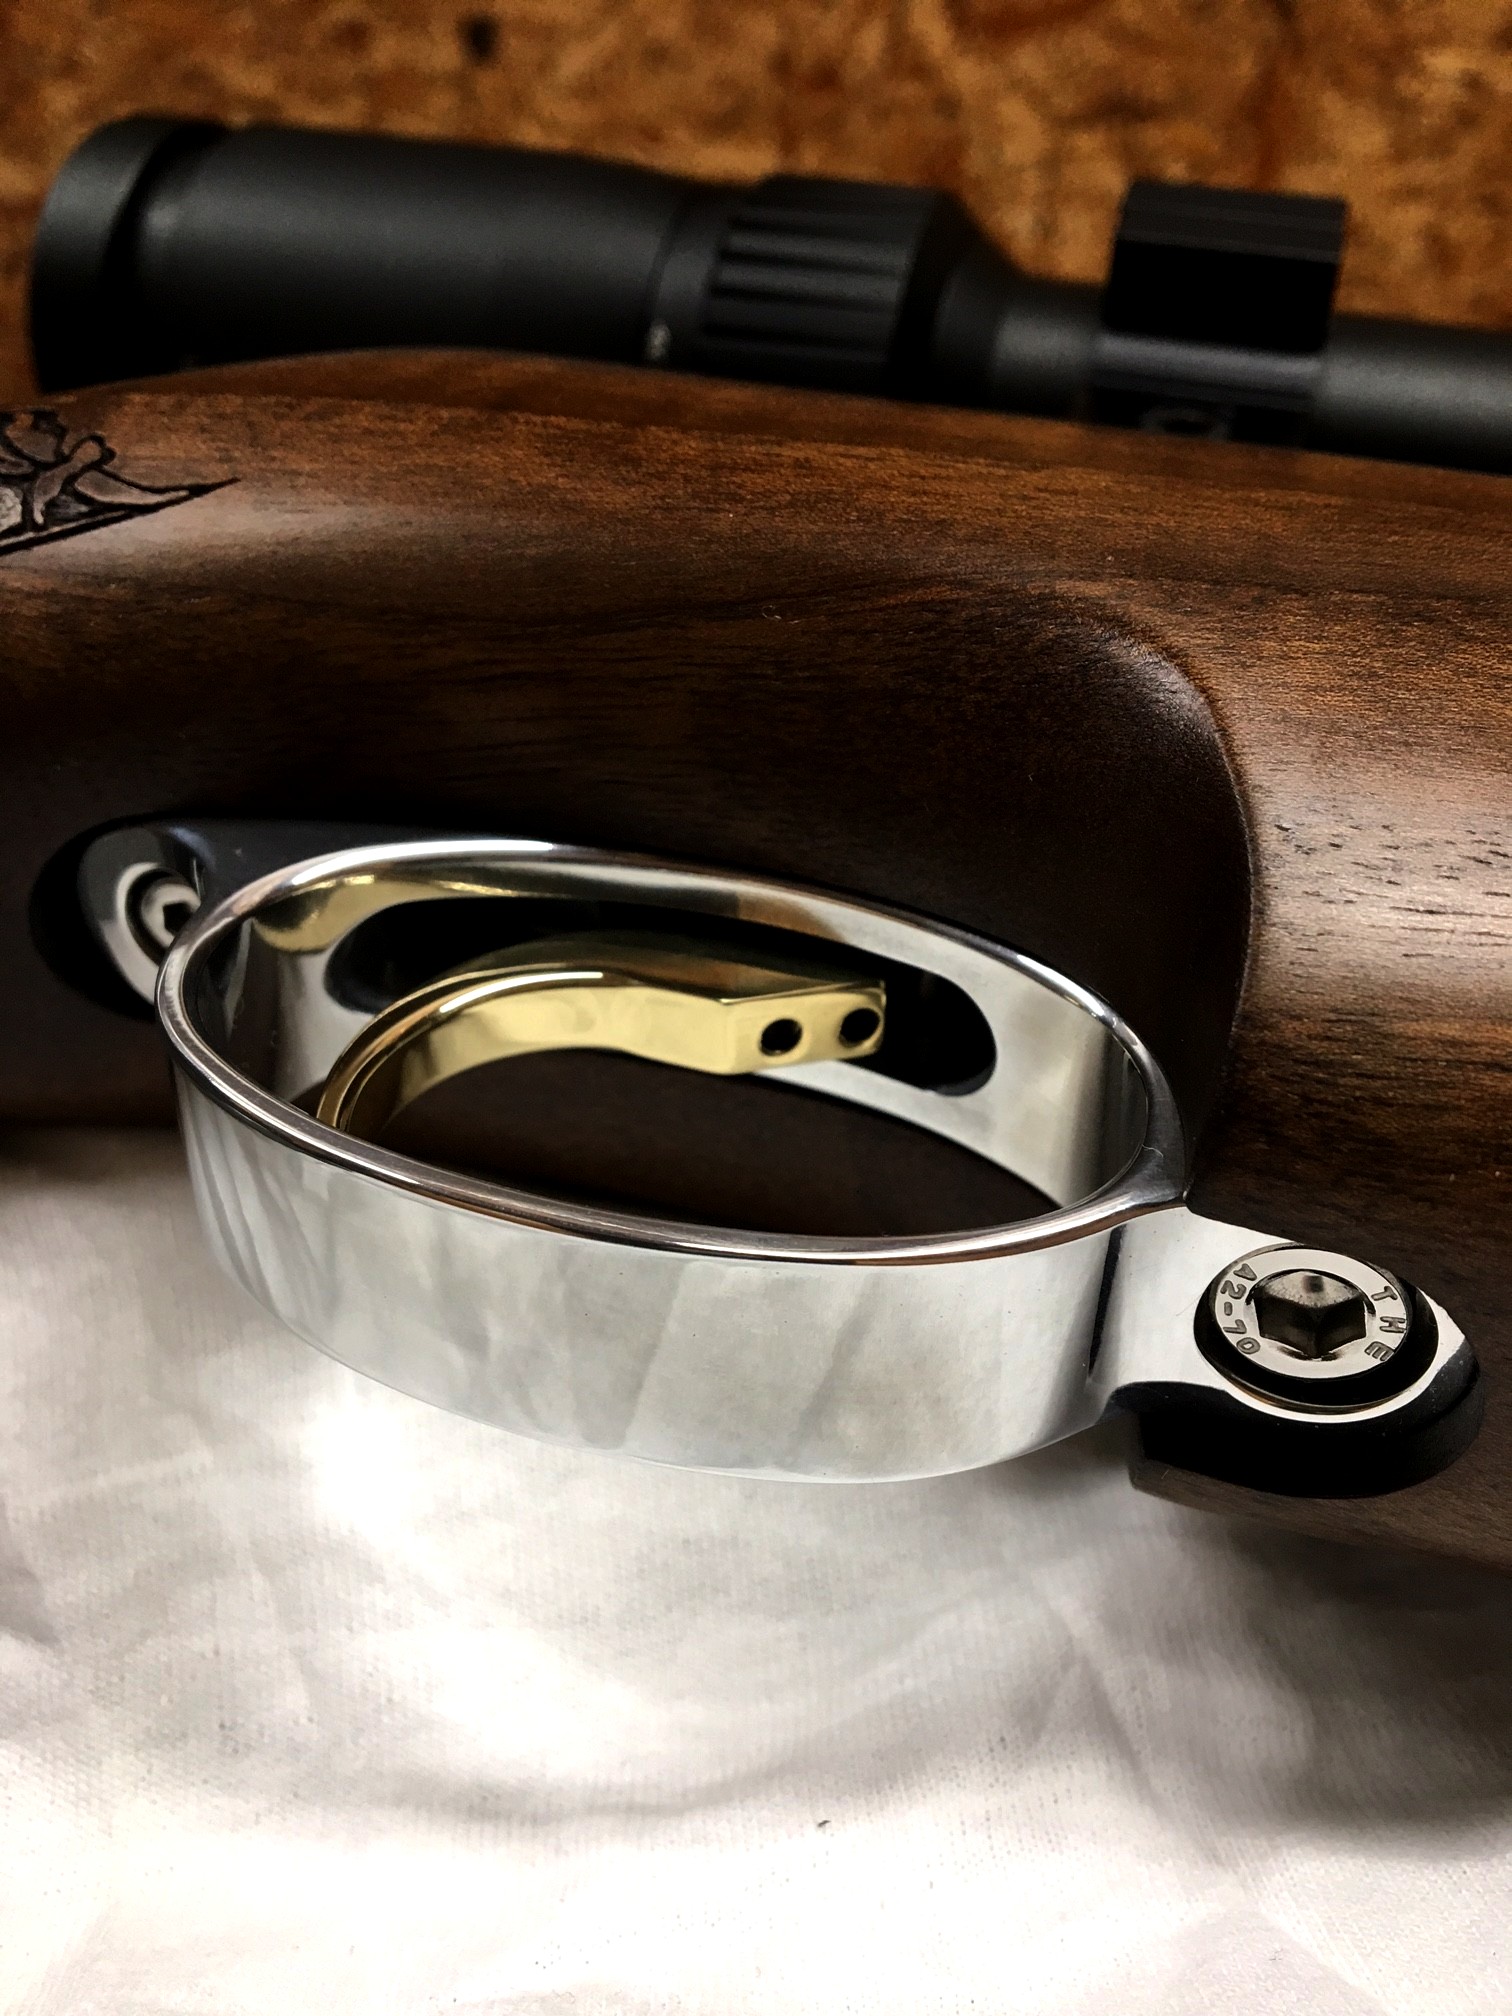
Stainless machined forearm bracket
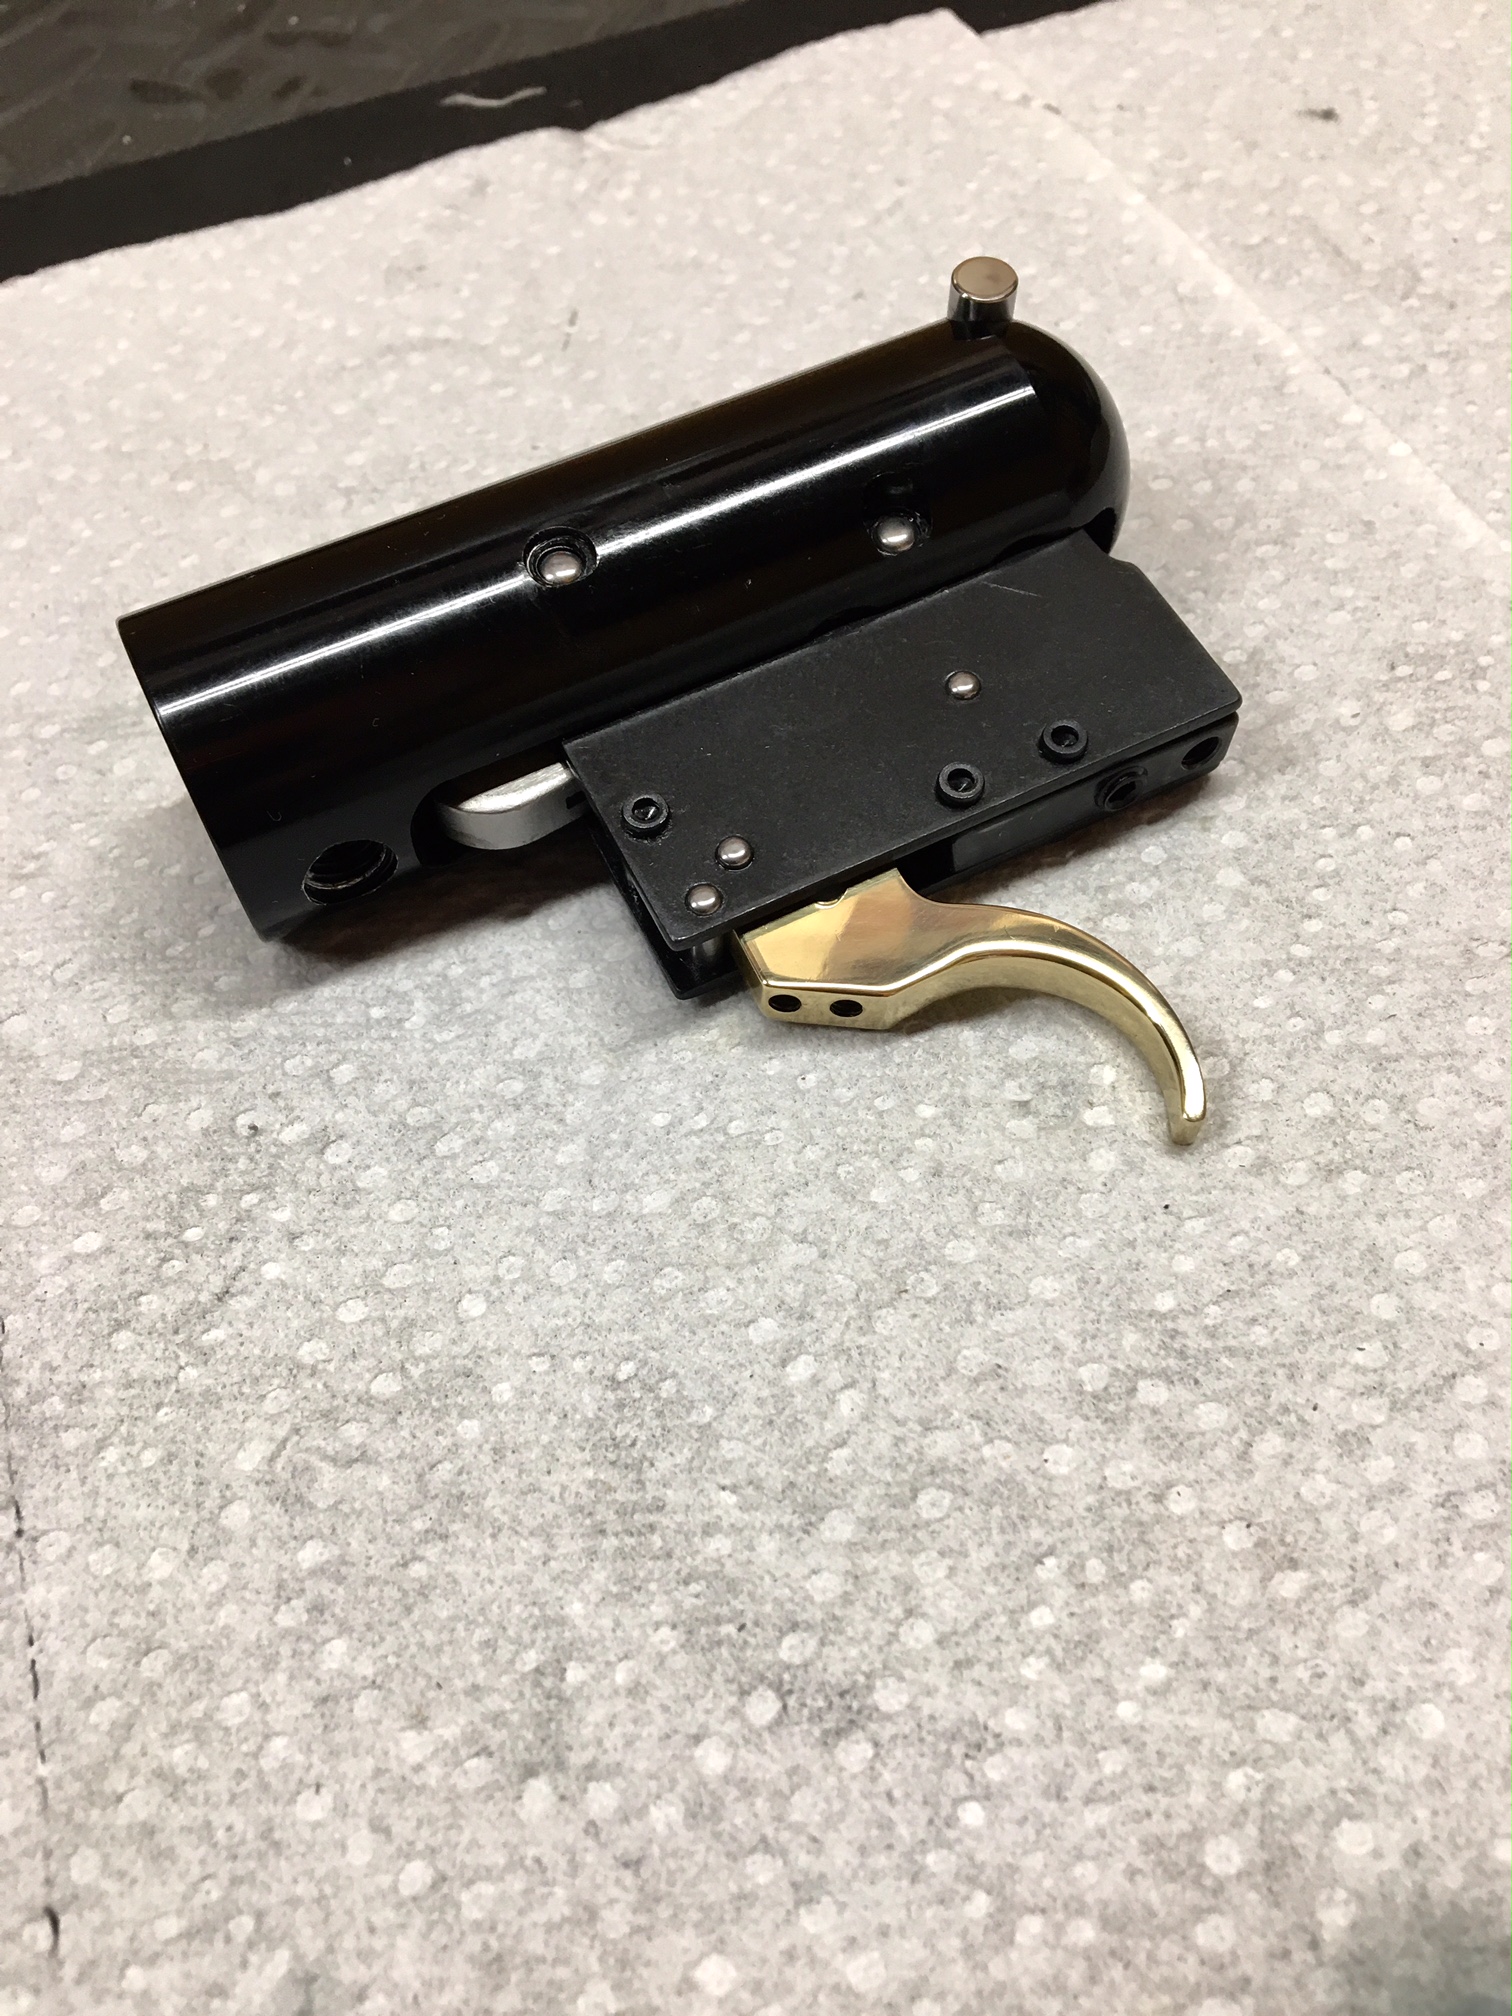
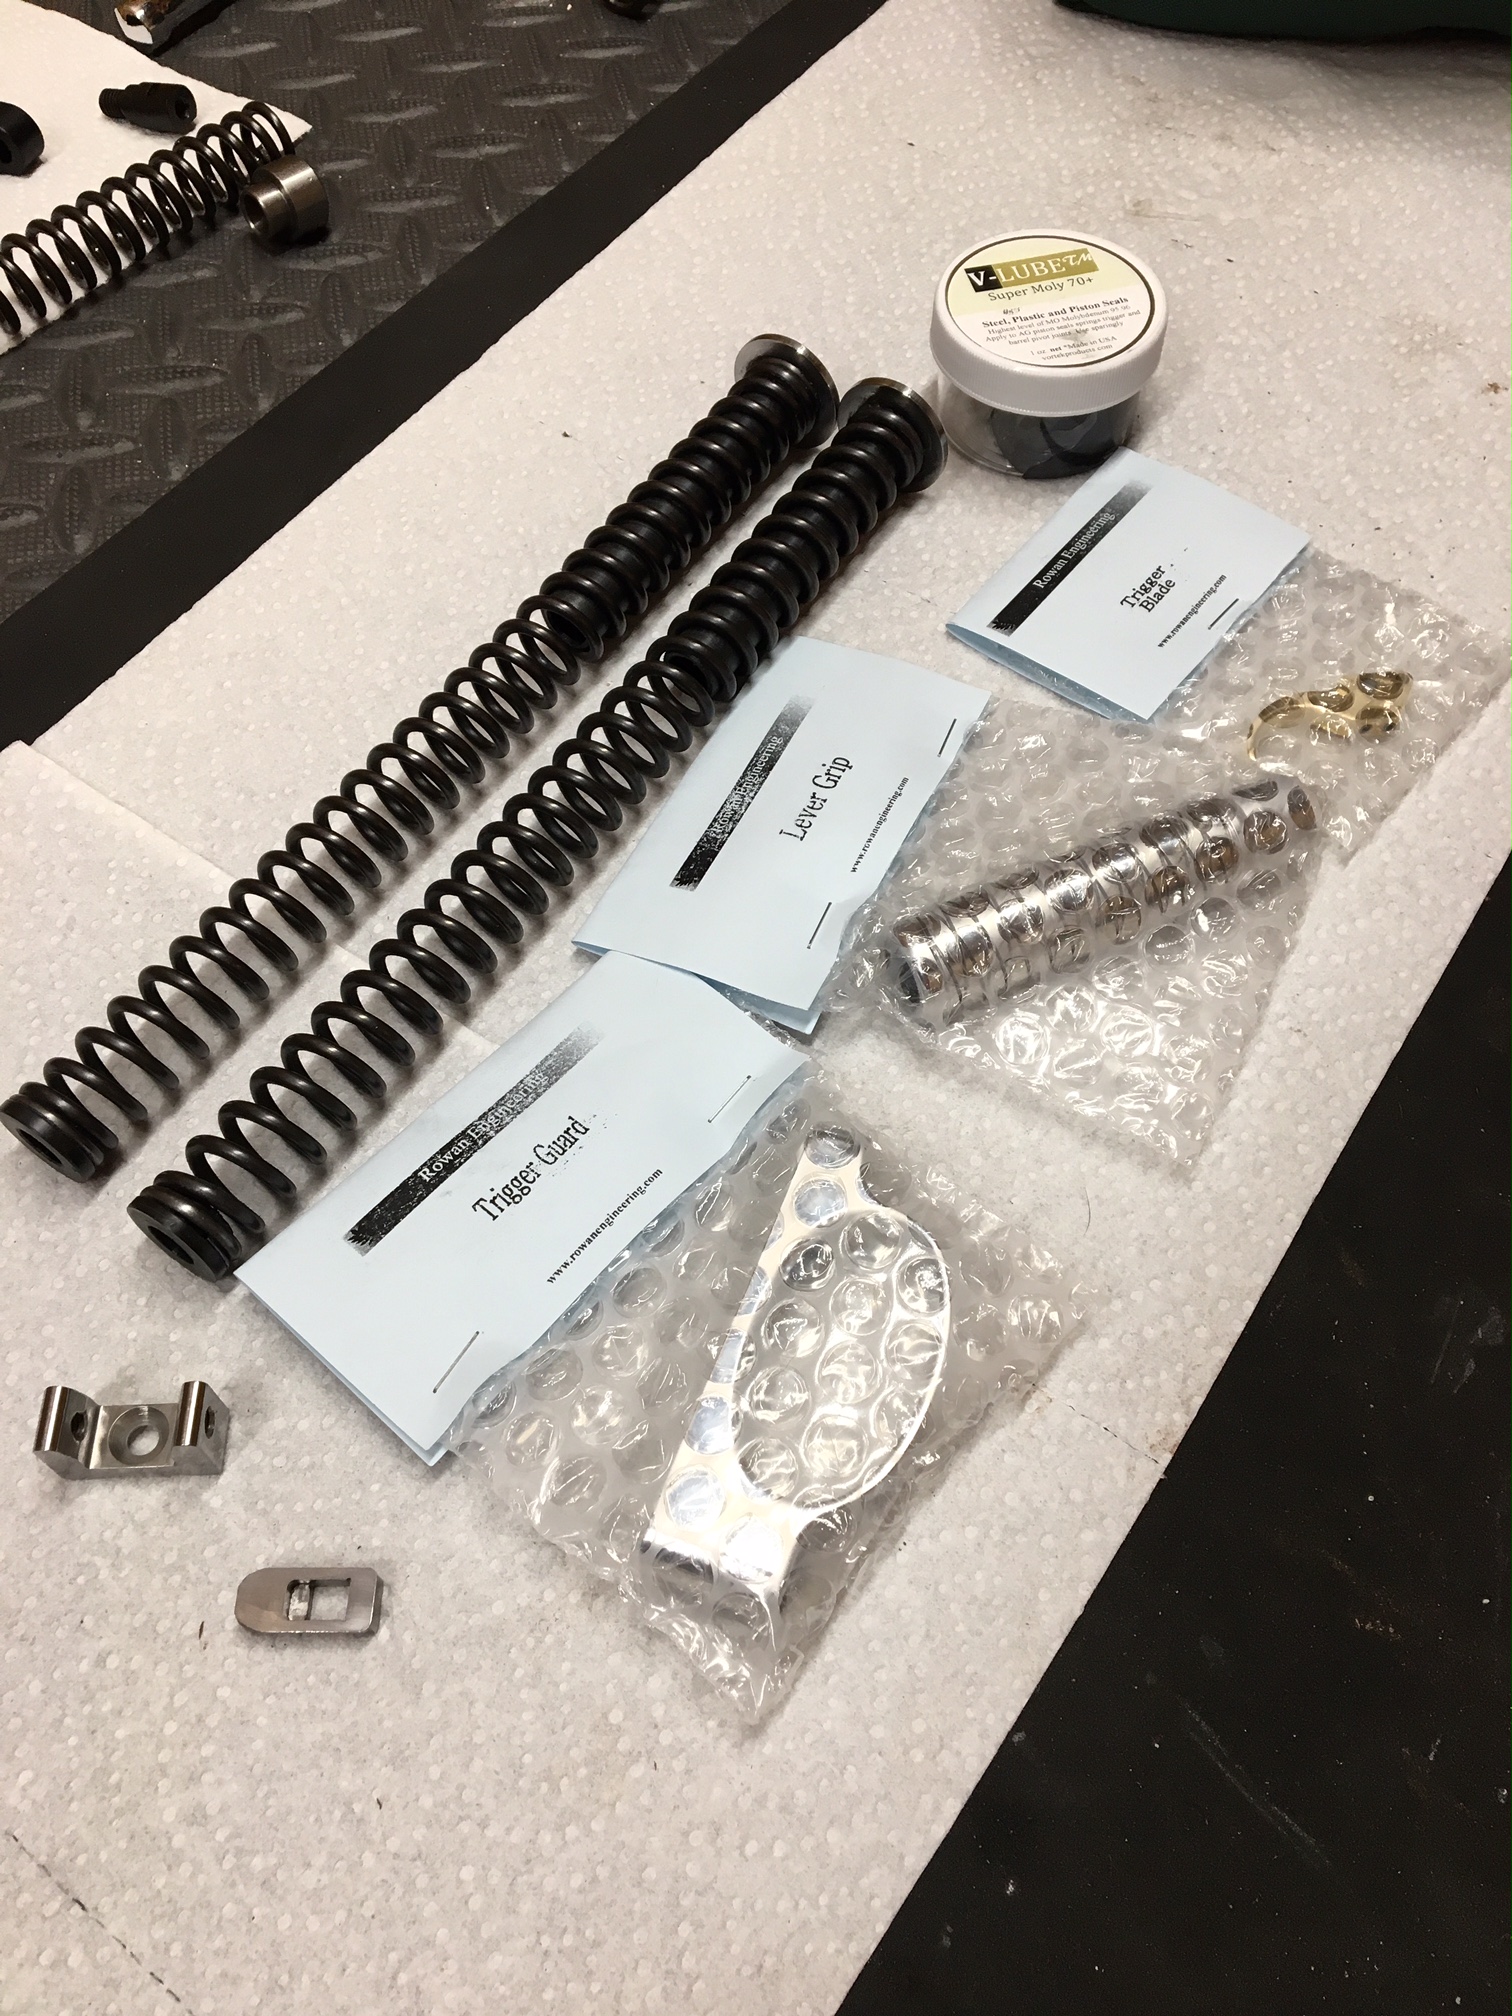
Rowan setback trigger
Rowan Trigger Guard
Rowan Cocking Handle
New tub of Vortek Moly 70+
Vortek Moly Seal
Not having a lathe, I send all my springs to Motorhead (Scott) for his precision work on making delrin guides and top hats. Being that I was down to the wire in pulling this project off, I had to ship the springs to Scott 2-day express with a prepaid return label so he could turn them right around and send them back. I first contacted Scott to see if he was available, and if he would be able to turn the springs around in time. Scott was available and was more than willing to turn them around for me in the short time frame. East Coast to West Coast and back in less than a week...and a weekend in between! Scott, a big THANK YOU for your willingness to help me out, and for the fine craftsmanship that goes into your guides and top hats
While waiting for remaining parts and supplies to arrive, I removed the stock, prepped and coated with 5 hand rubbed coats of Maccari's Royal London Oil. After 5 days of curing time I then lightly rubbed finish with Maccari Stock Mud, followed by 2 coats of Minwax Finishing Paste.
I have had several AA walnut stocks over the past couple years that were very light in color. While they had nice detail, they lacked color. As a result I had to deepen them using Behlen Solar Lux dye. However, this stock was nice and dark, and had great coloring so I did not have to use the dye.
So, the day before I started my vacation I finally had all supplies ready to go!
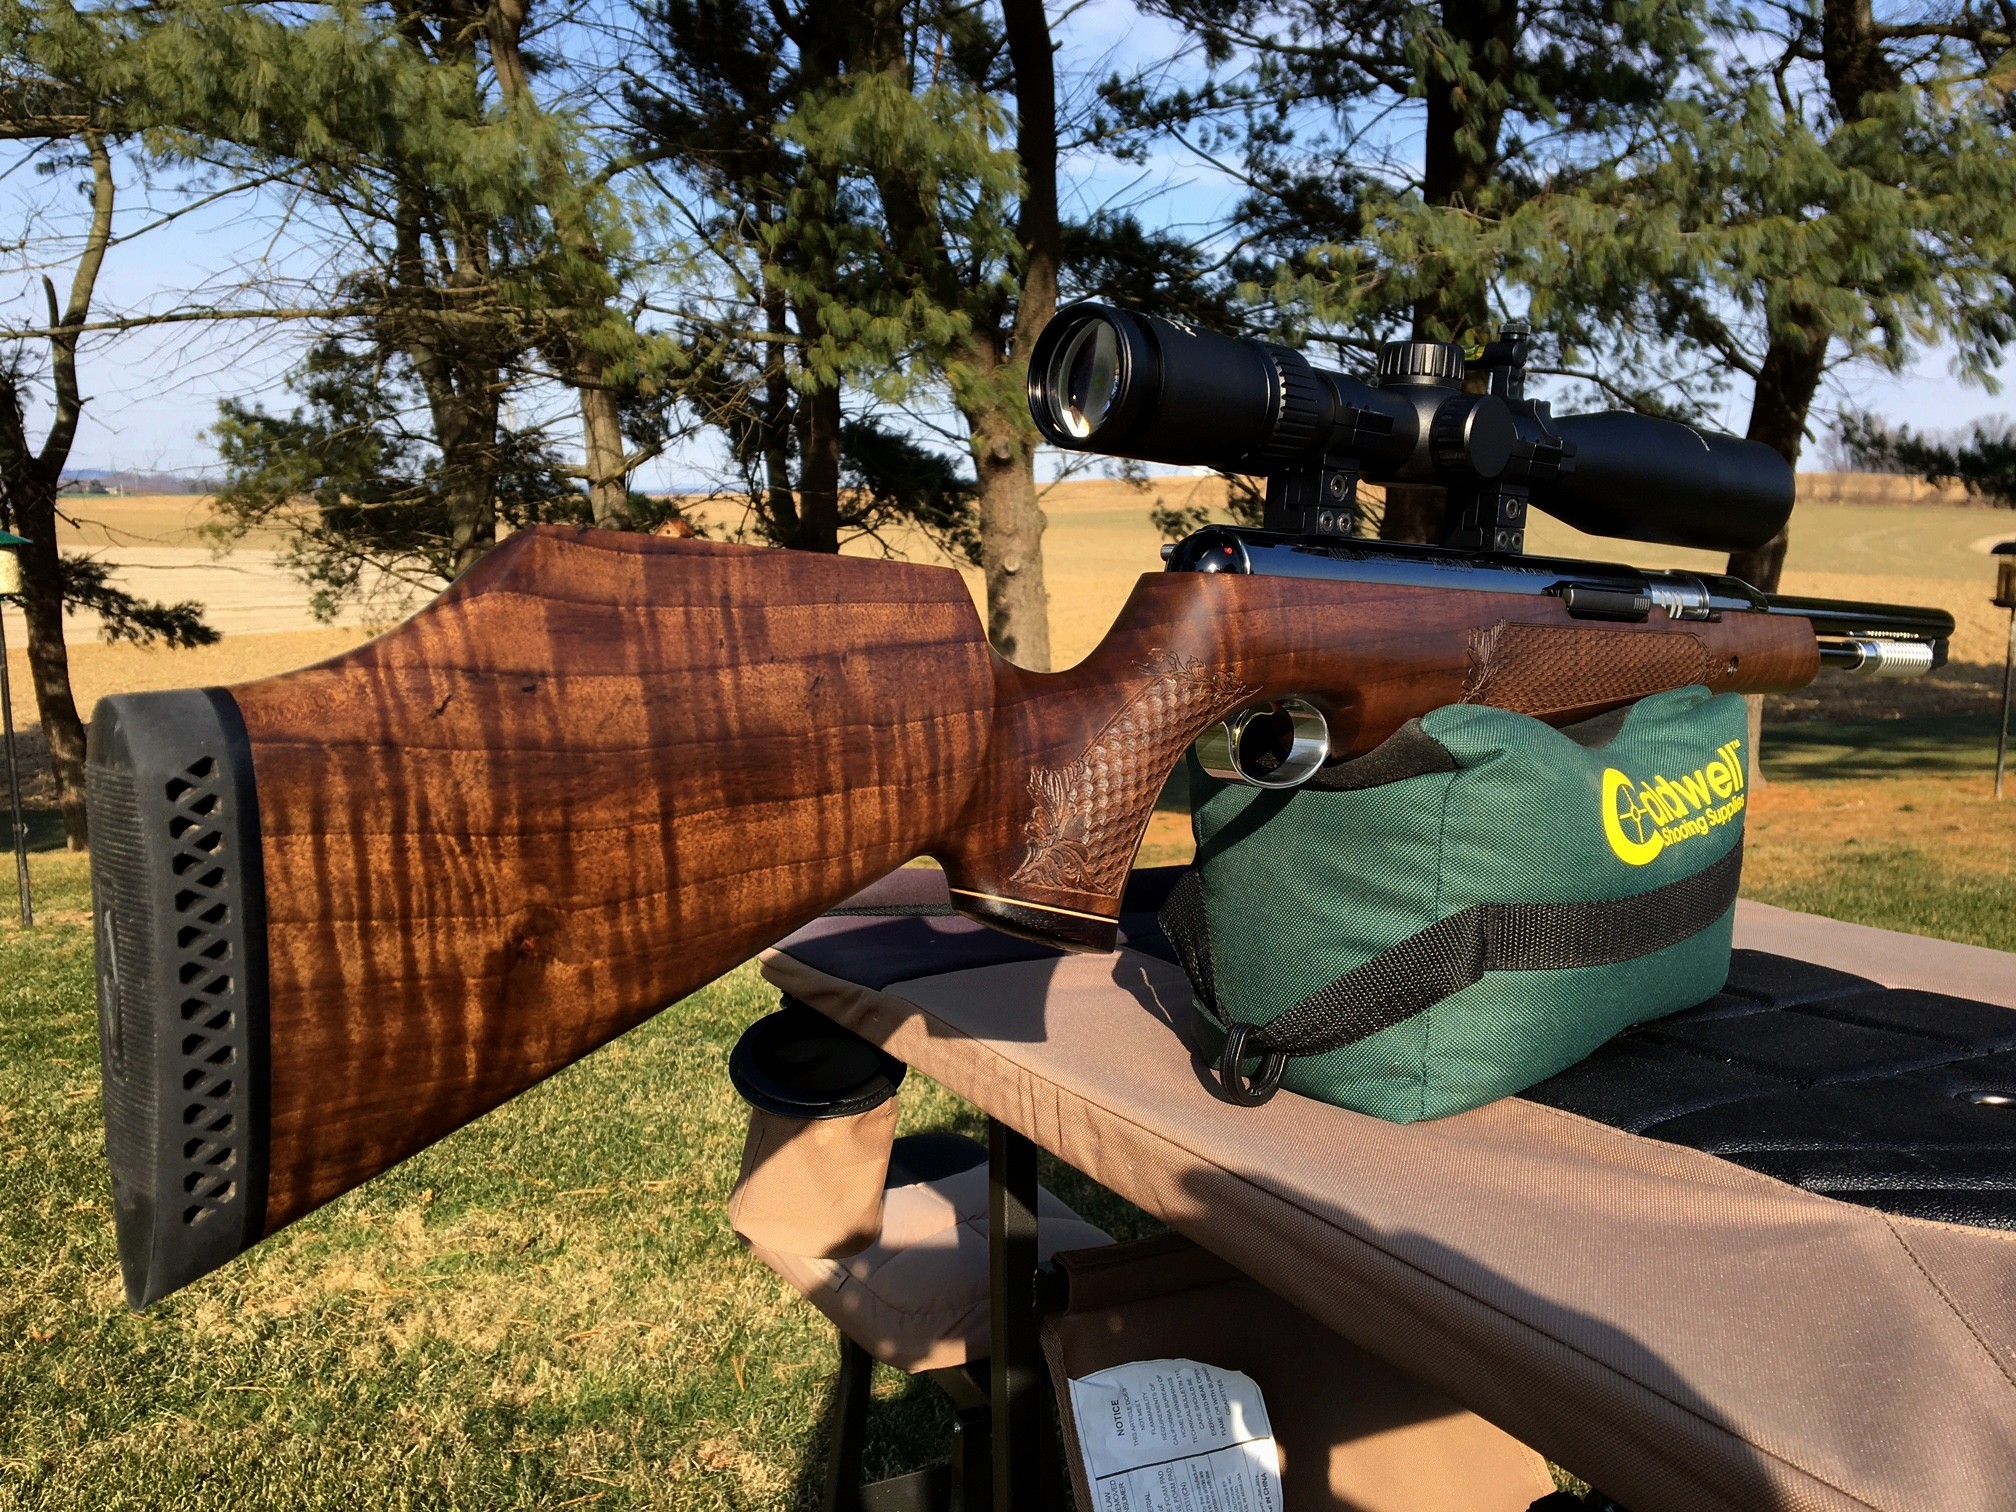
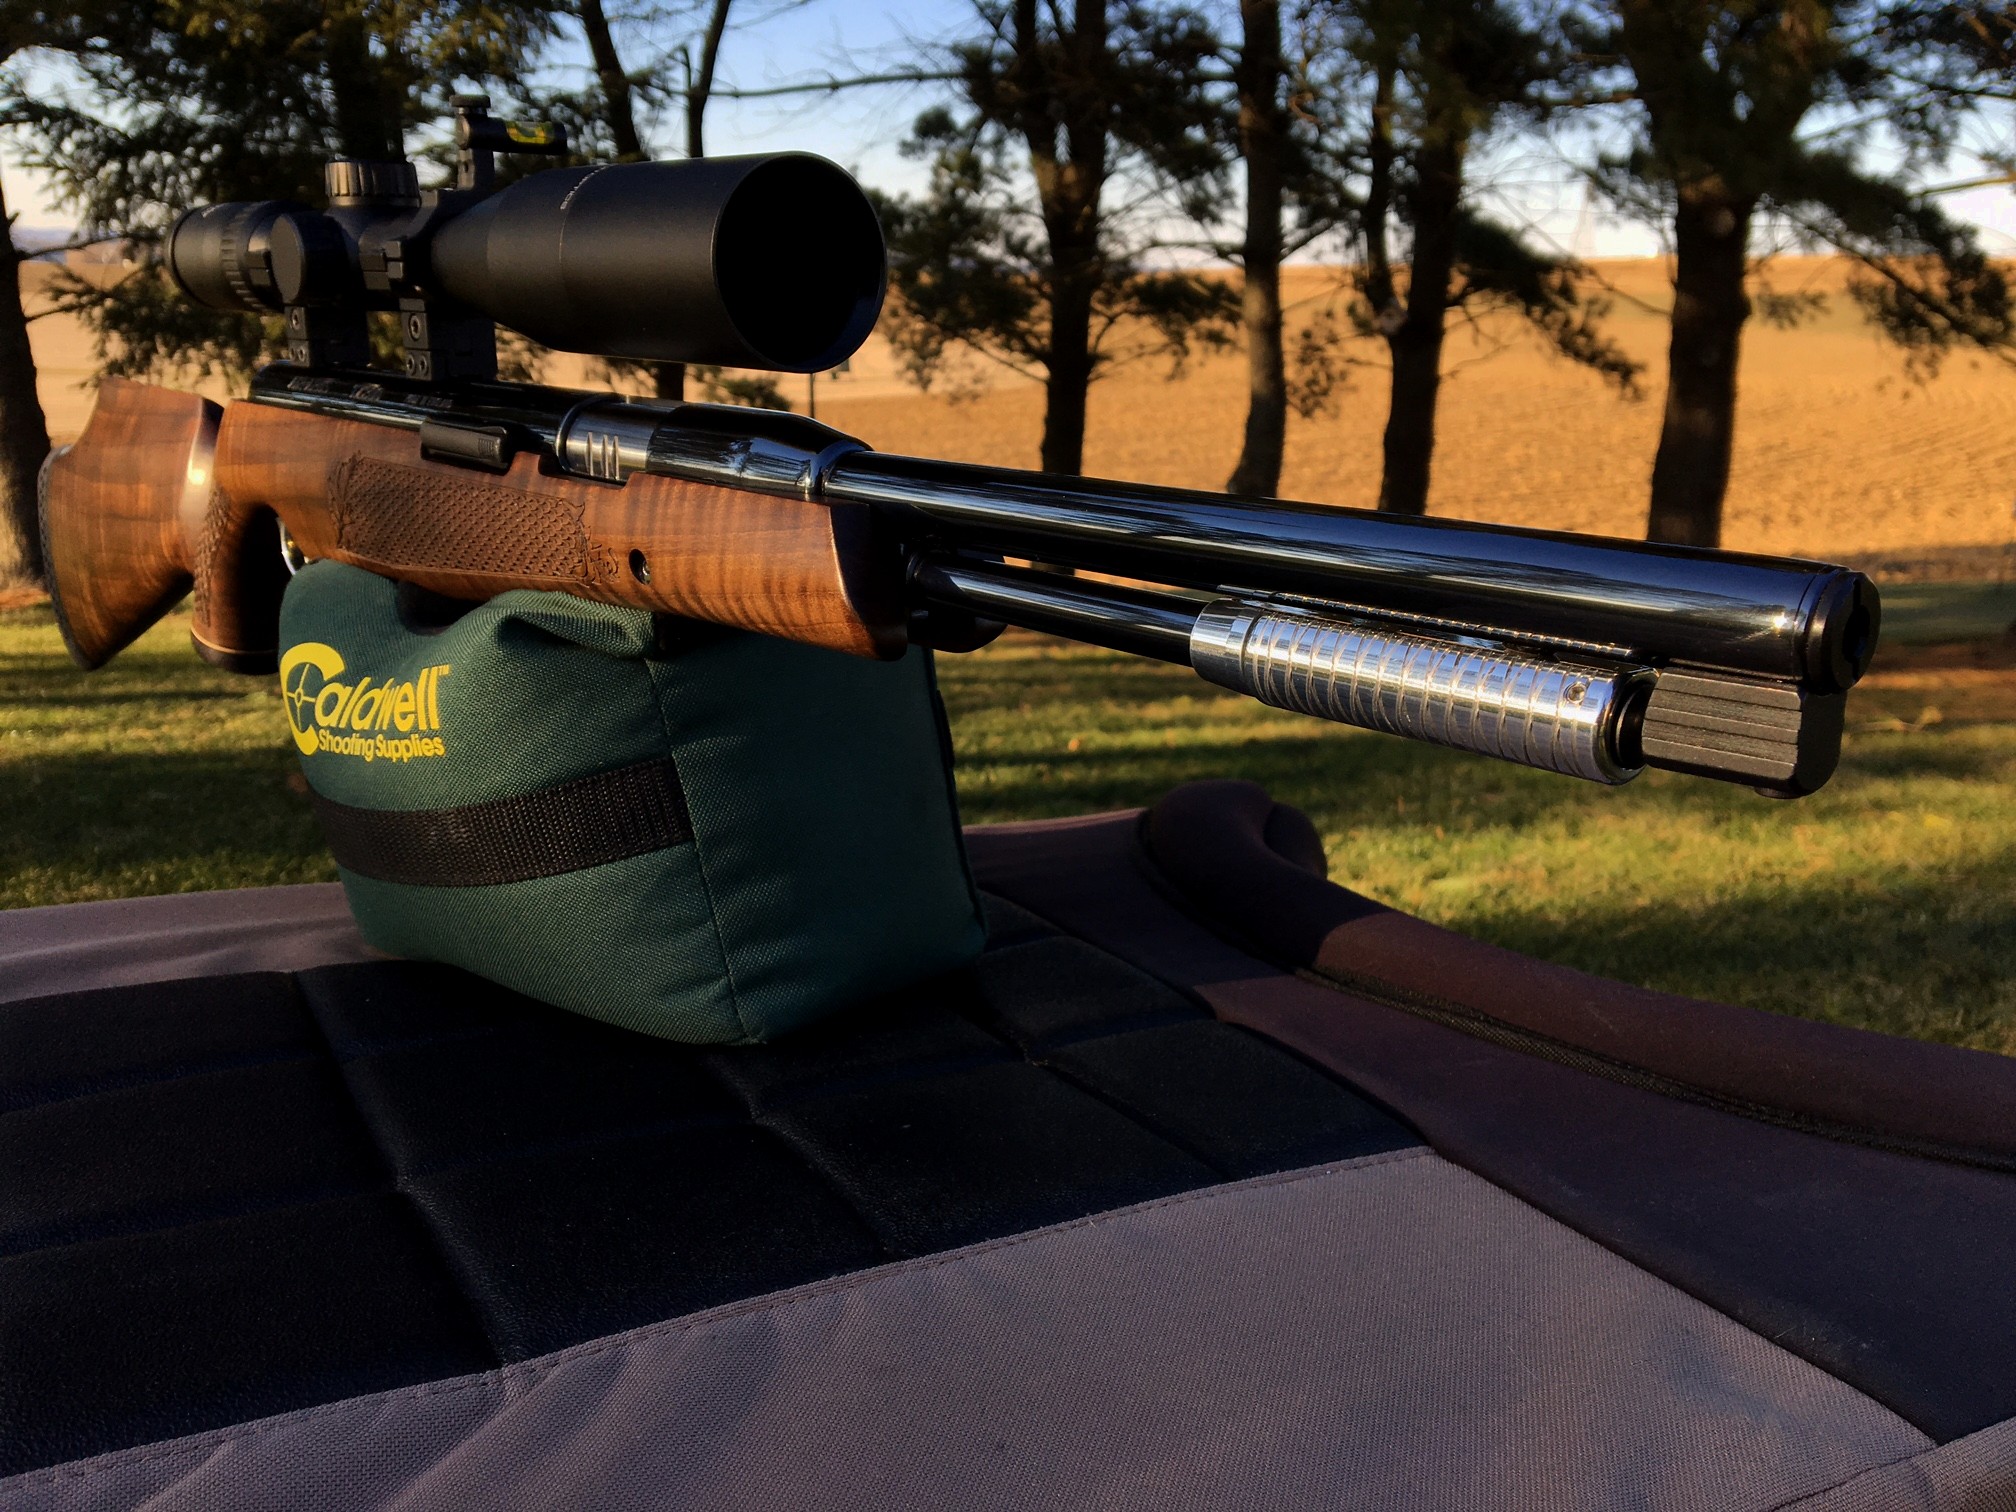
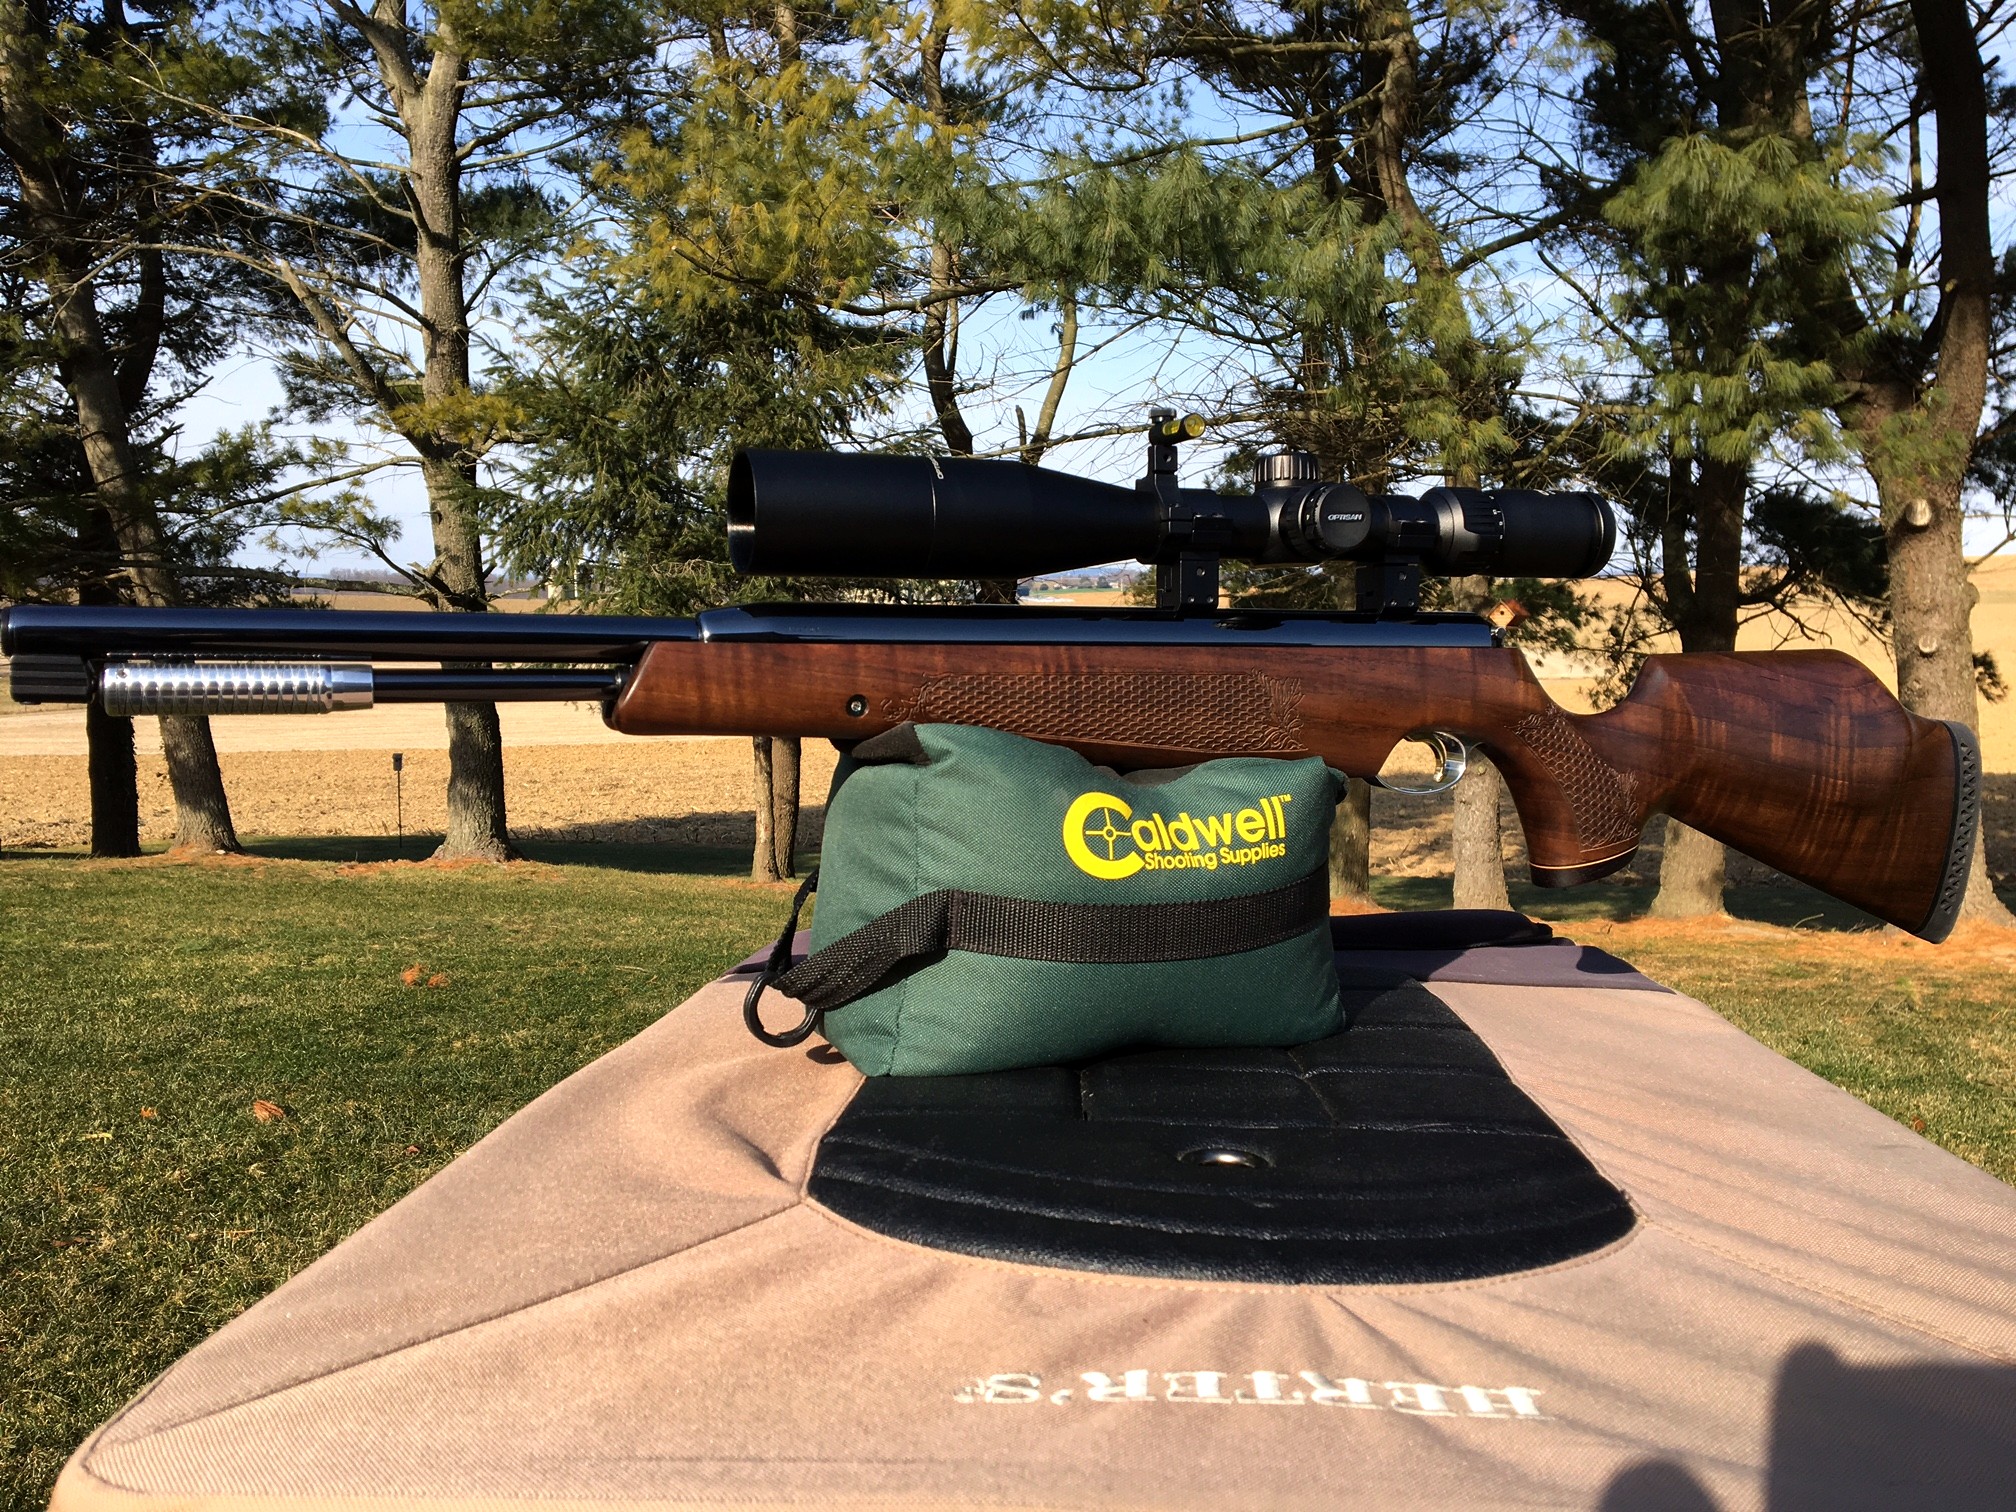
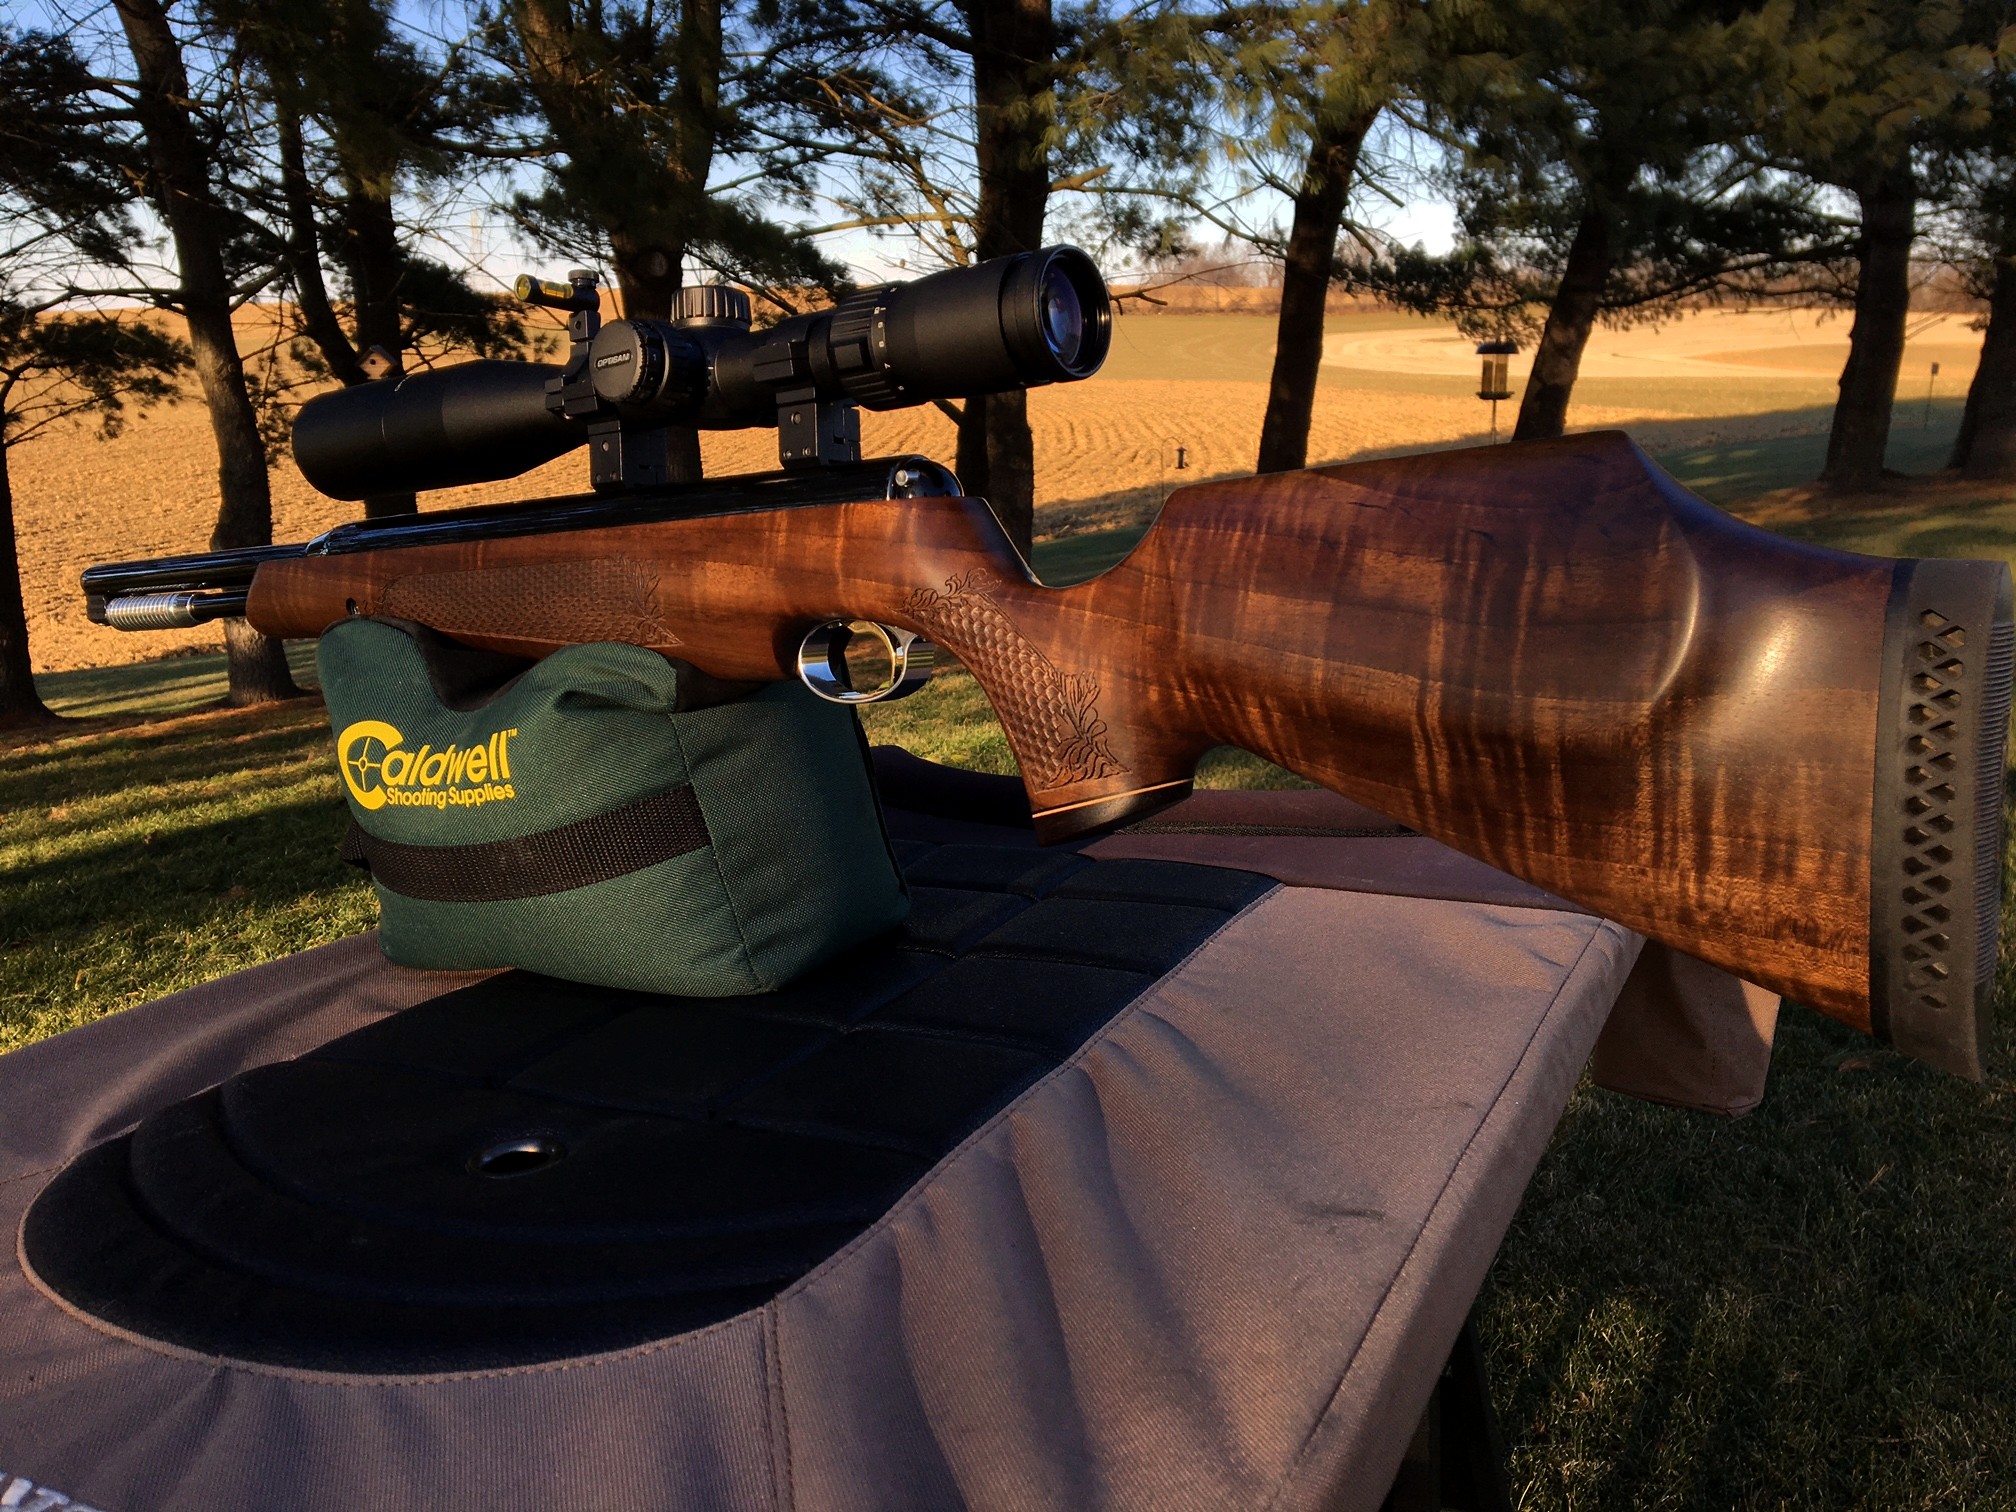
Here is the rifle - straight from the box
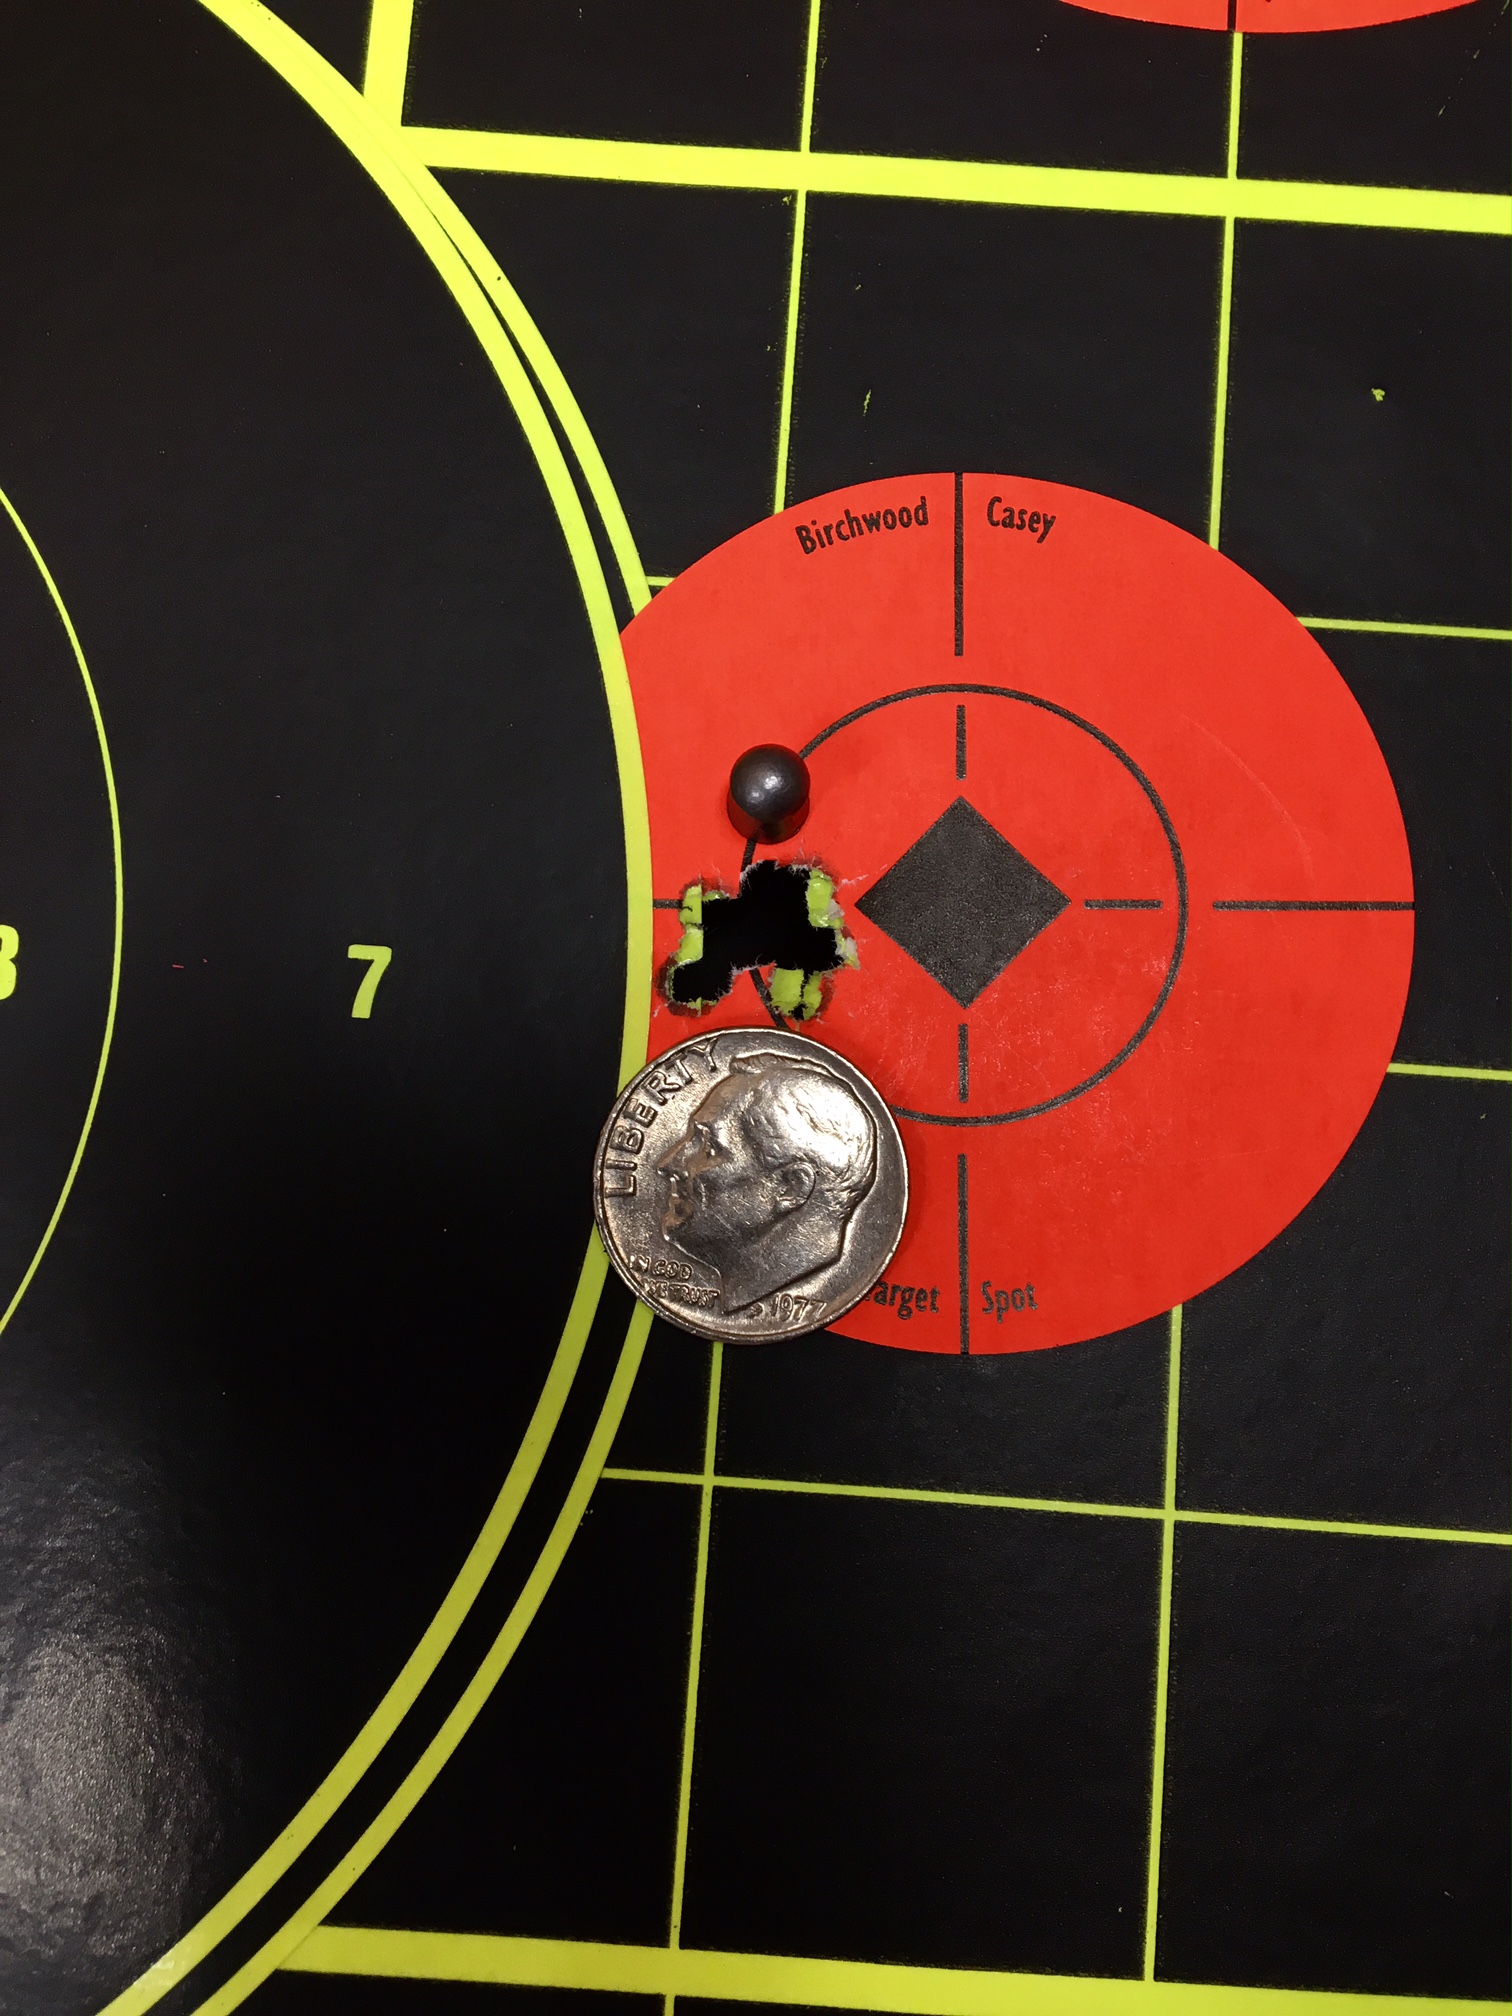
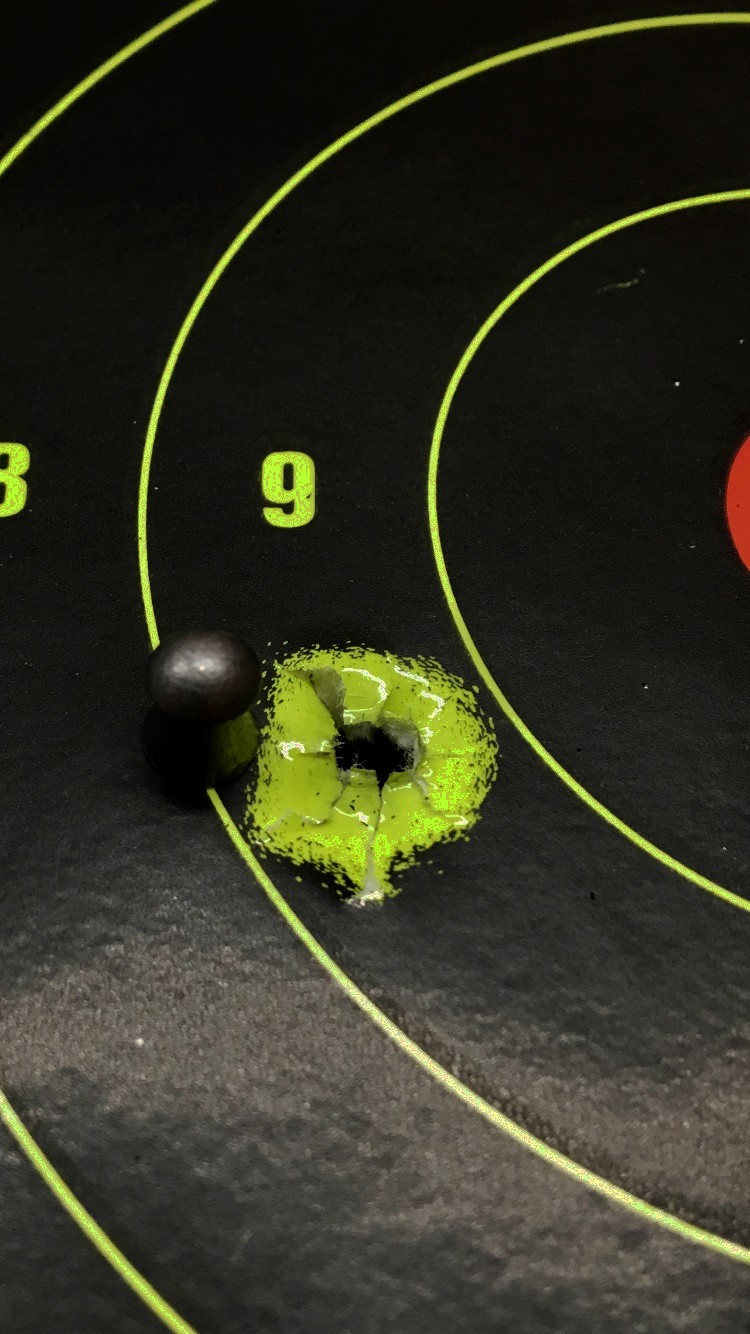
First step was to take the rifle from the box and right to the chronograph to document out of box performance.
After a handful of shots in the beginning, the velocities had settled nicely around 878fps using the Air Arms 8.4gr 4.52 for about 14.4 fpe

Notes on out of box performance;
Absolutely no spring twang, but there was a very noticeable buzzing feel on each shot
Very firm, sharp recoil
A slight grittiness across the first stage of the trigger pull
Stage 2 of the trigger pull was very crisp with no creep whatsoever
Trigger Pull was 1lb 2oz.
Solid cocking cycle, but rather noisy with a dry rubbing sound as the rifle was cocked
There was a slight hint of dieseling smell in the air
After reading some posts about rifles that arrived with a brown rust like residue in the breech of the barrel, I took a good look at this one. It was perfect!
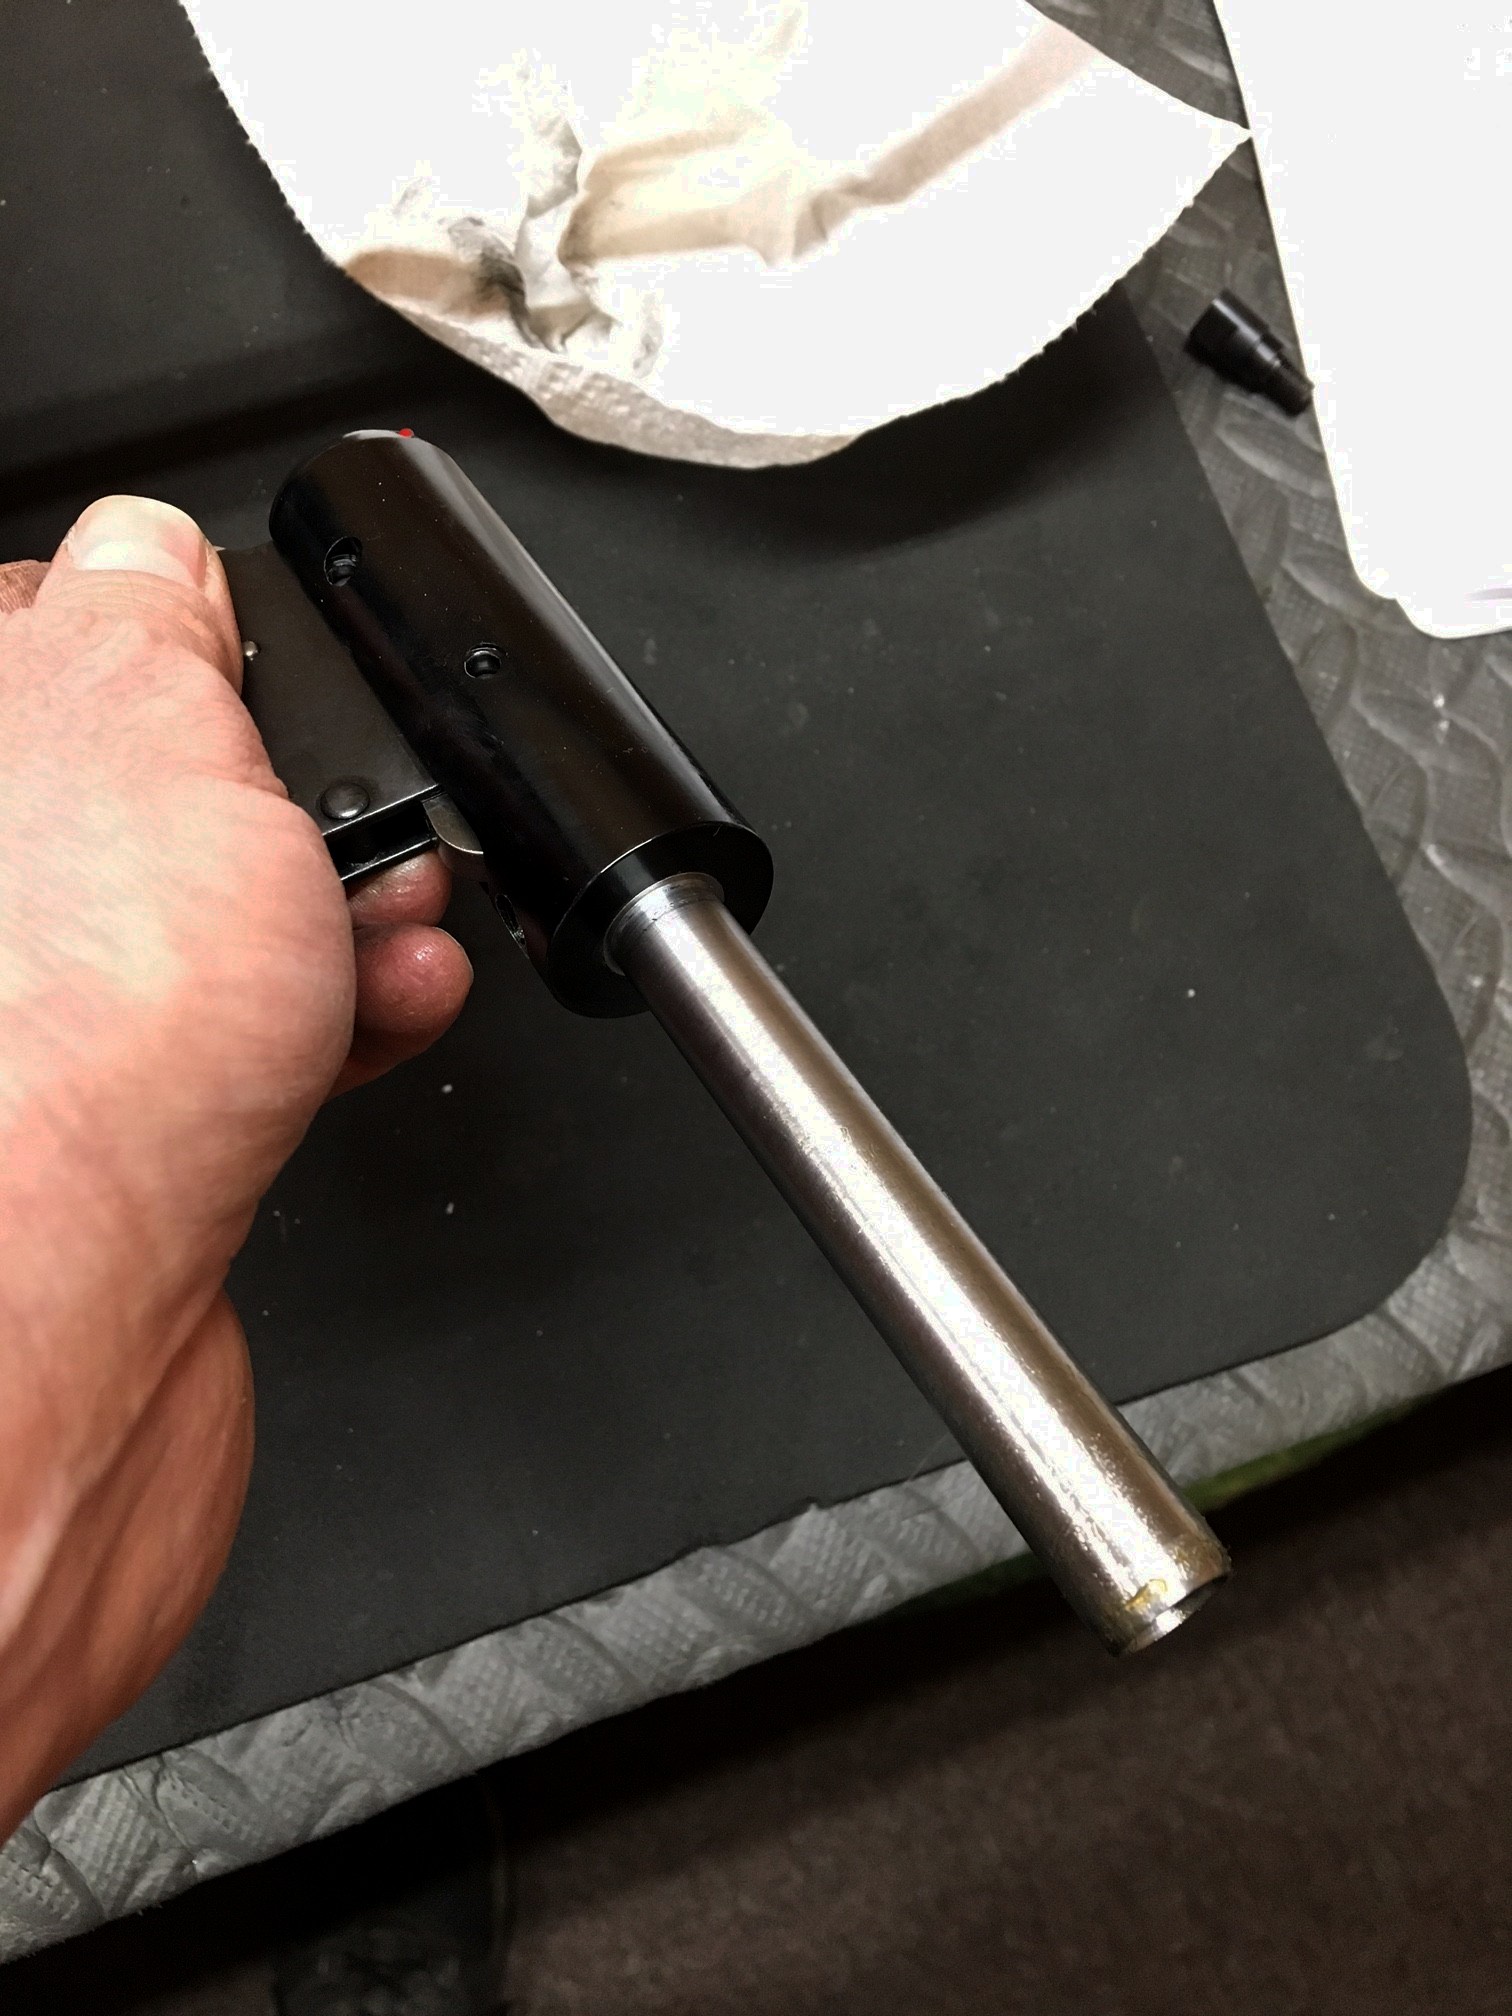
Time to tear the rifle apart and inspect each part
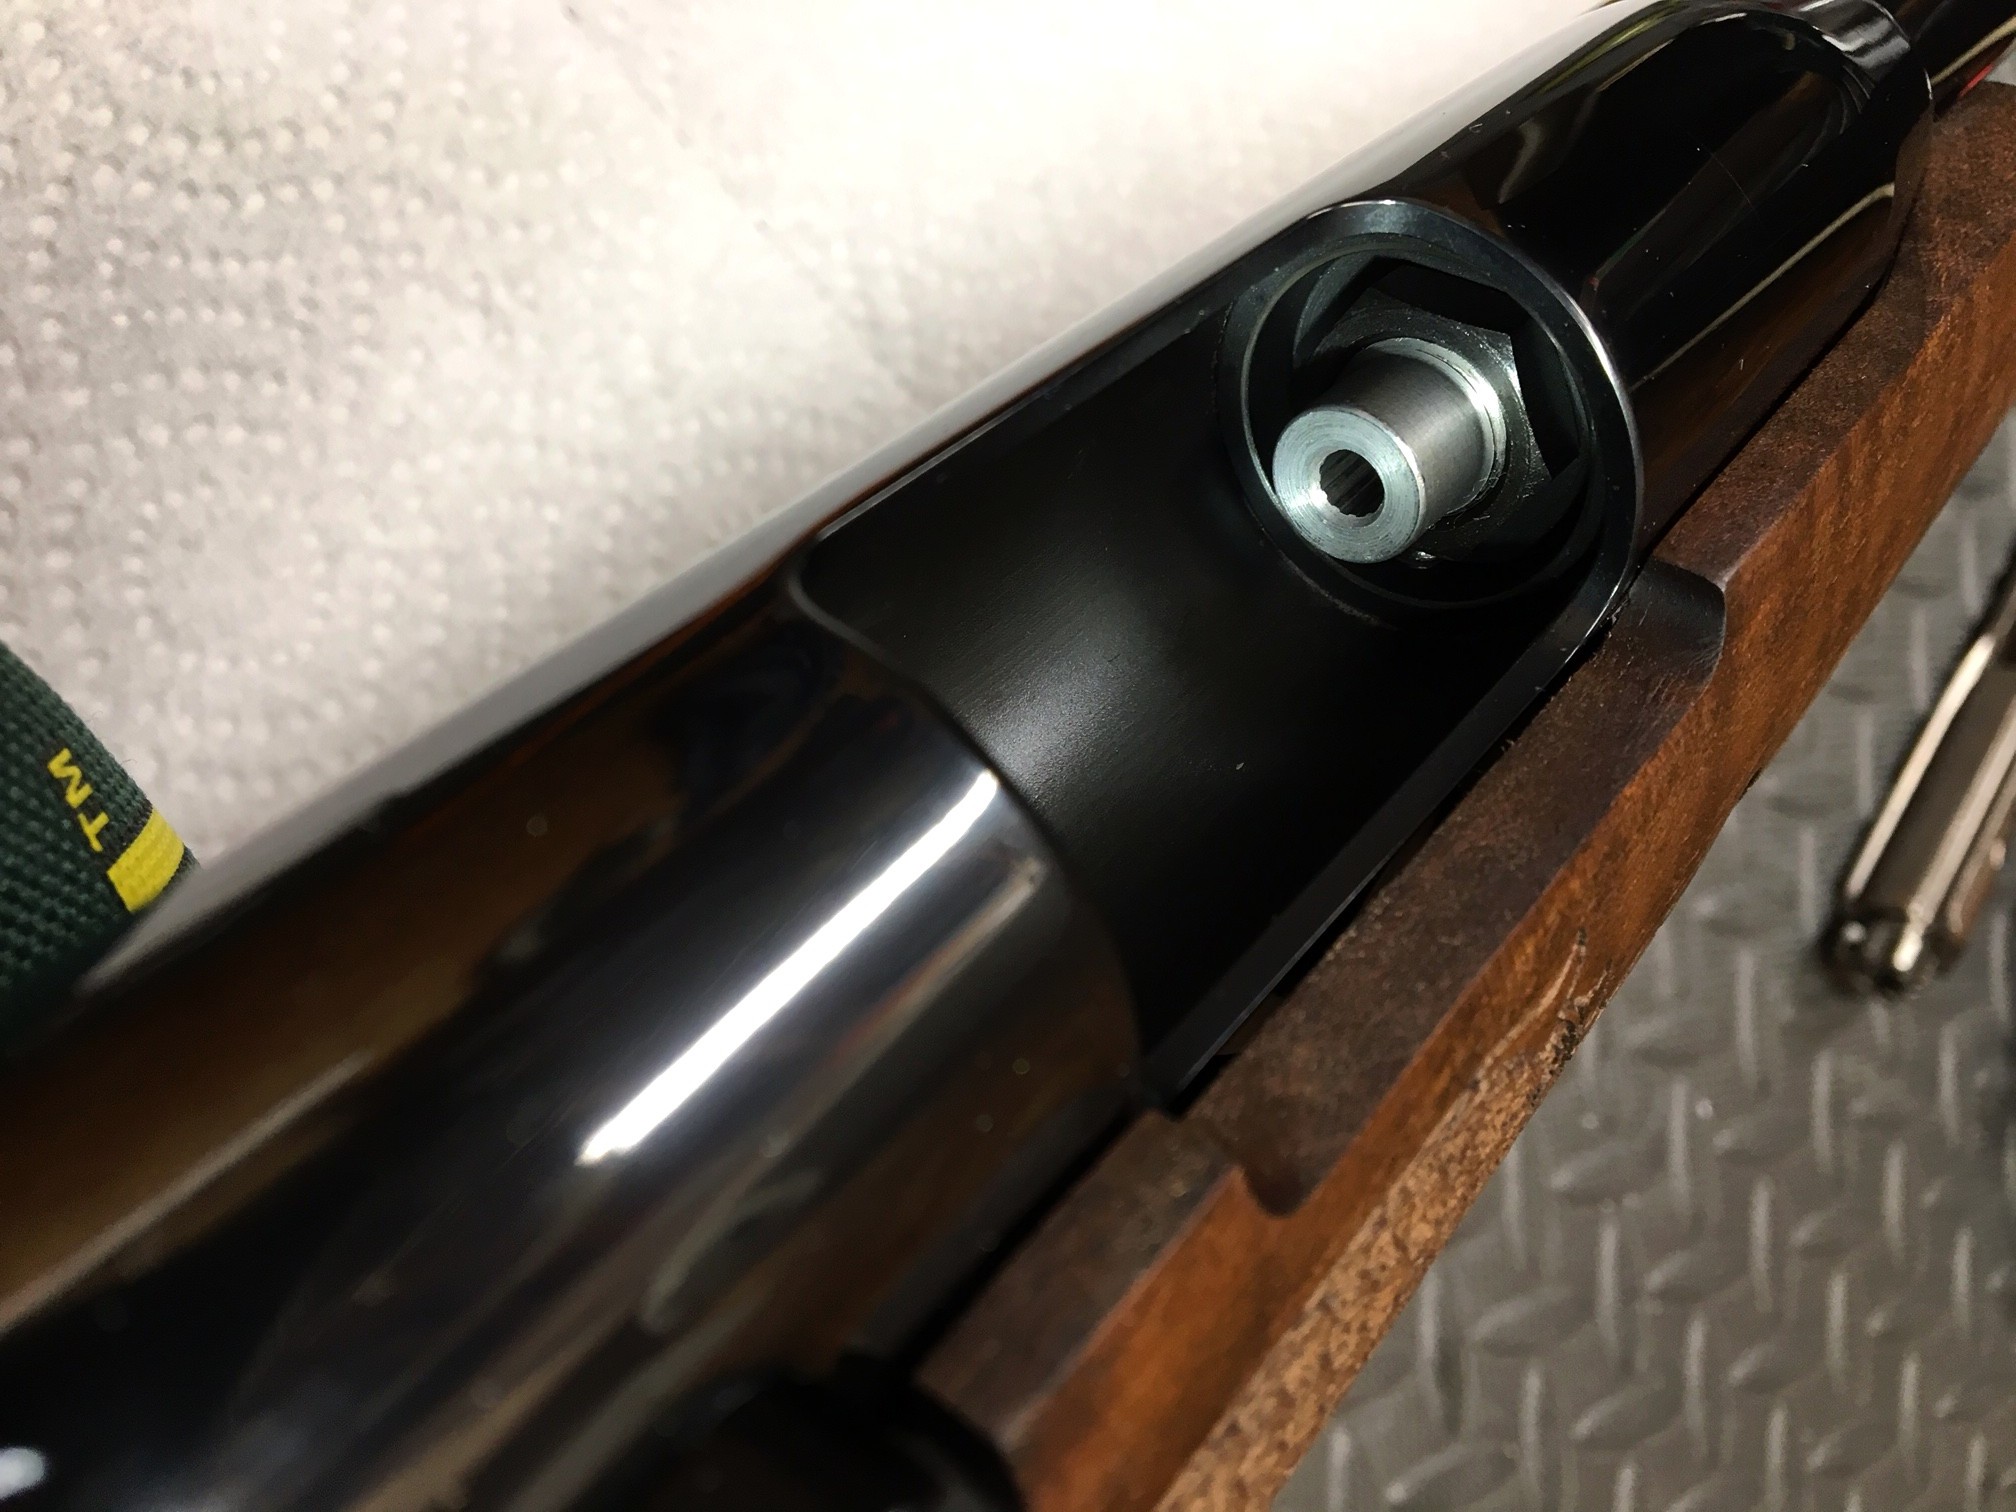
The spring guide had a snug, press fit within the trigger block. I saw this on a recent post as well, but it was the first time I had experienced it. A little wiggling of the guide and it pulled right out.
On my previous Air Arms rifles the guide was a loose fit
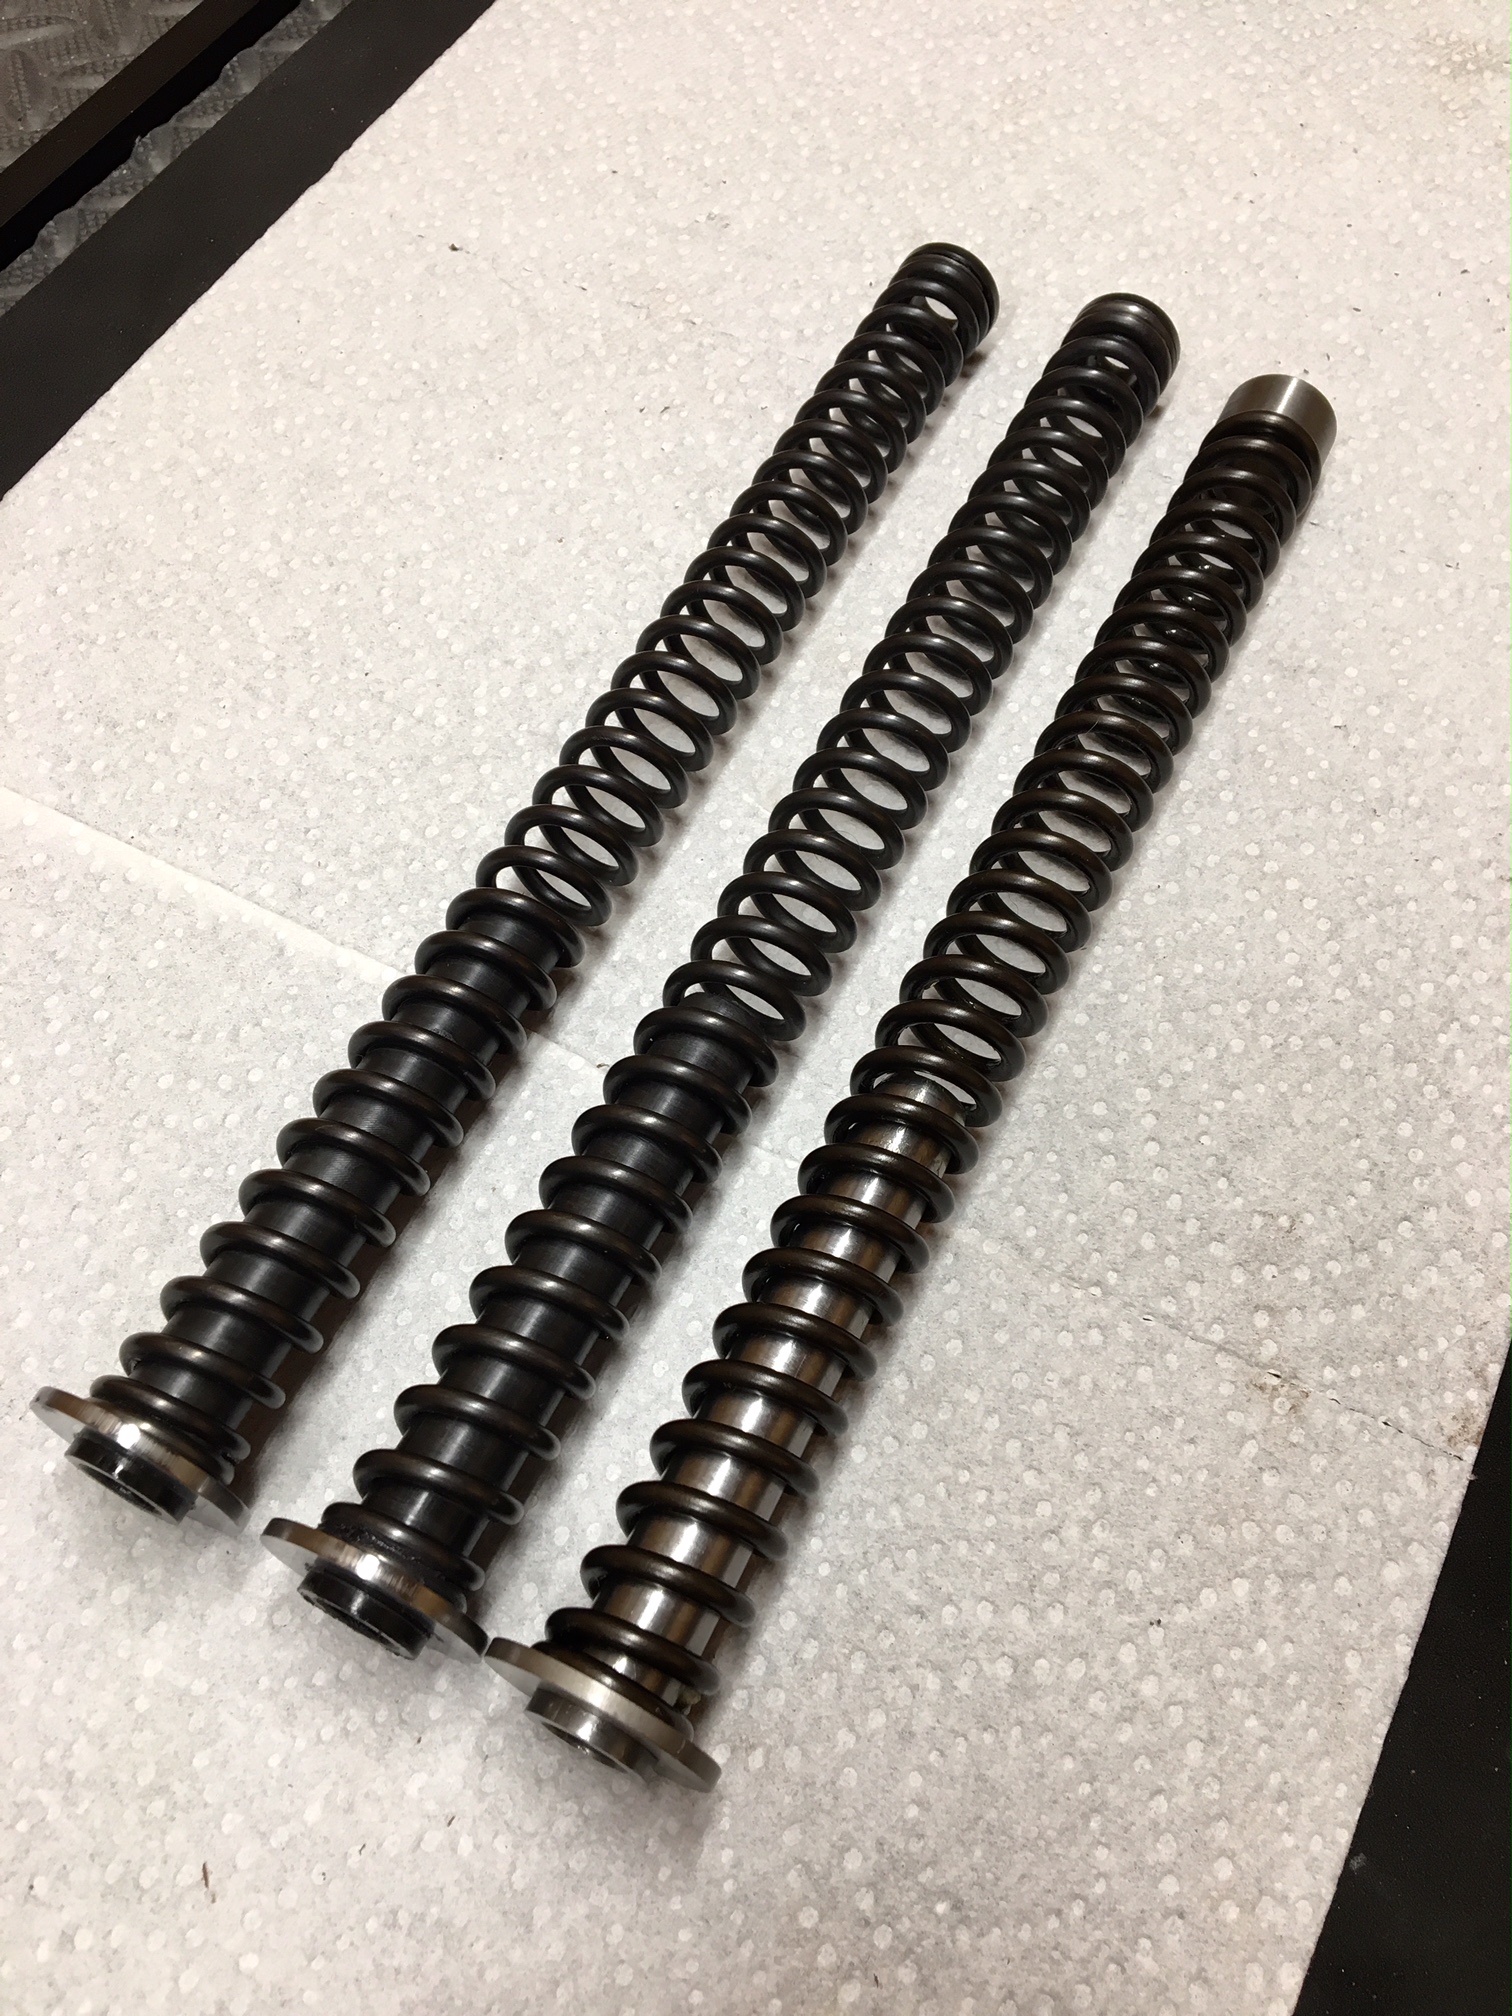
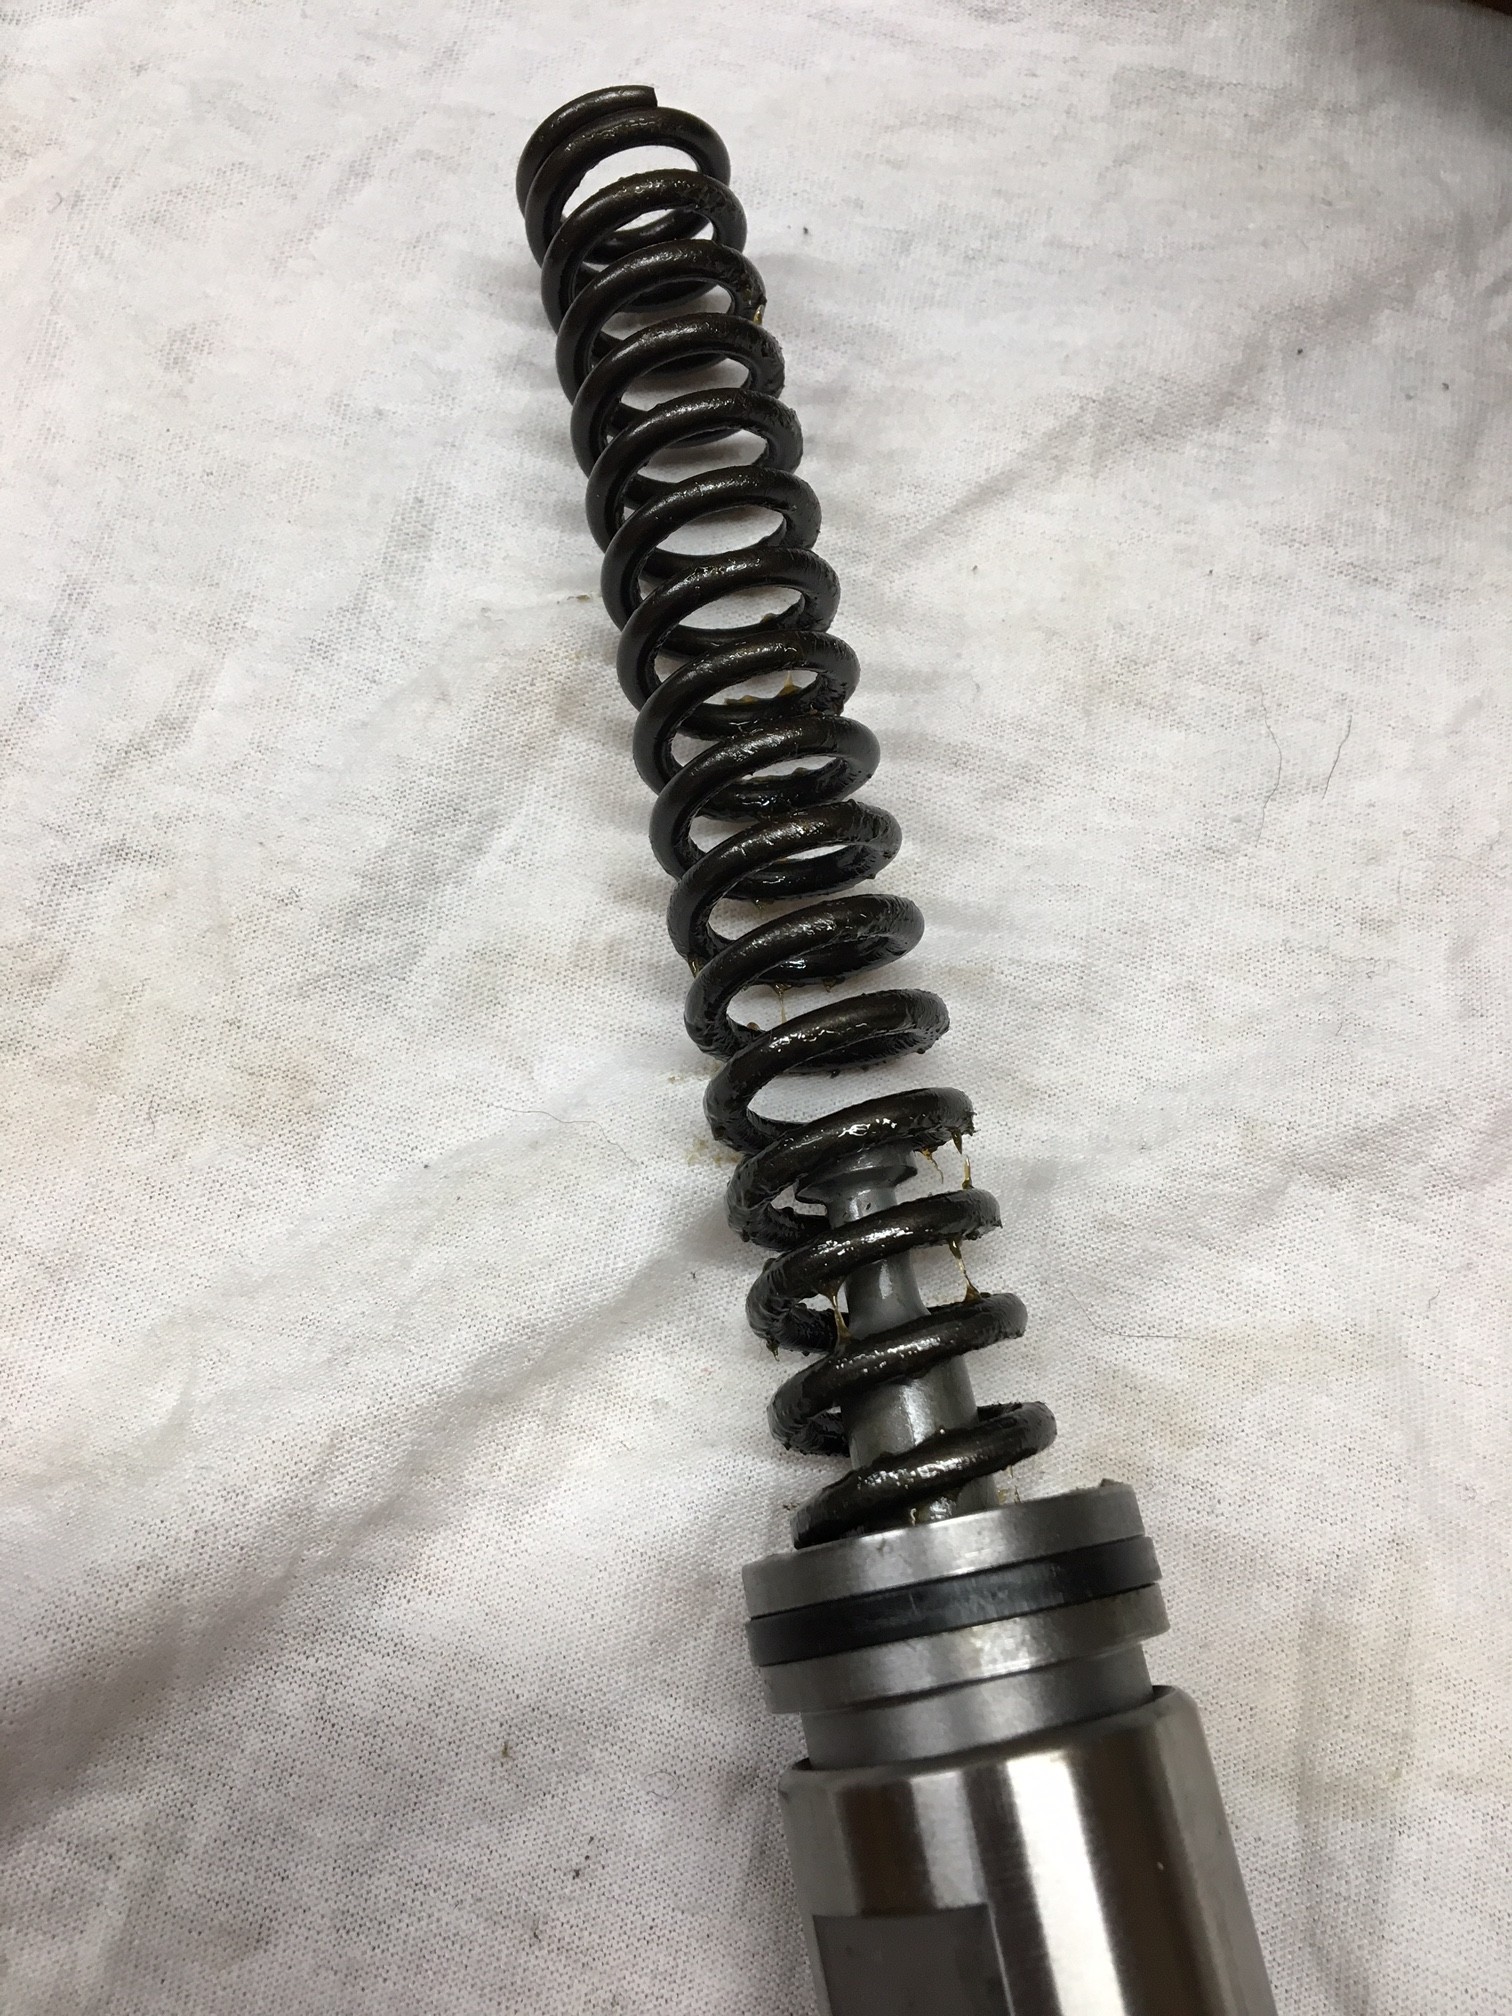
The factory spring had quite a bit of grease. That would explain why I had no spring twang.
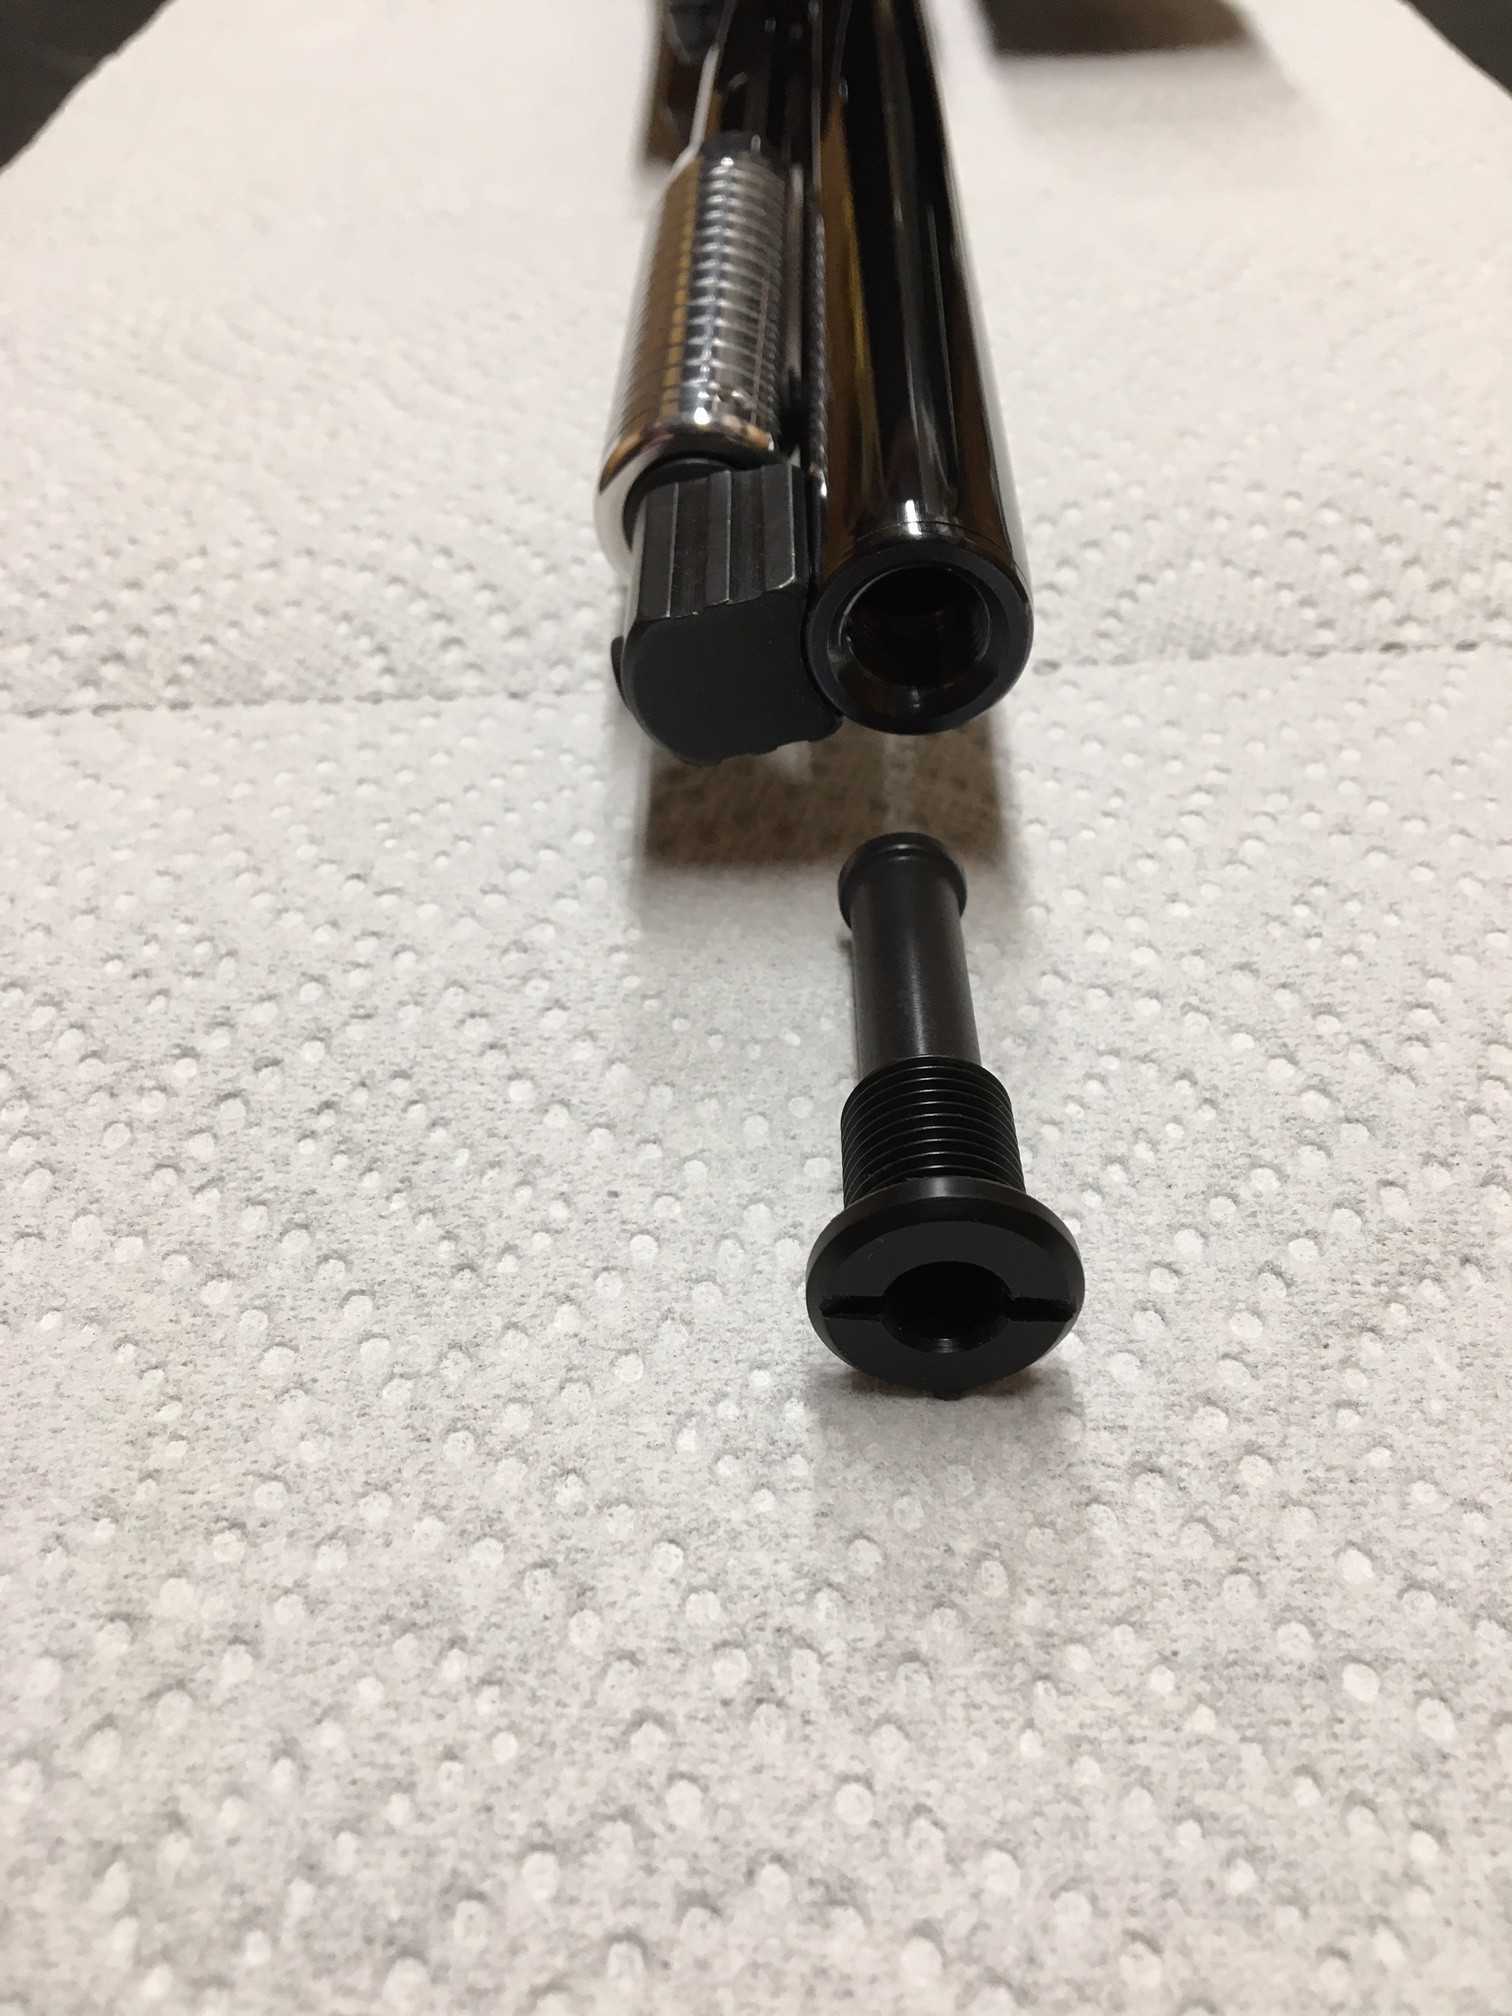
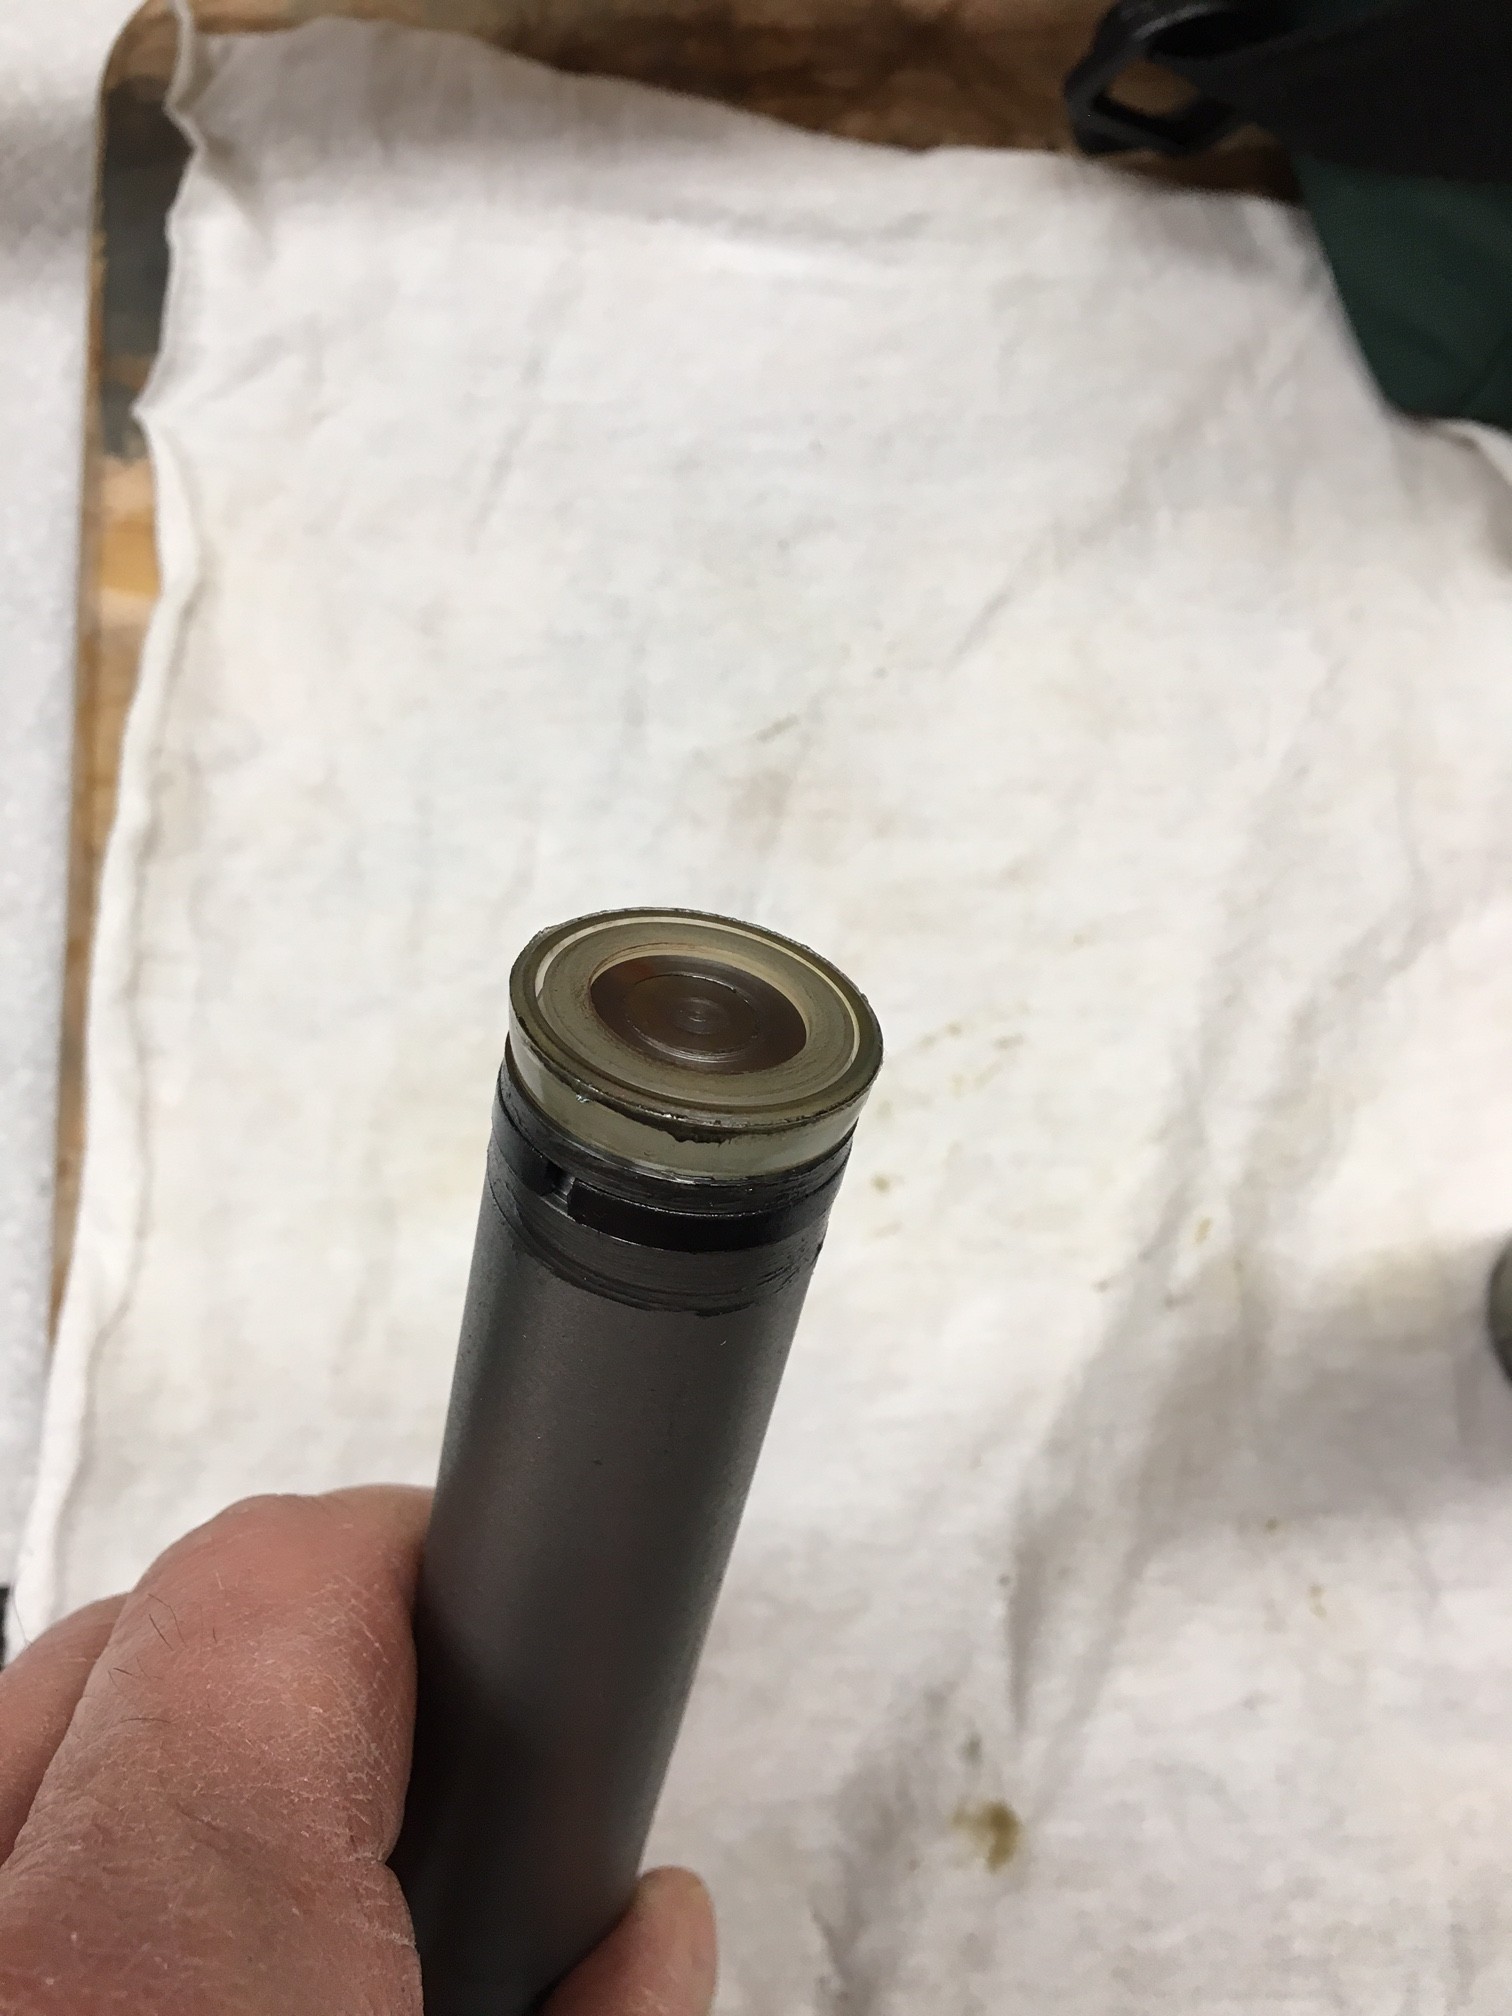
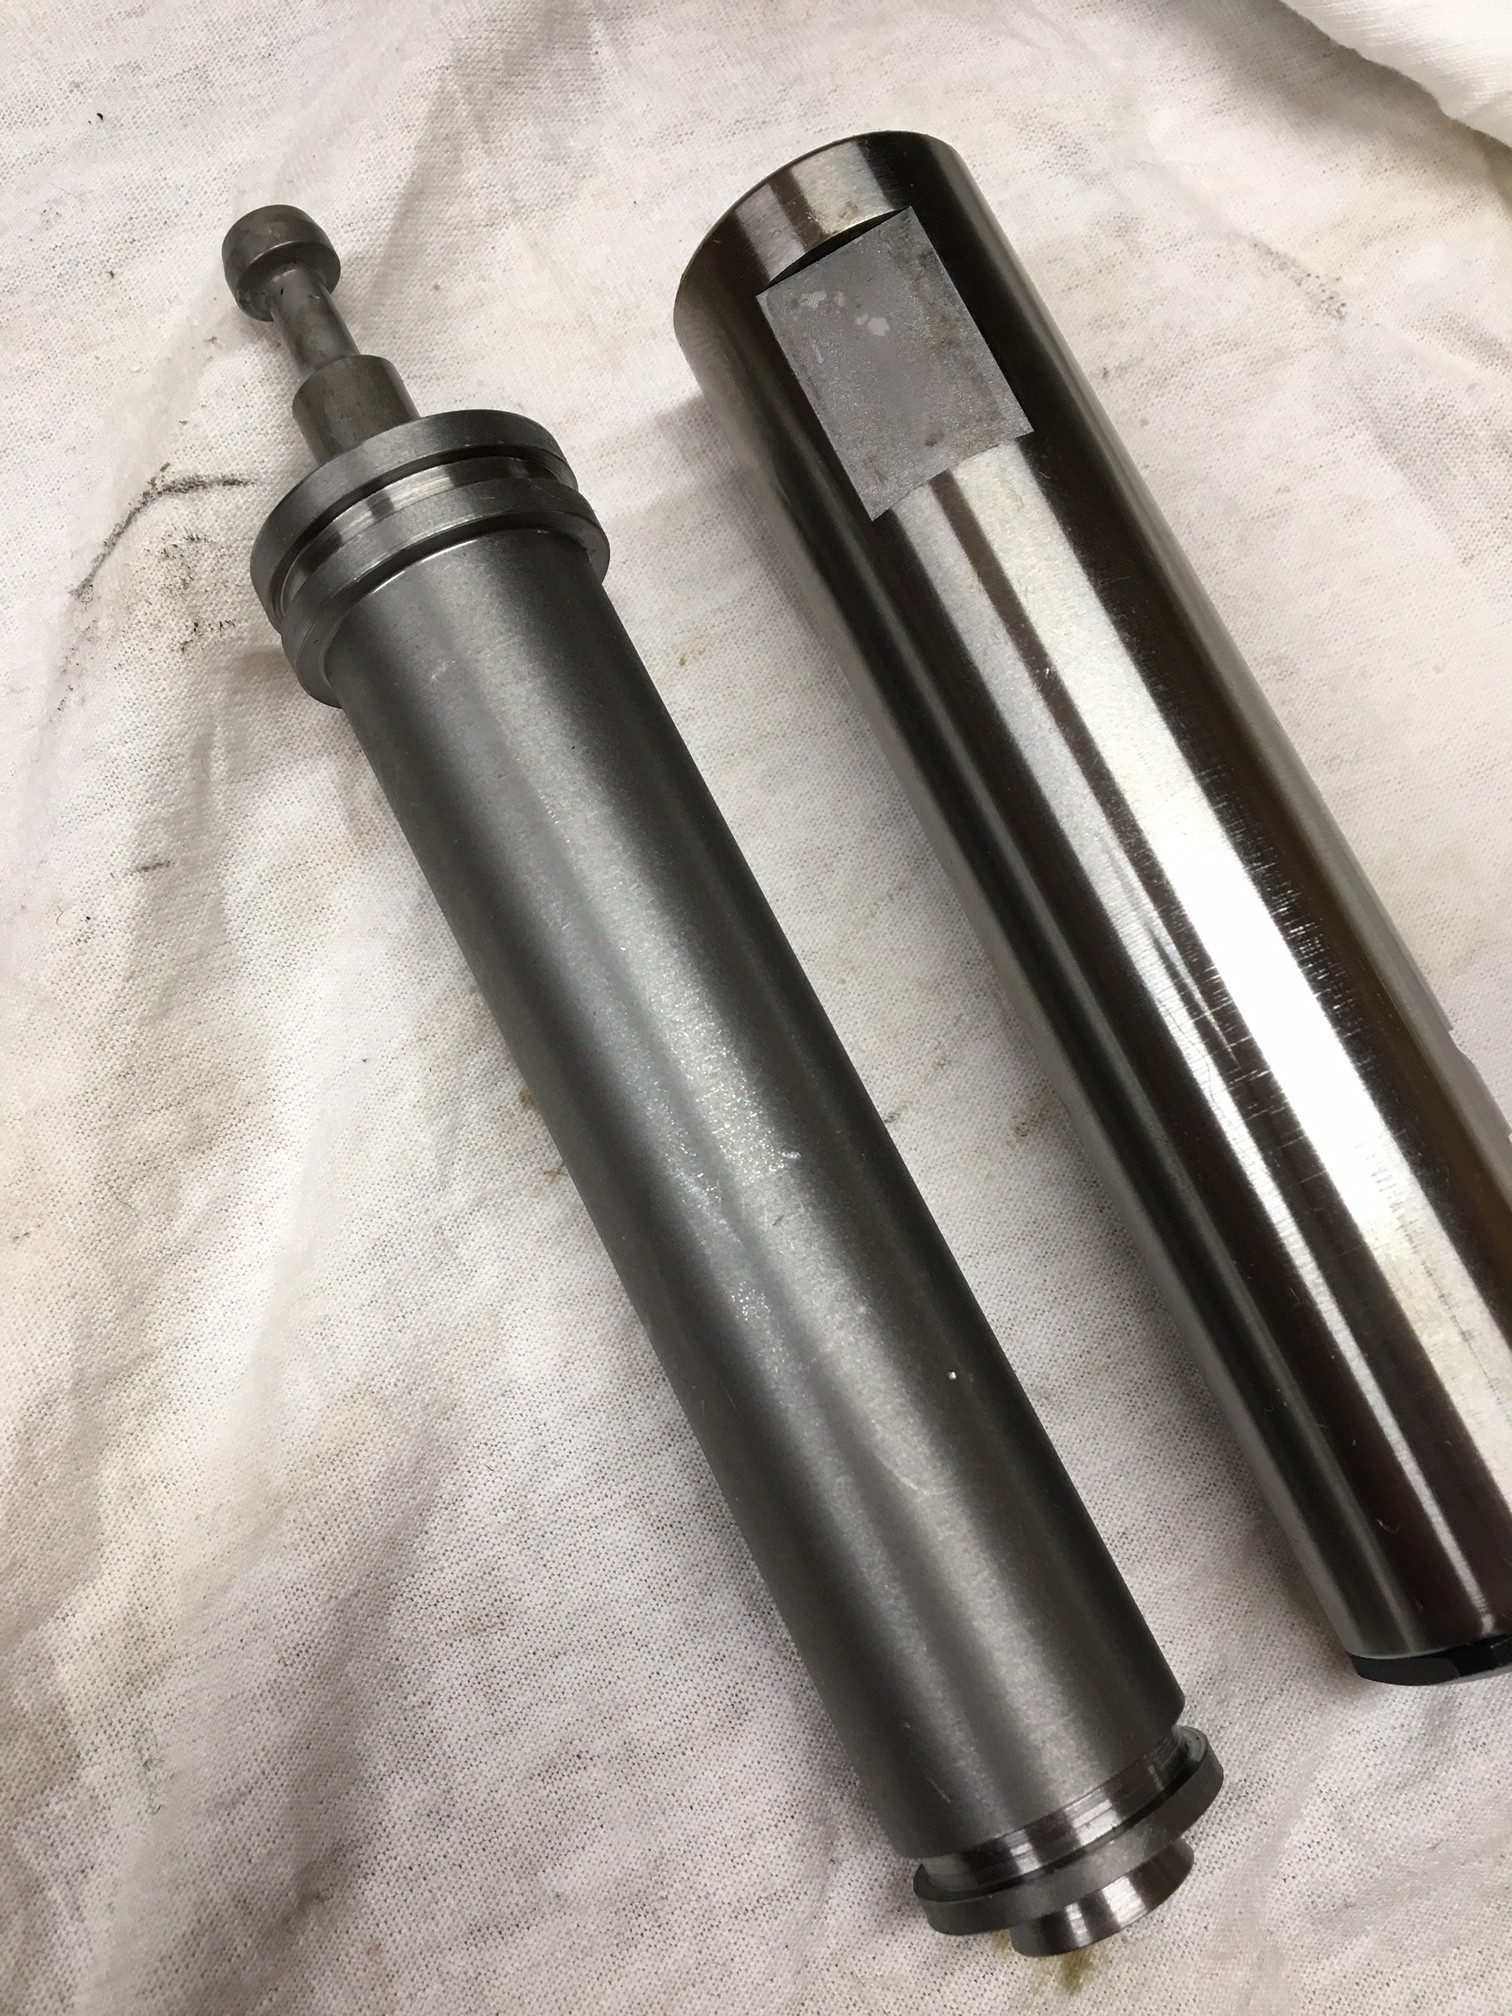
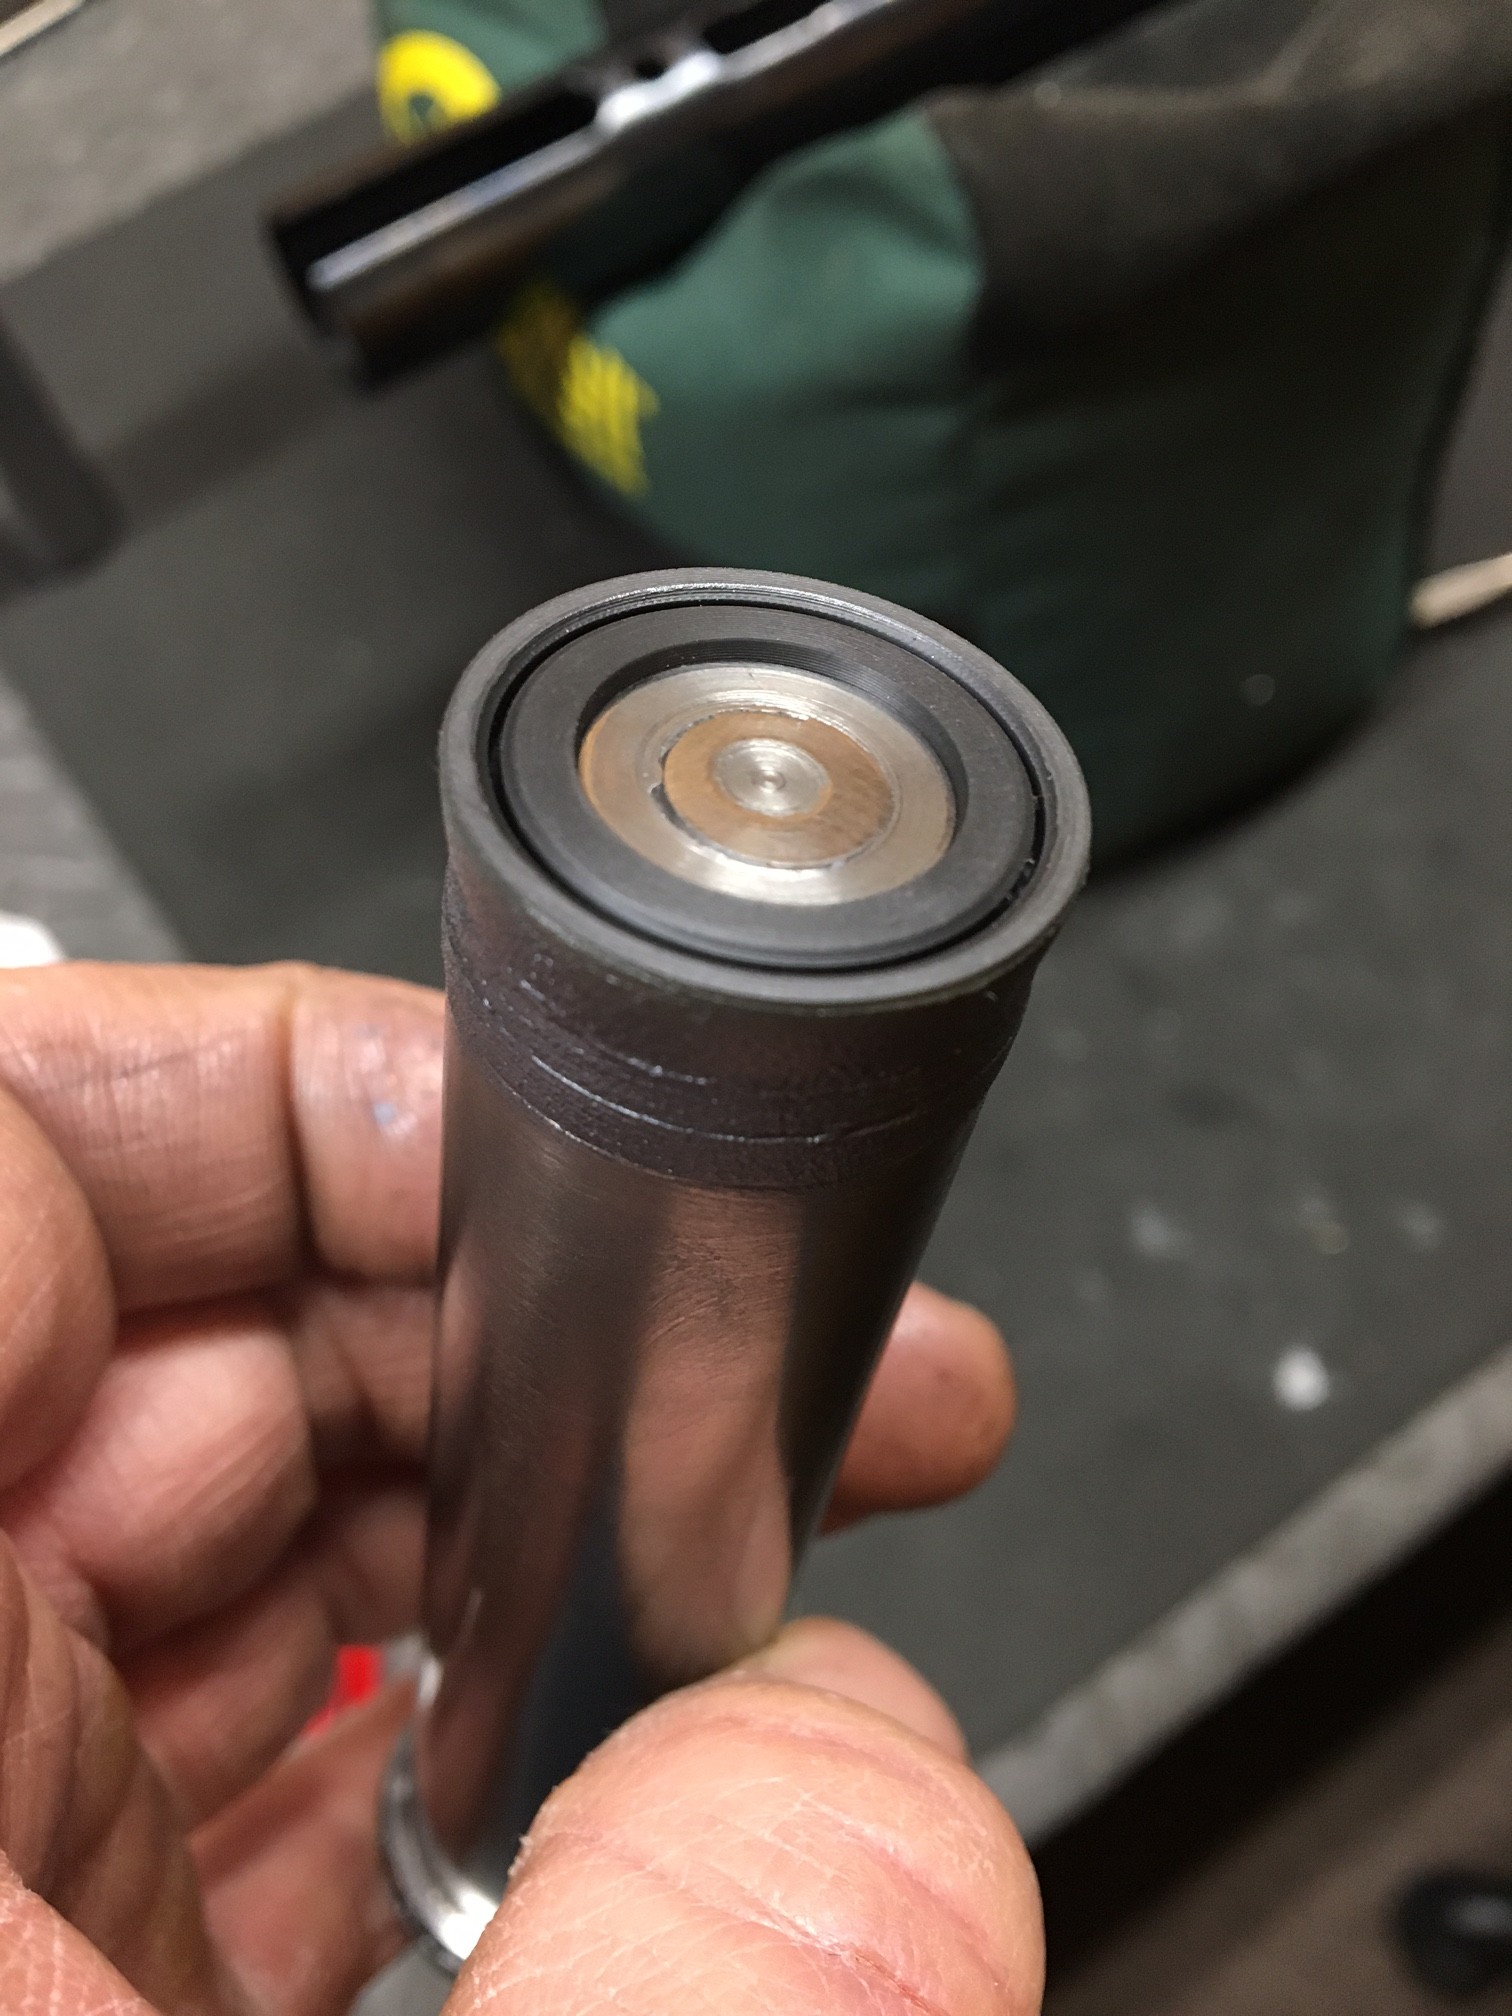
A quick check on the factory seal fit revealed that it was on the loose side with the piston quickly dropping under it's own weight. Here is the factory seal as it was pulled right from the compression tube. Only a small amount of moly lube, which was good.
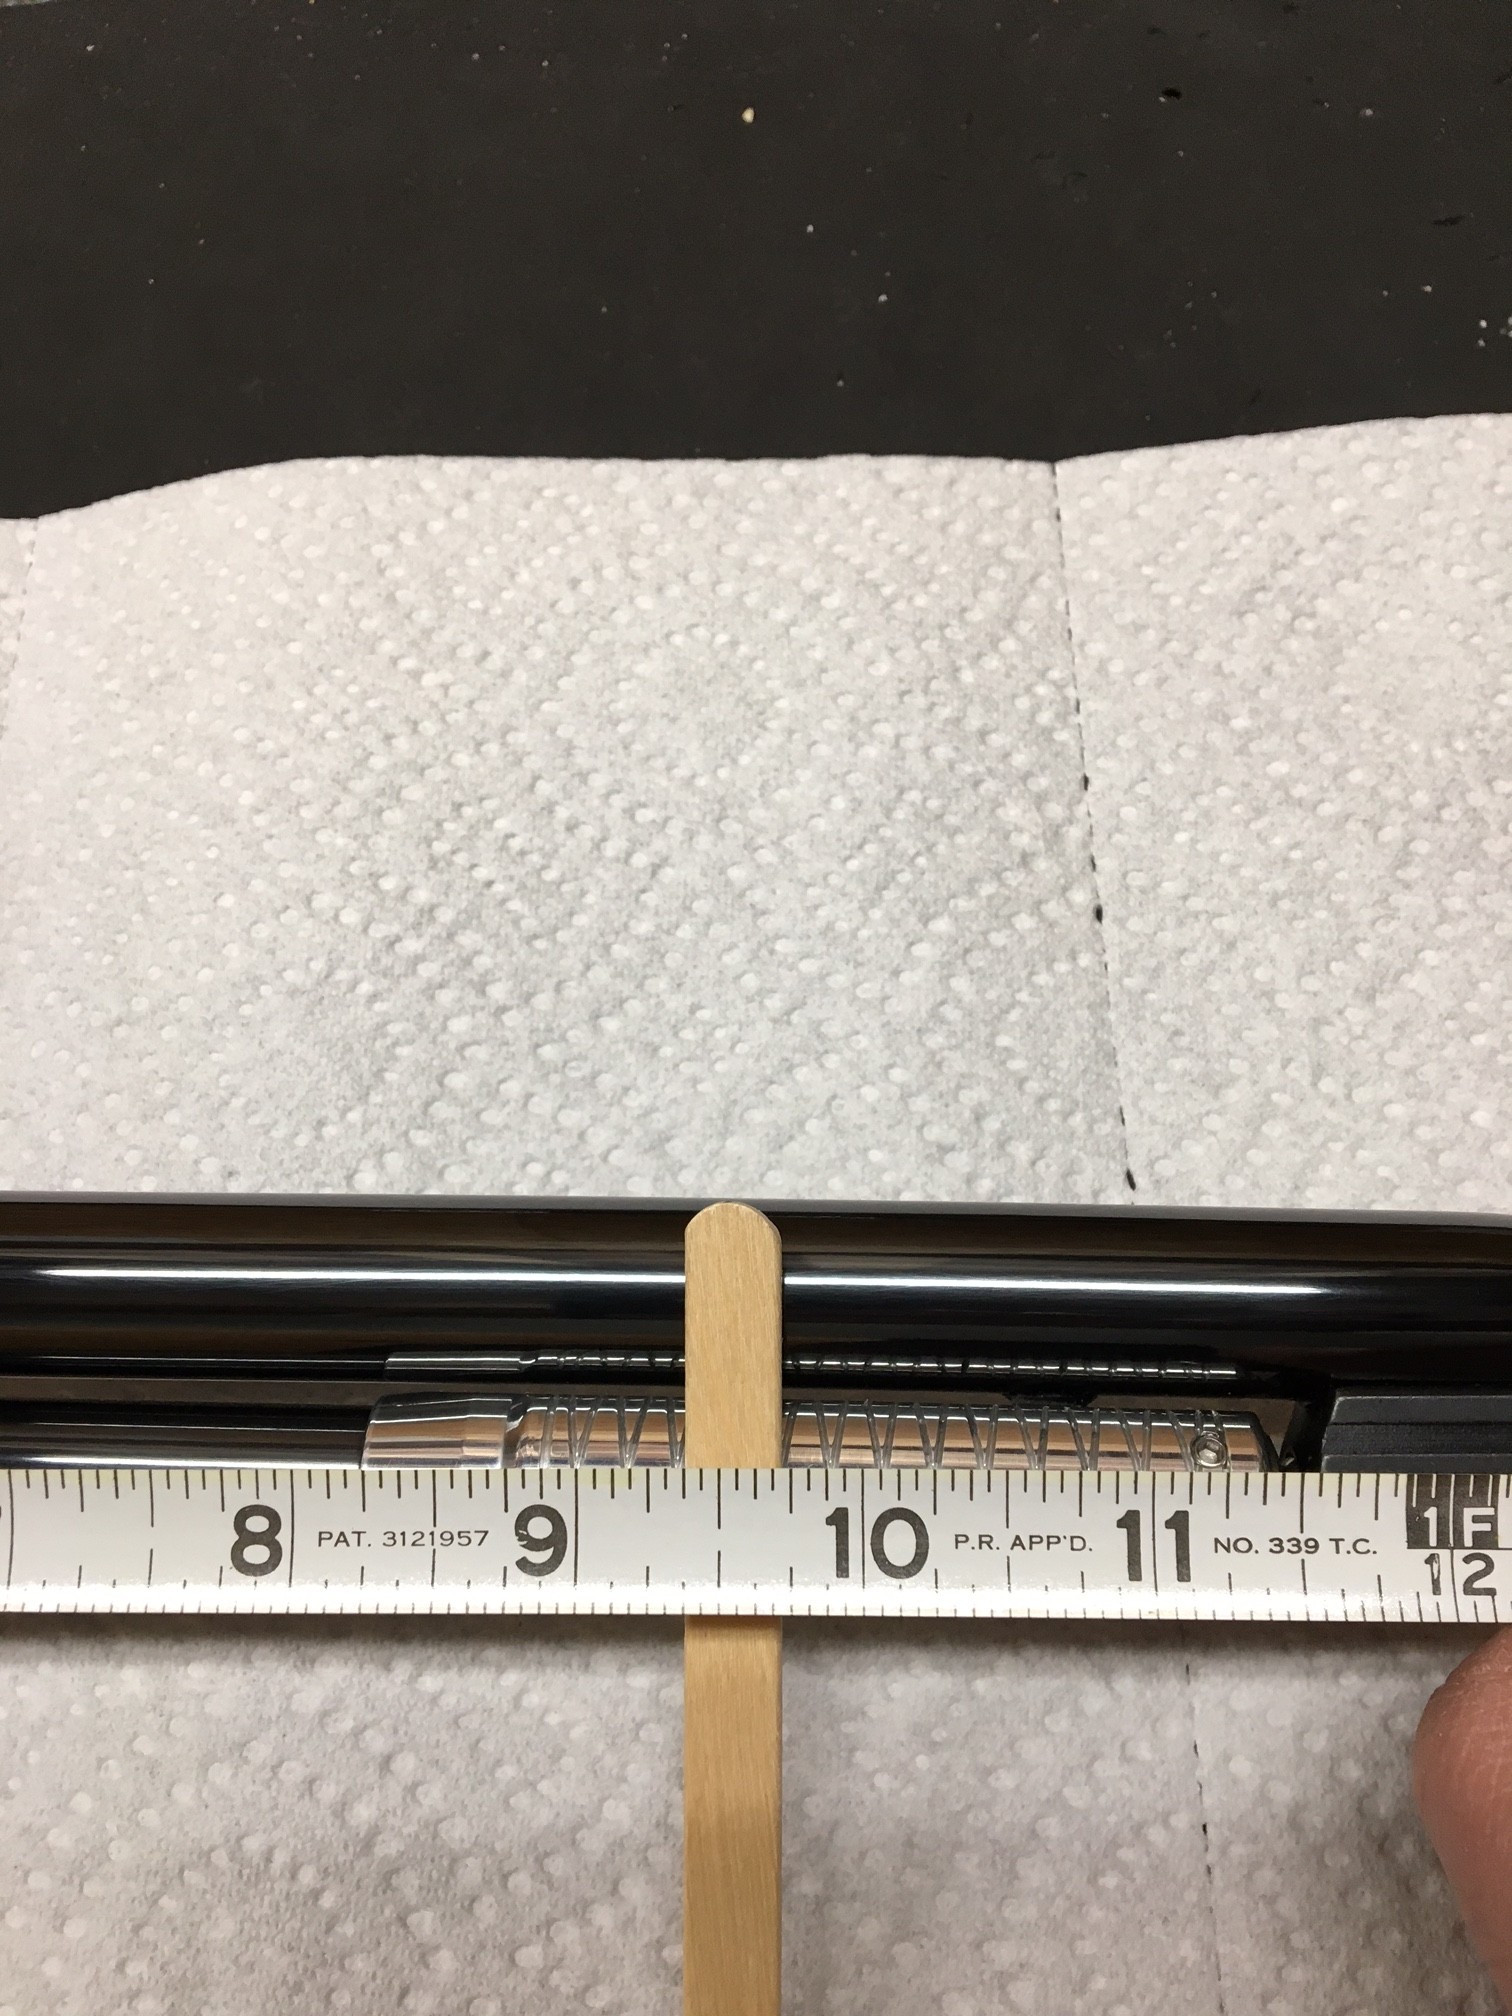
Nice cross hatching in compression tube
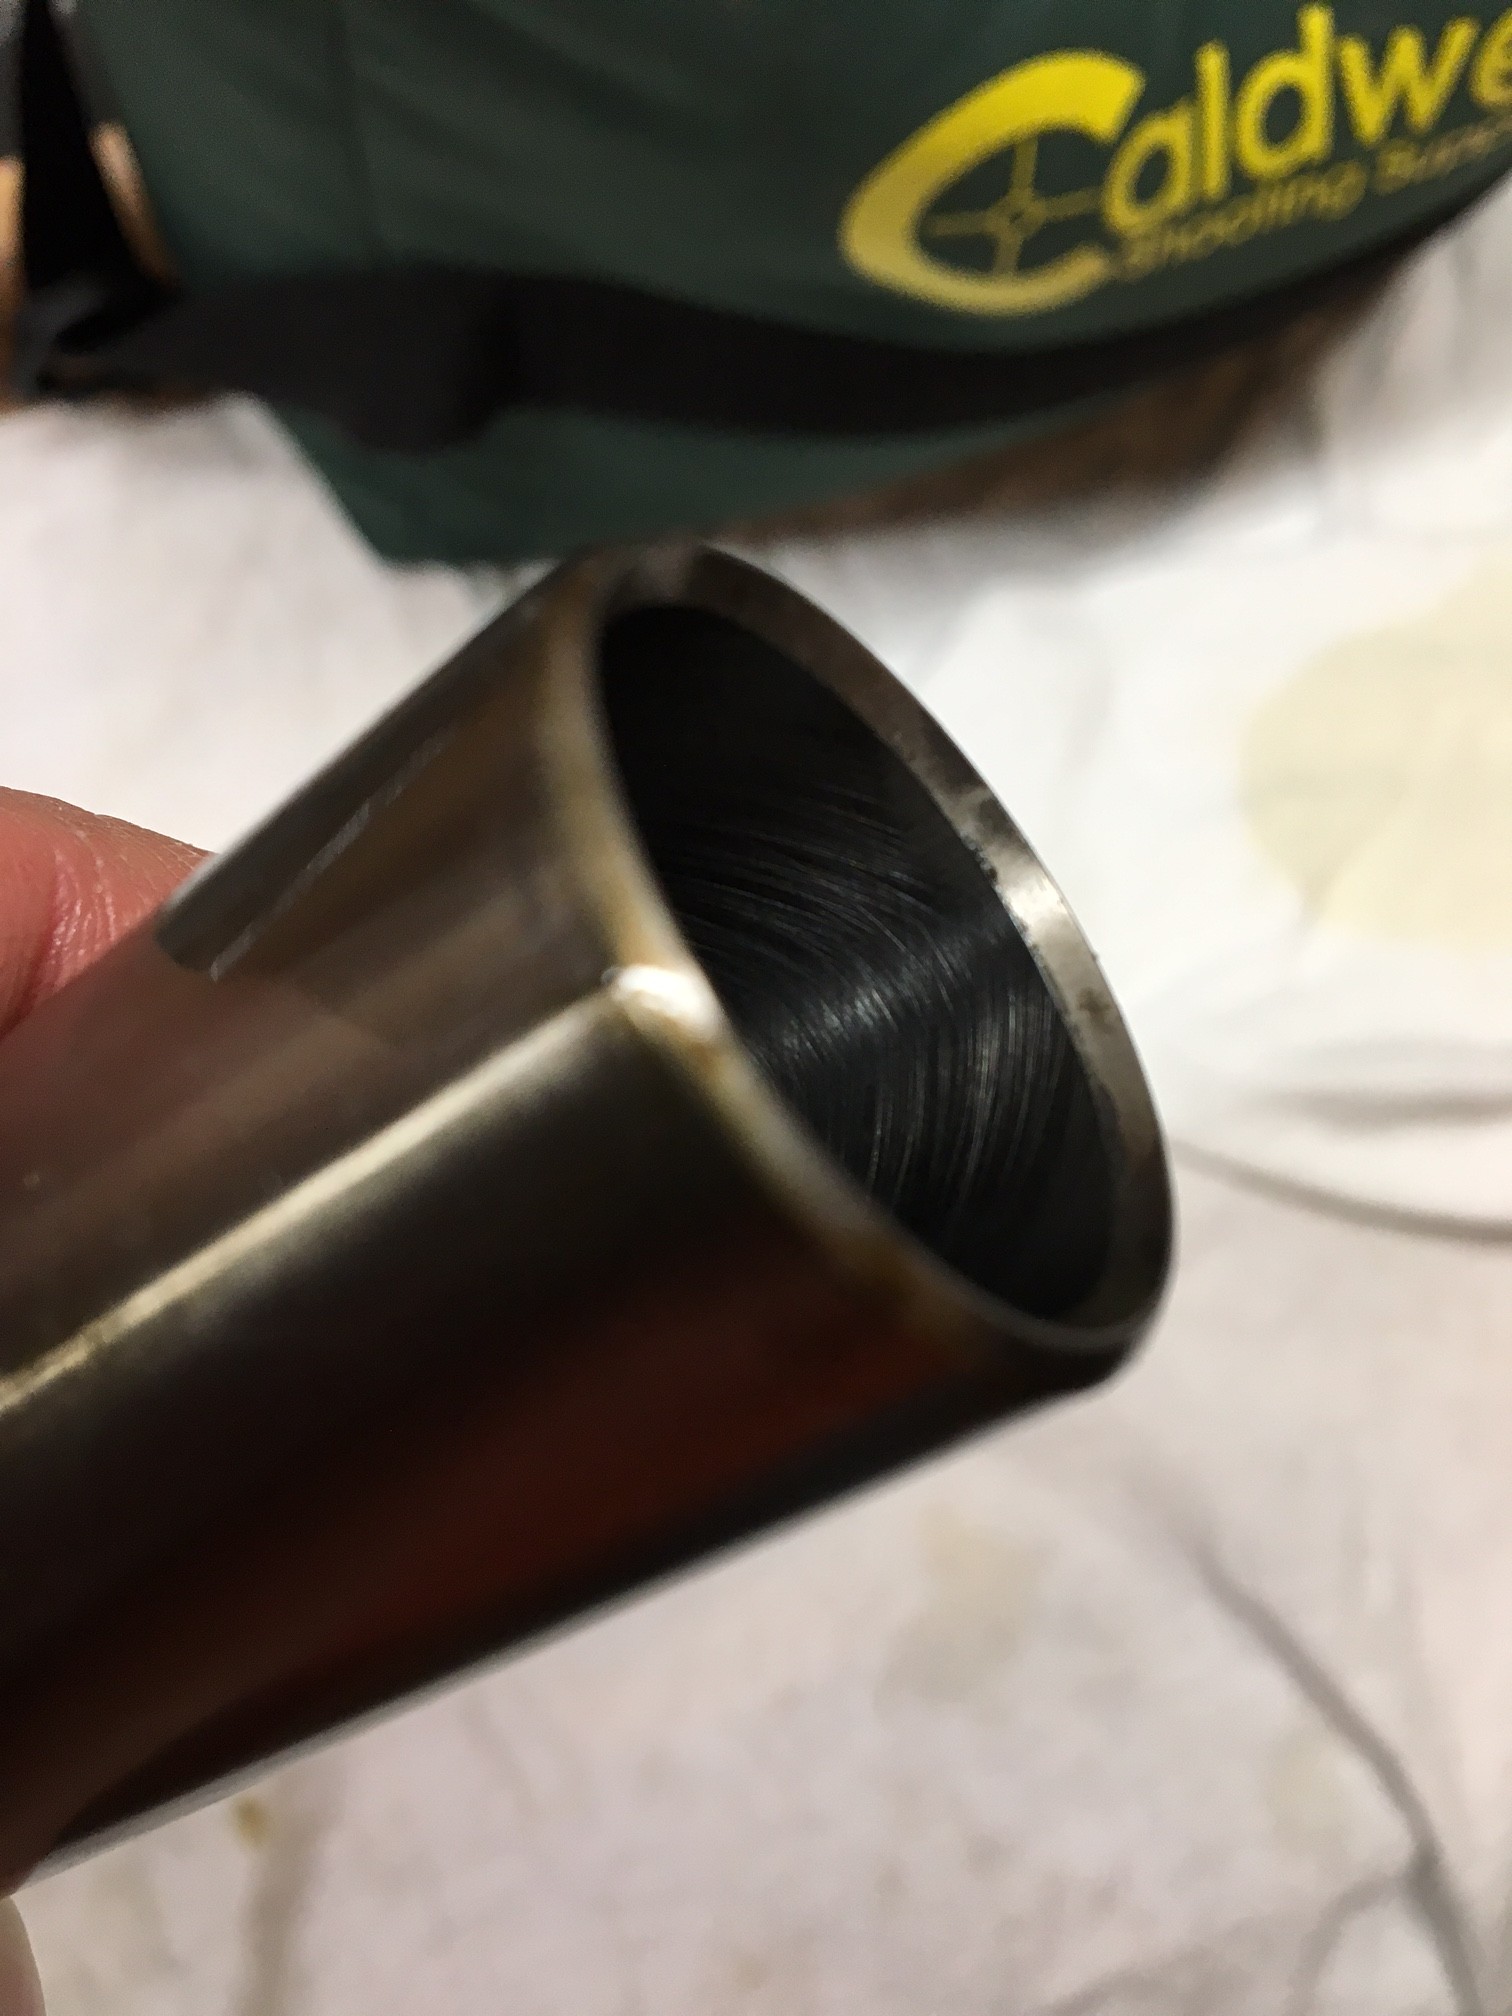
Compression tube was nice and clean inside with no burrs or debris
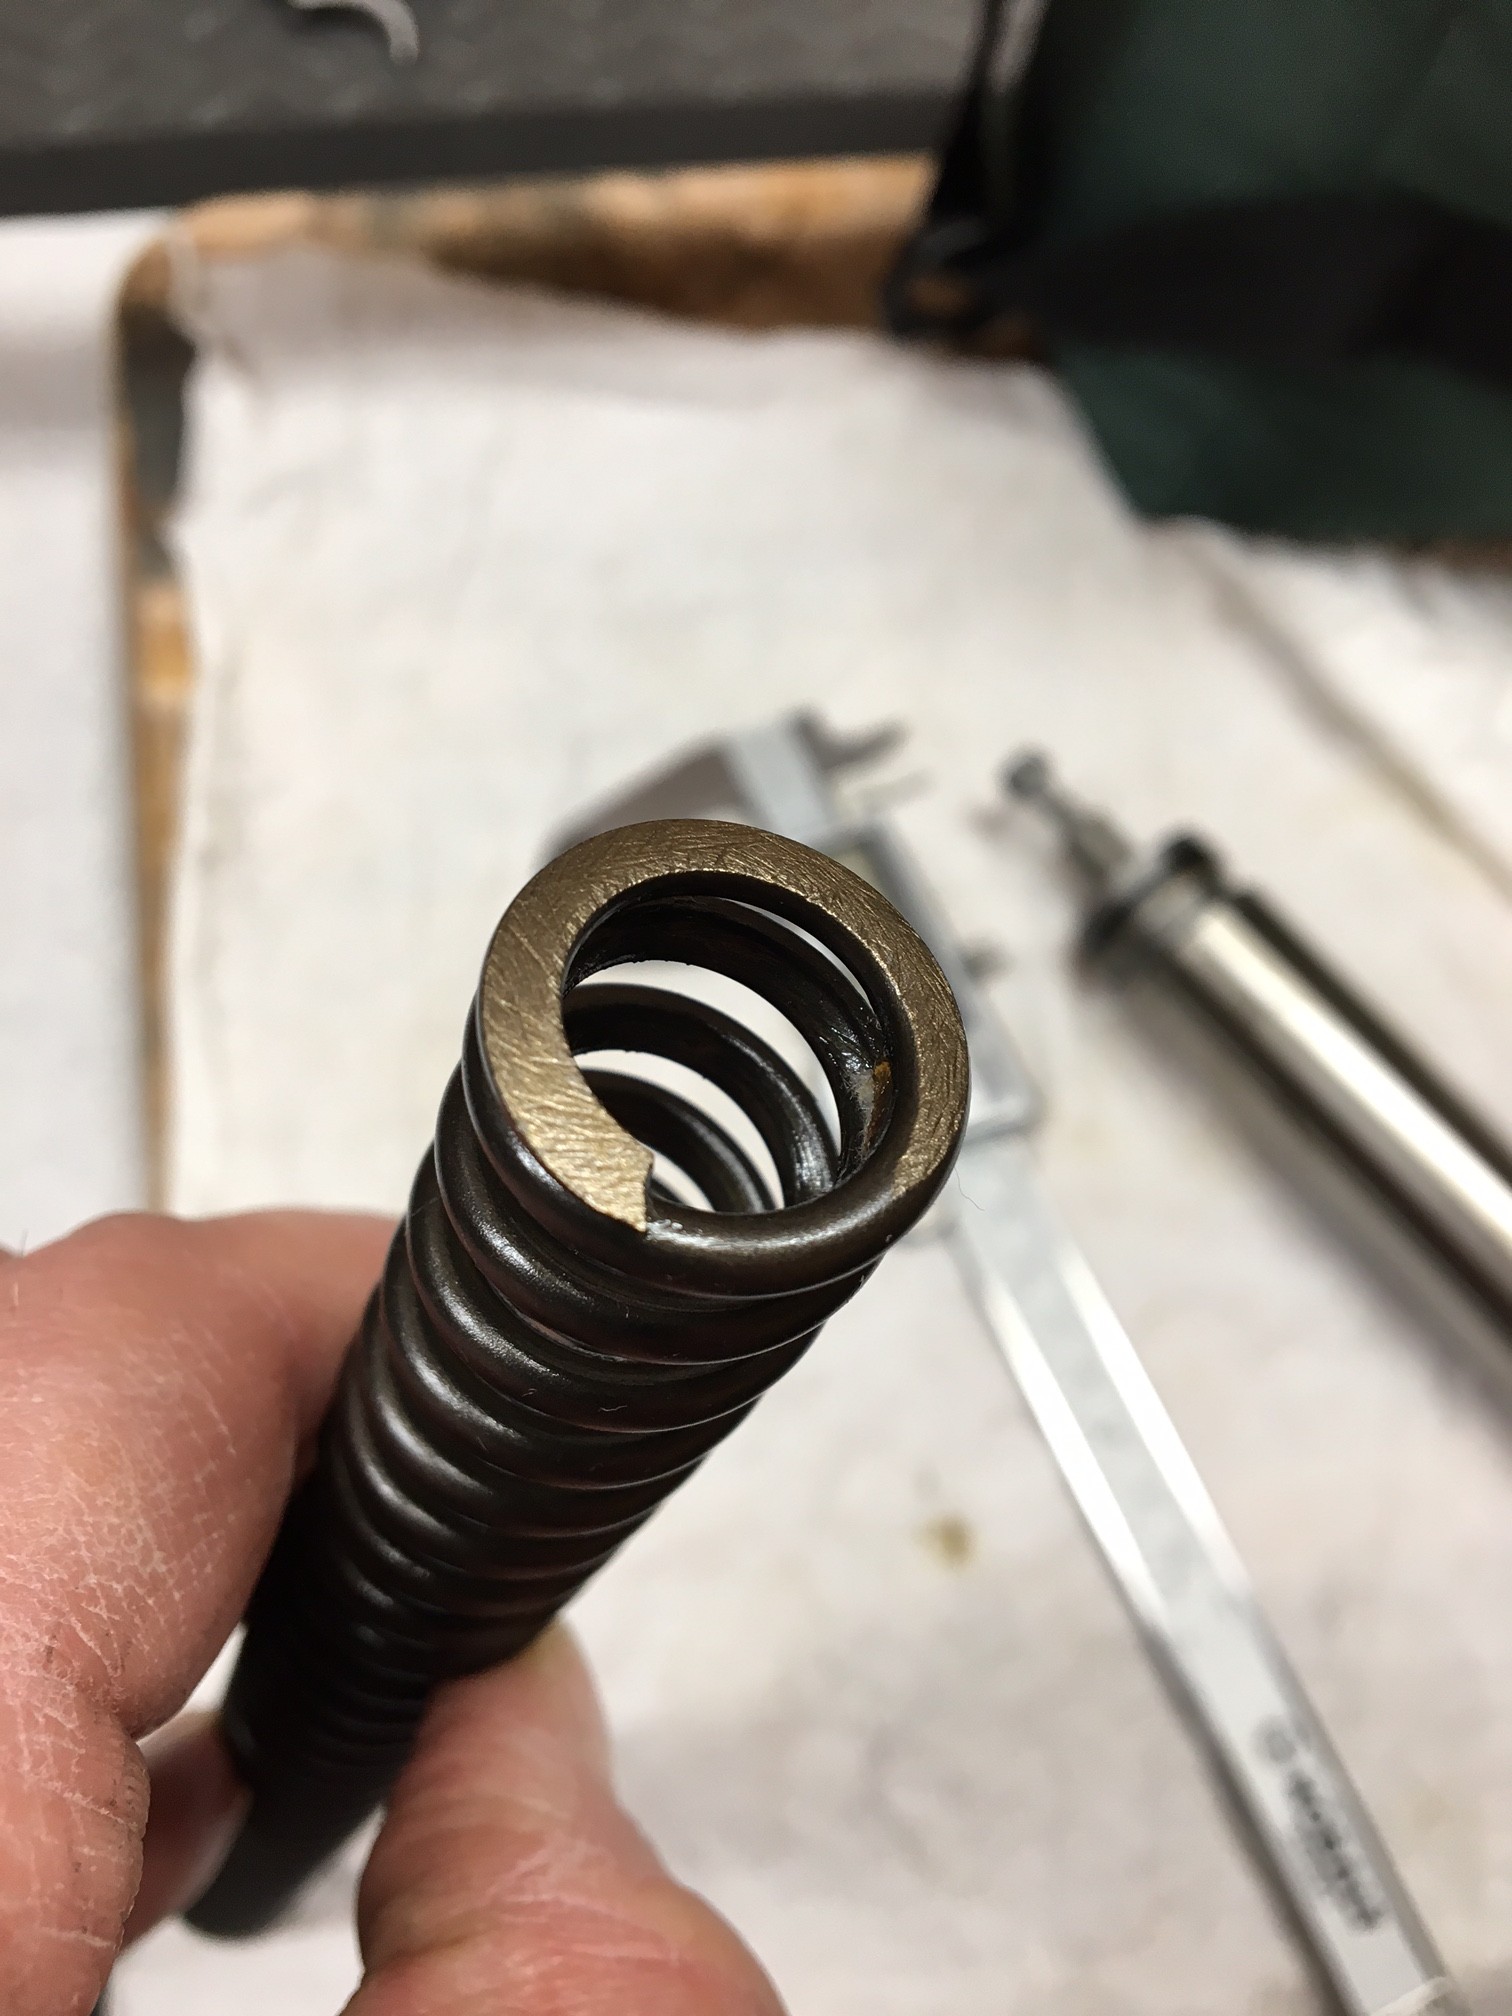
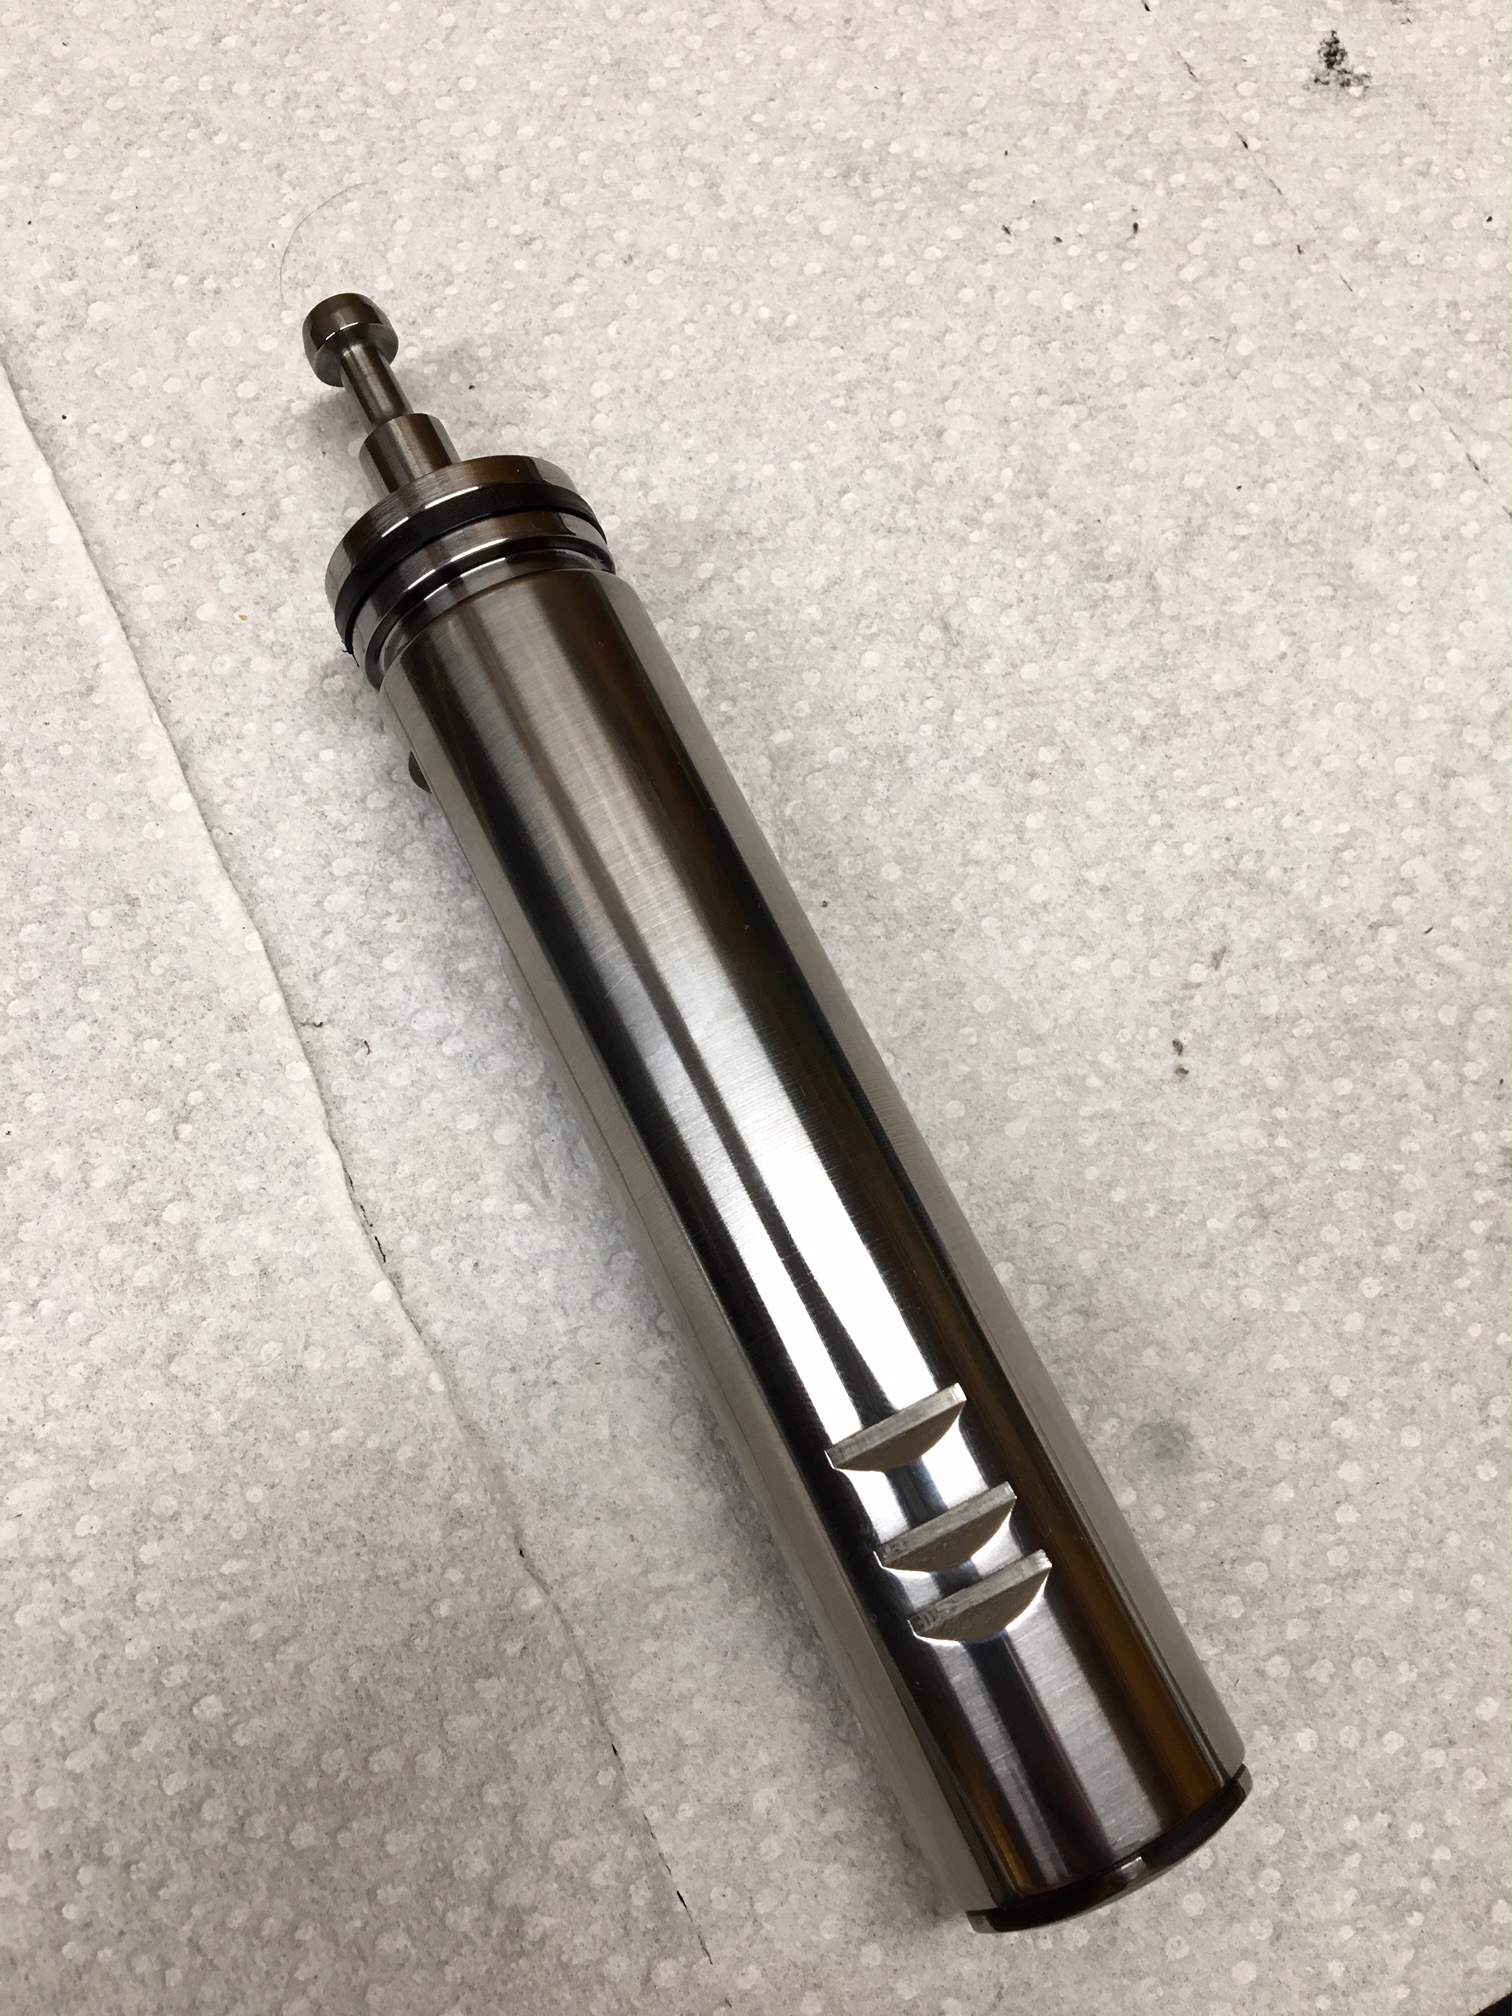
Factory spring end was a little rough. I like mine polished up quite a bit more than this
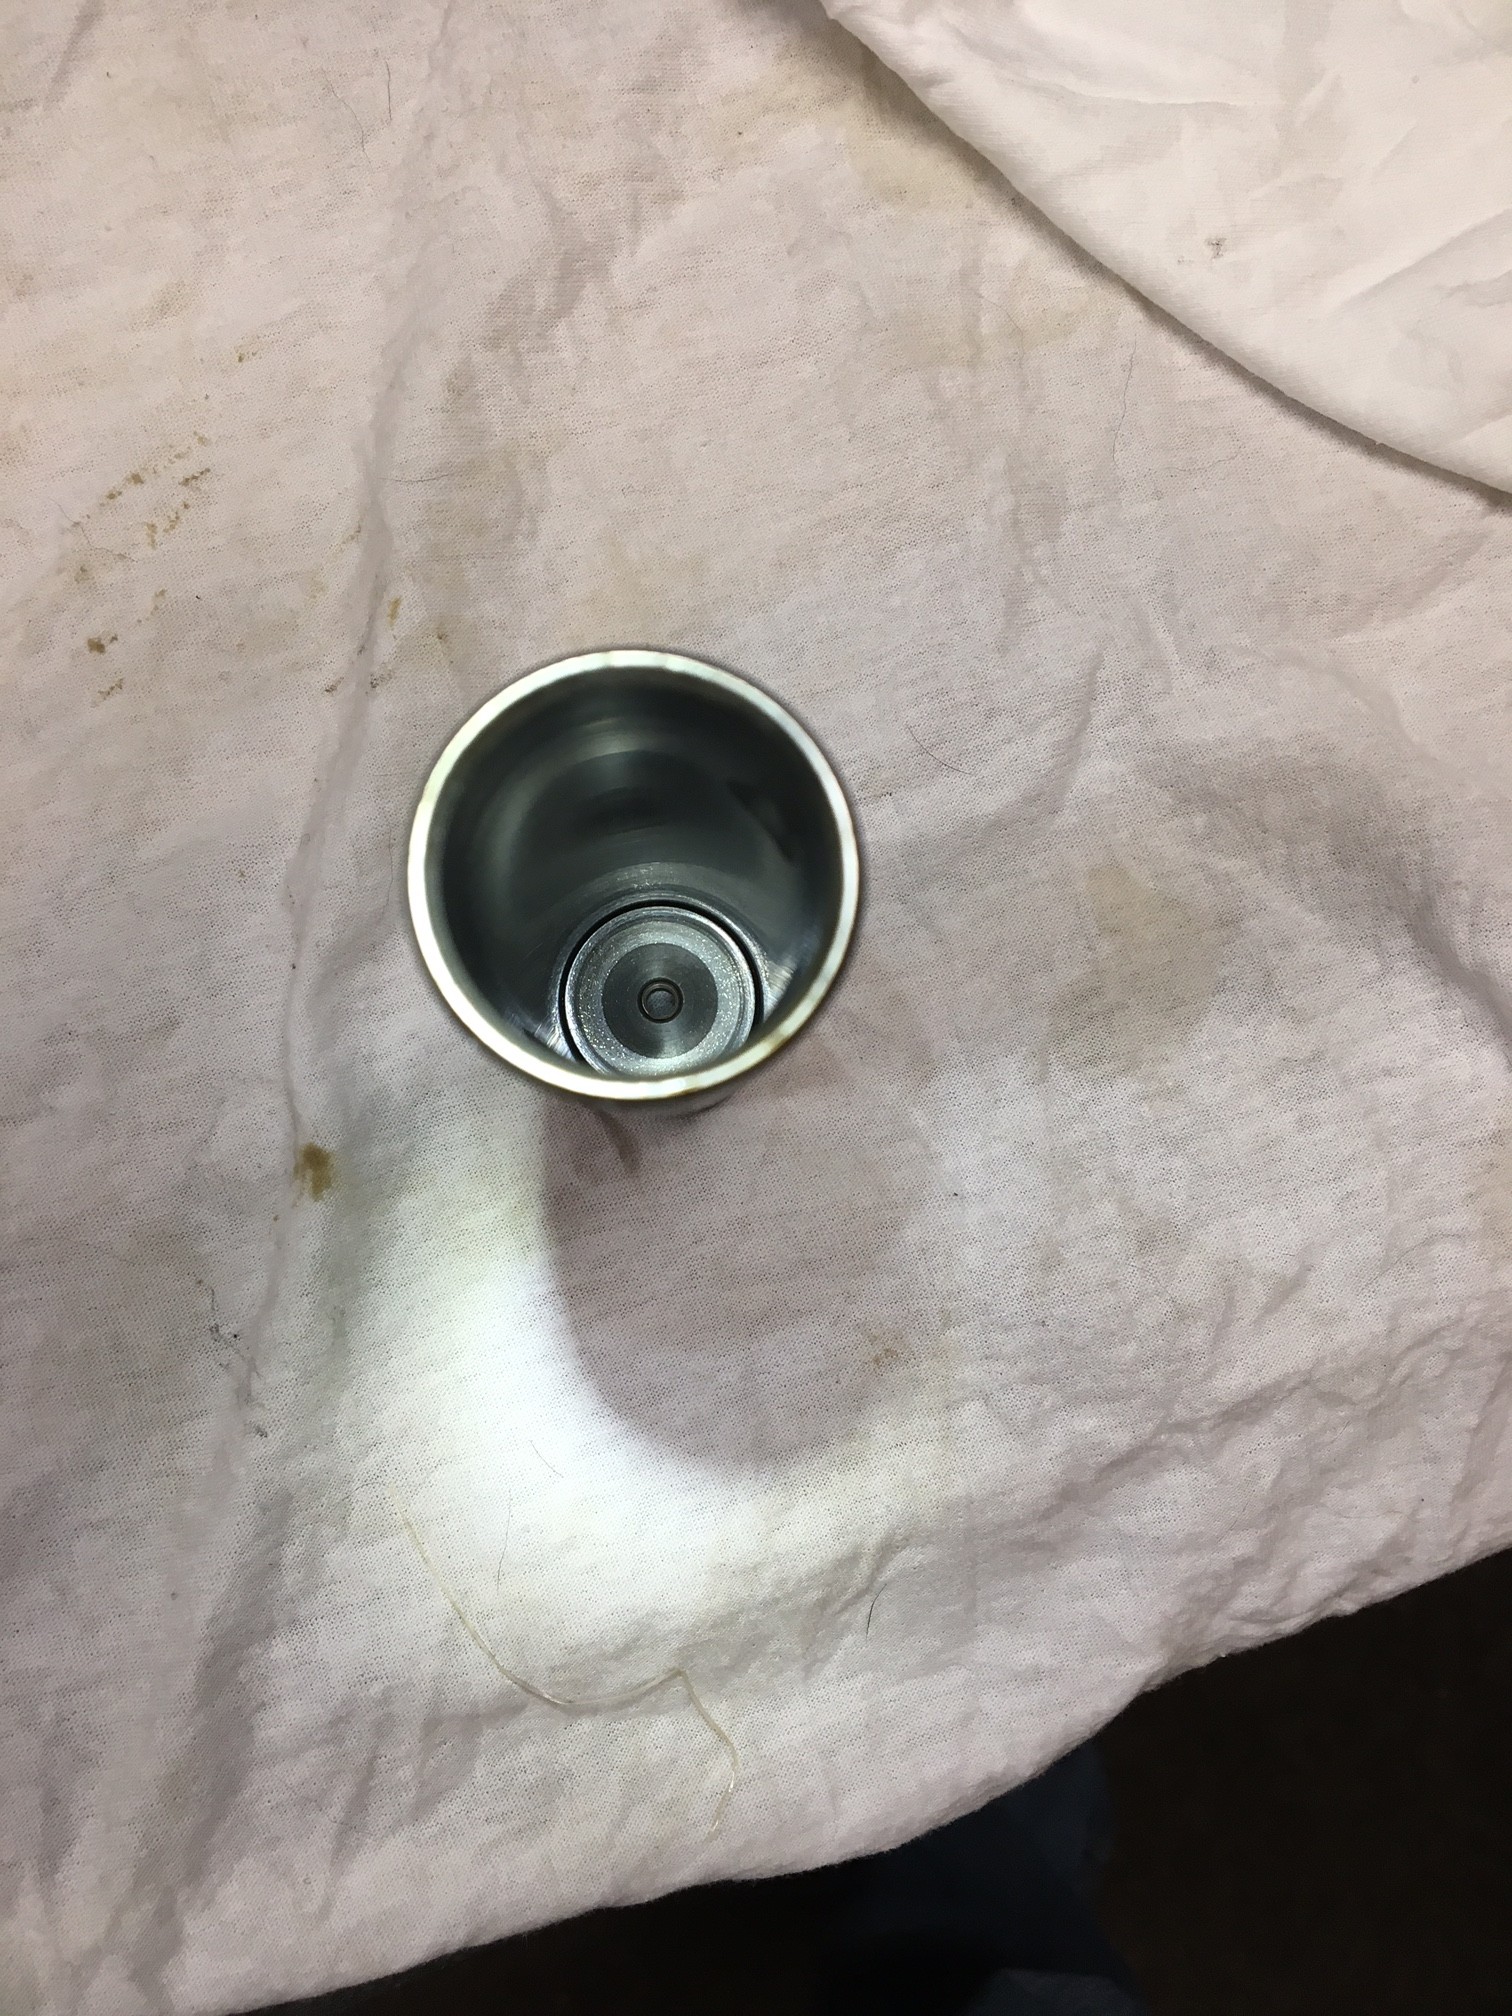
Compression tube and piston
Let's get to polishing and tuning!!
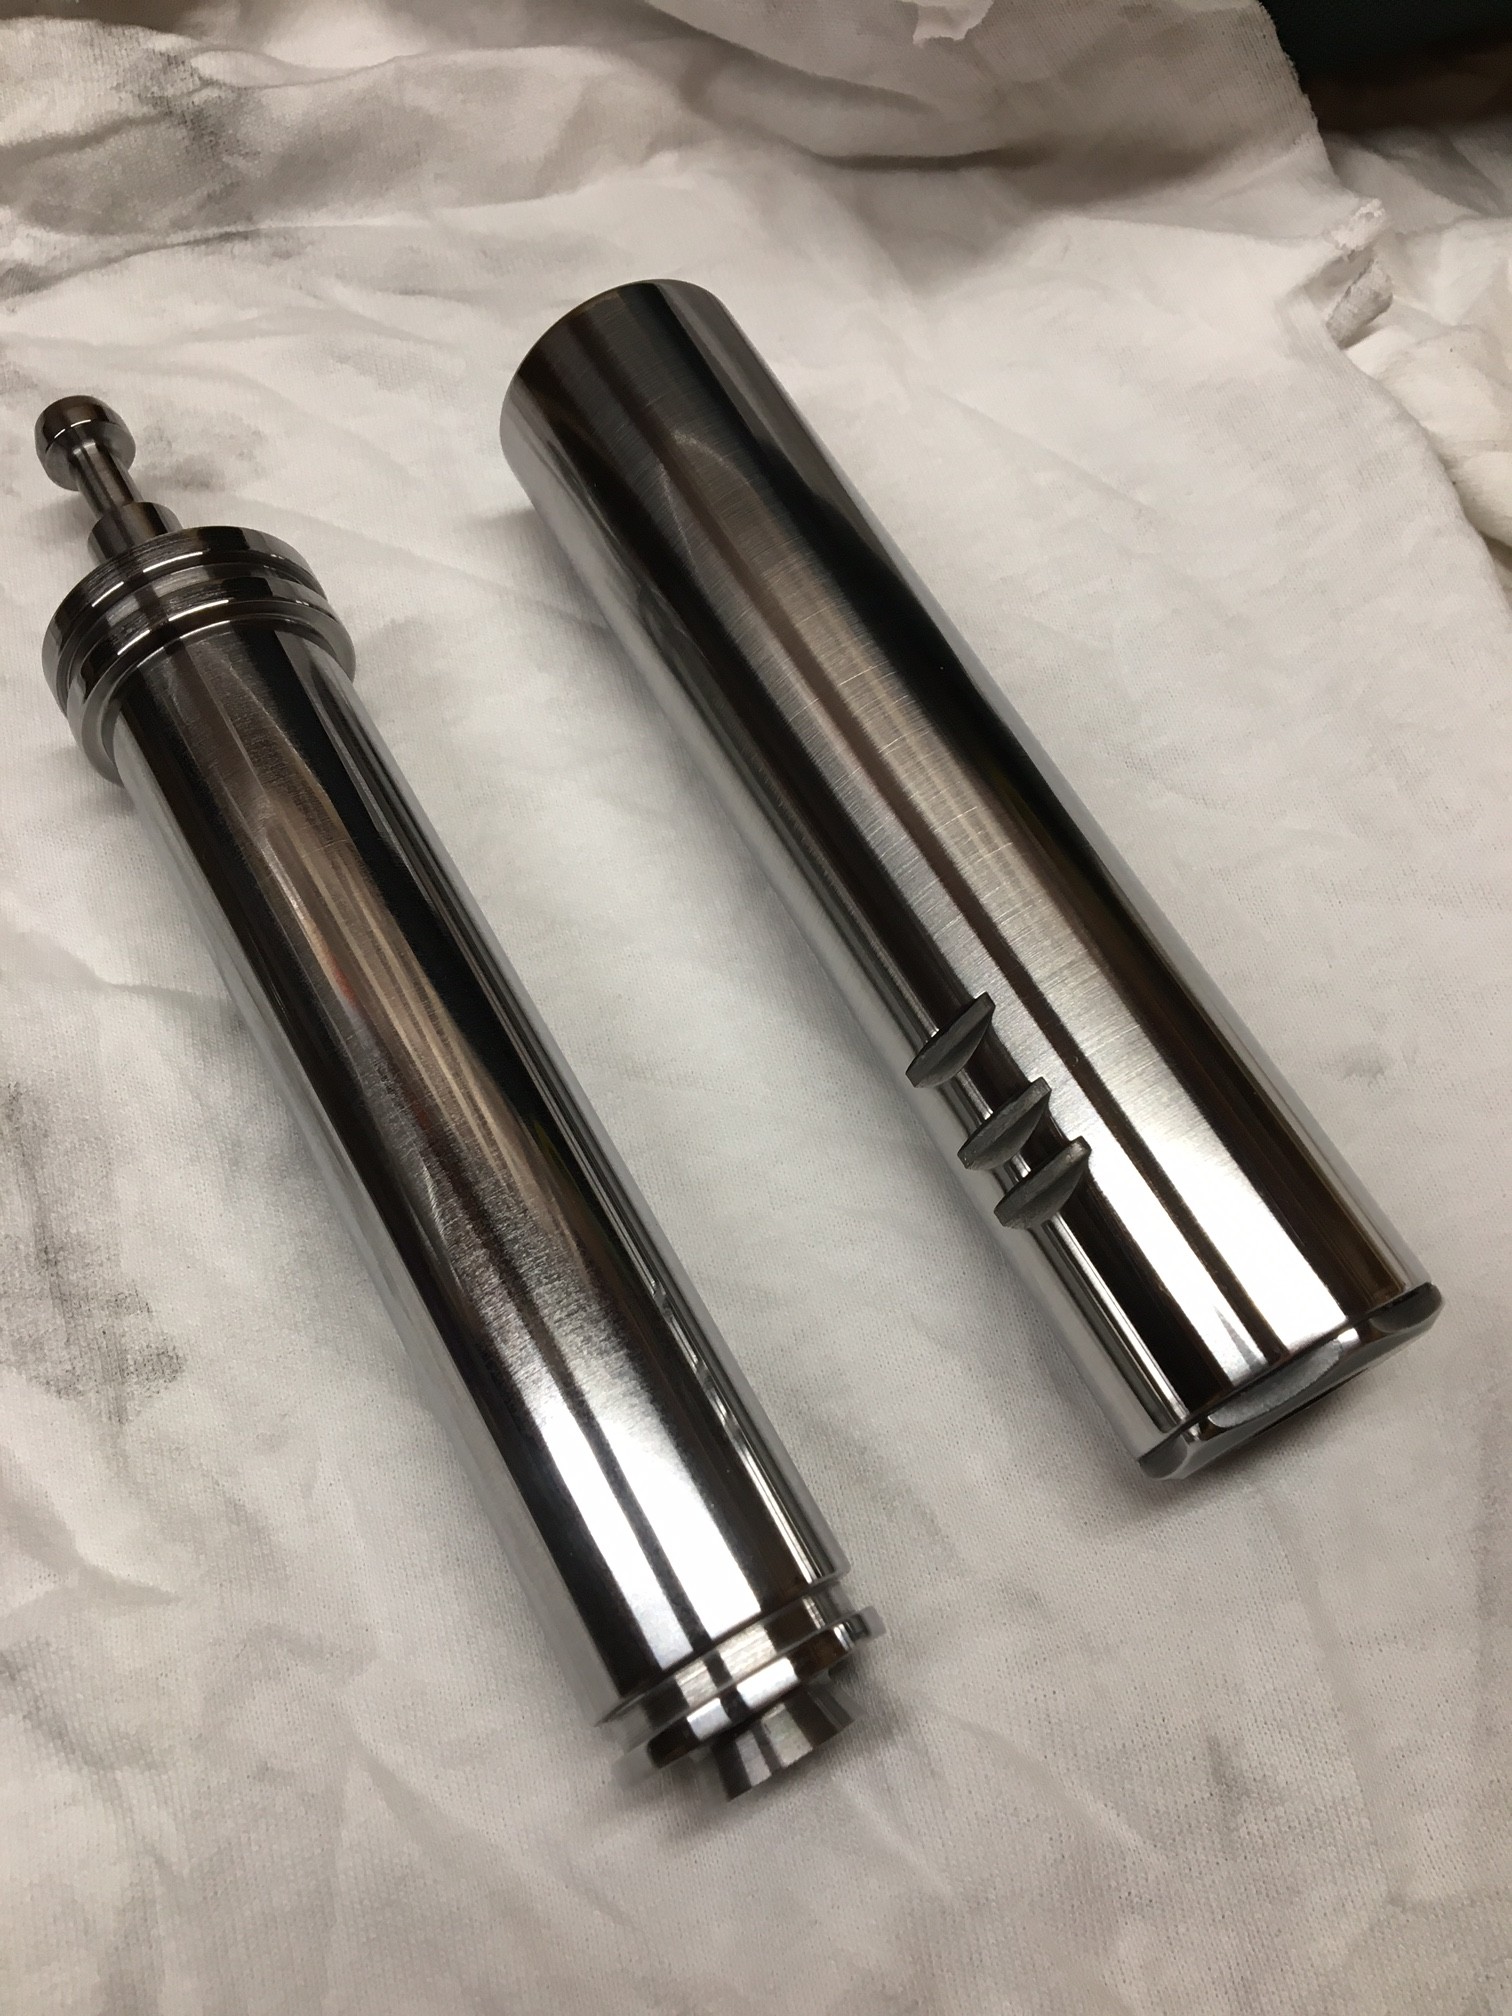
Piston and Comp Tube after polishing and deburring
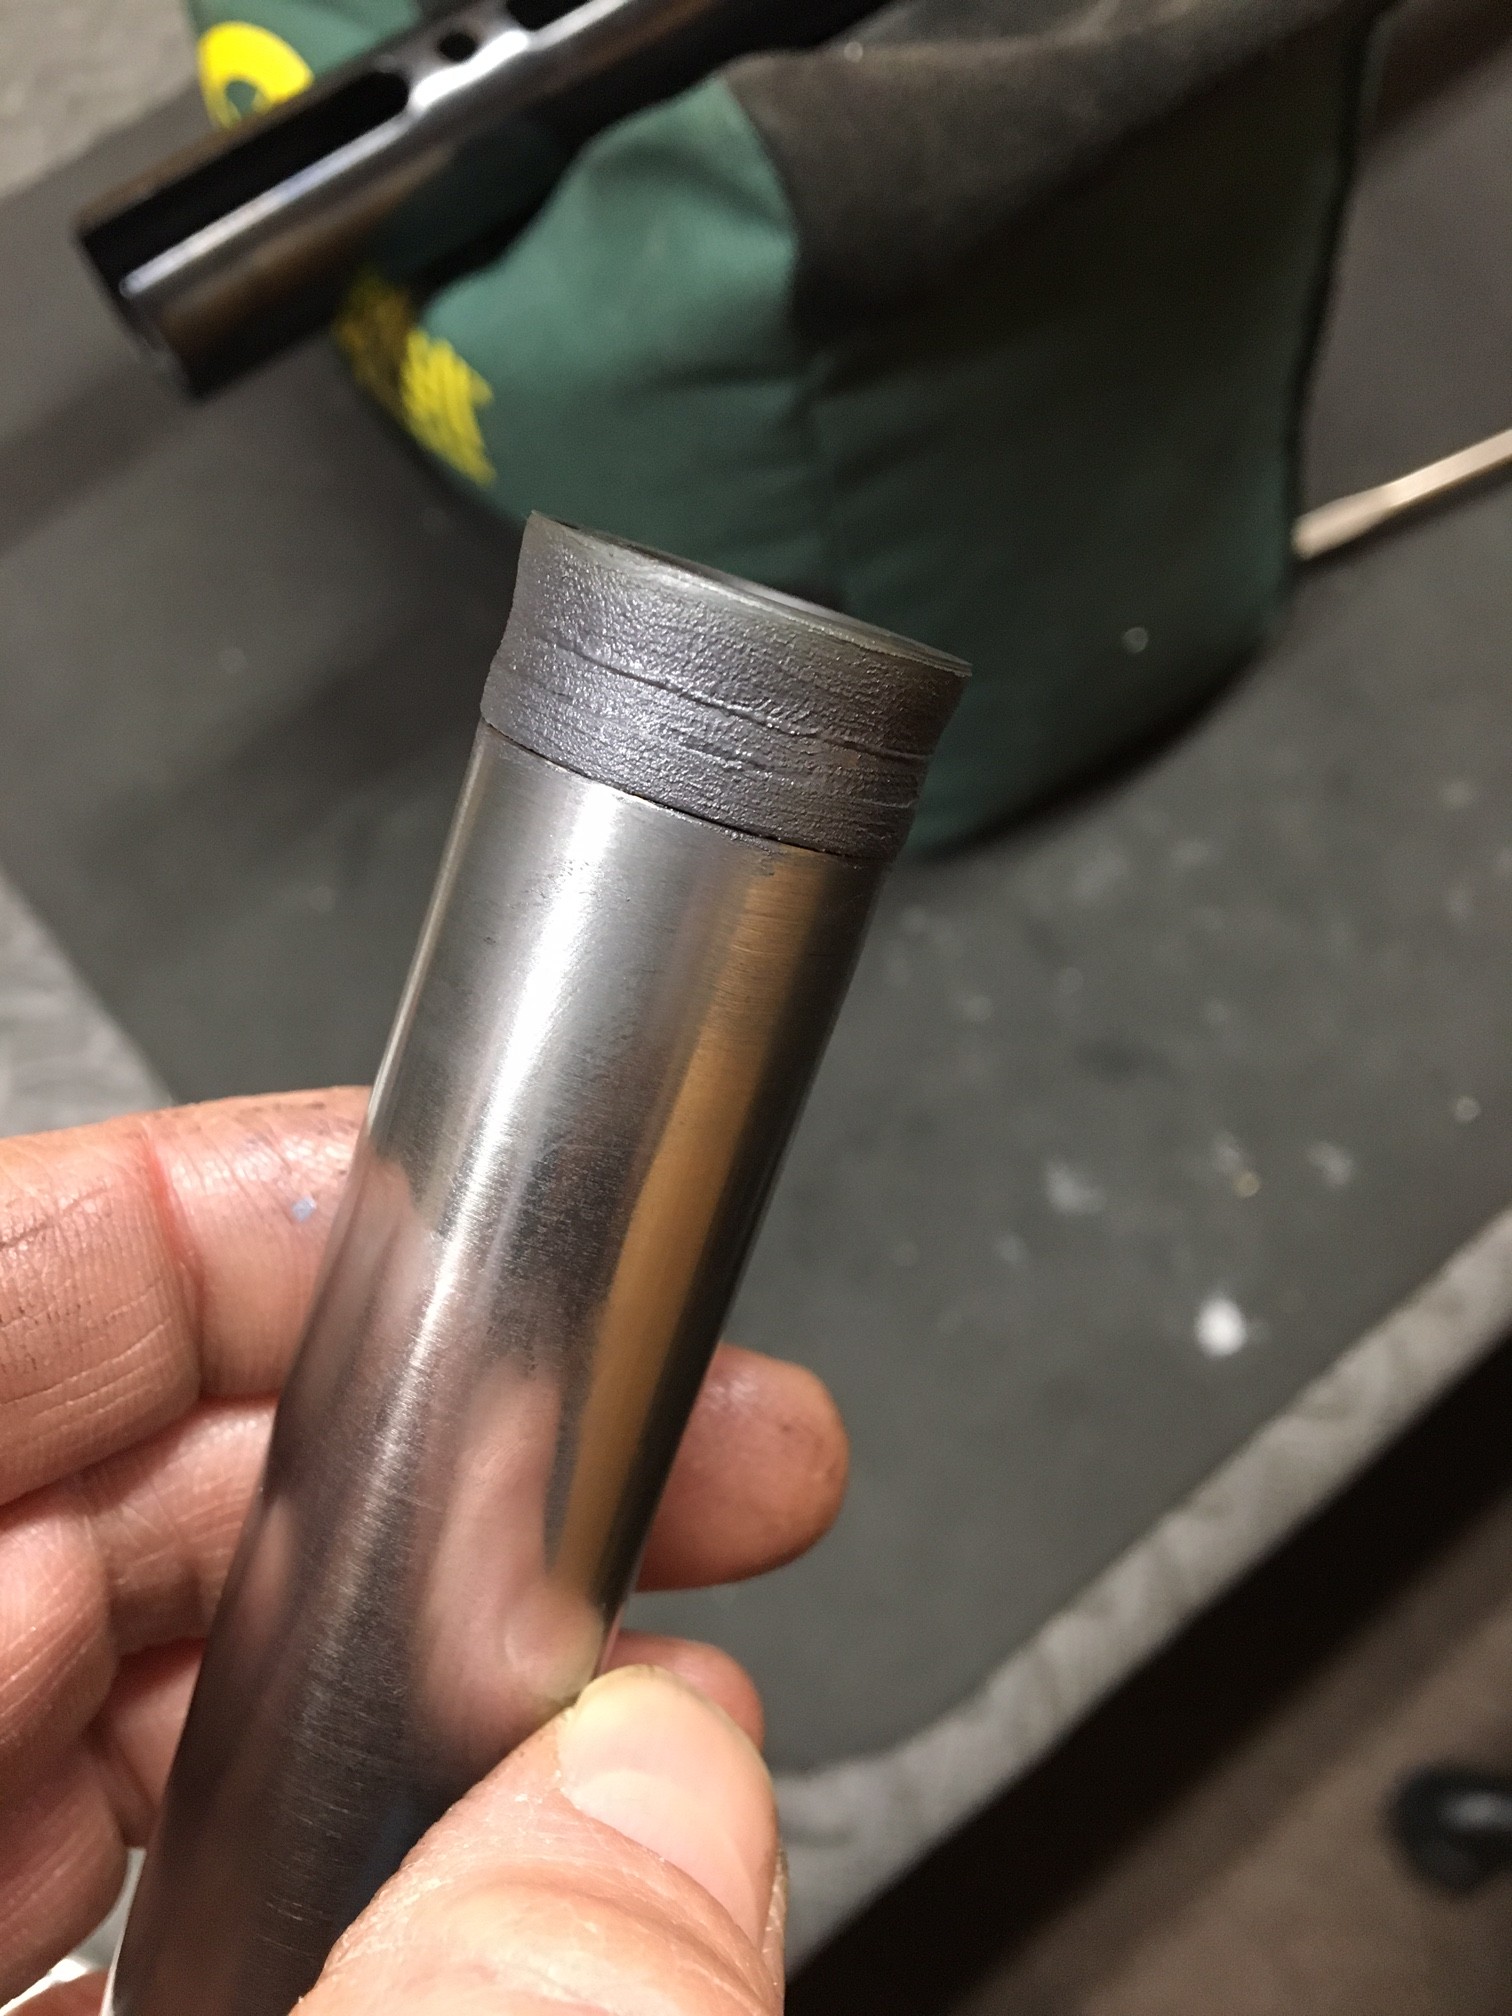
Carefully removed factory breech seals, cleaned around transfer port and then installed a set of Maccari standard breech seals lightly coated in 100% divers silicone
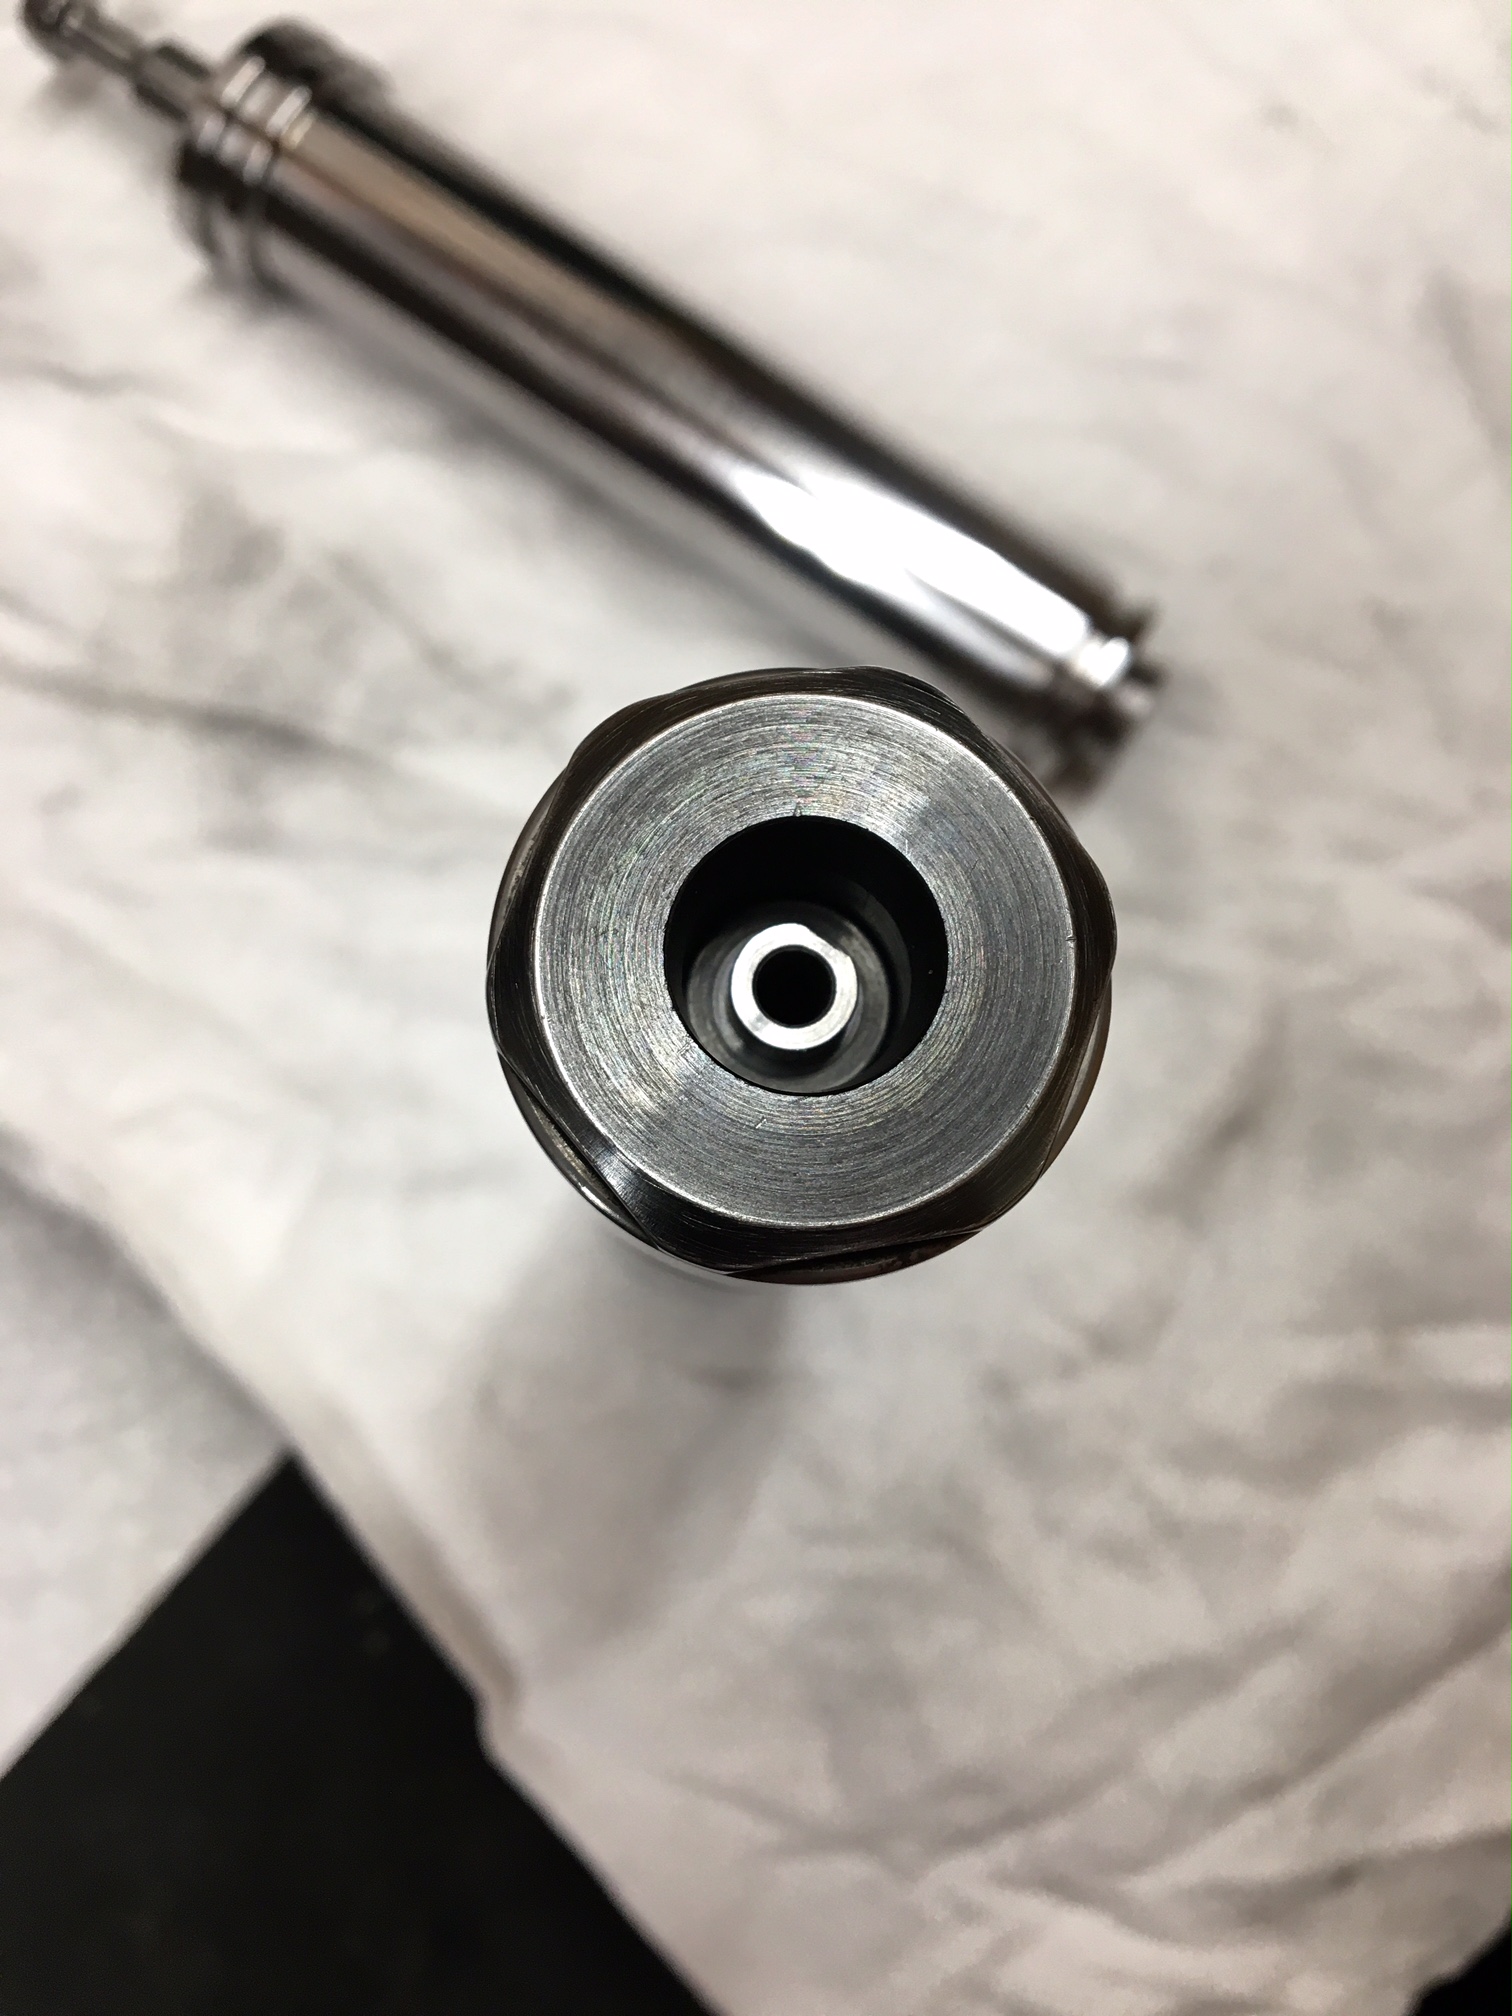
Removed factory seal and installed a Vortek Moly Seal - Lubed with tiny film of Vortek Moly 70+
I also smeared a very thin film down into the inner walls of the compression tube and outside of piston.....almost like a dry rub
Careful not to get any moly on the leading edge of the seal
While most seals I have installed required hand fitting, this one did not. It dropped in and gave me just the right amount of resistance. I like to start them out with s little resistance so the seal can break in over a couple hundred shots or so. But this one had just the right amount of resistance with no fitting necessary.
Piston and comp tube lubed with new seal, ready to drop in the rifle
This past year I sold all but one of my springers and moved to PCP rifles. My 30 and 50 yard shooting had moved to 100 yards with the quest for tiny groups at that distance. While I really do like PCP rifles, I also missed the spring piston rifles that I sold. I missed the craftsmanship and mechanics that were the lifeblood of my springers. I missed the hefty feel, the slight recoil on the shot, and the challenge of shooting them. I also missed tearing into each new rifle, then evaluating each part, polishing and tuning until the rifle was customized just the way I wanted it.
Any other PCP shooters ever had this same feeling? I know some have left for PCP and never came back to springers. But for me, I never lost my appreciation for fine springers such as the TX200, HW97, HW98, etc.
I recently sold my .22 PCP rifles in order to get a larger caliber for my 100 yard shooting. I then picked up my only remaining springer...the HW98 and started target shooting at 30-50 yards. It didn't take long for me to realize what I had been missing!!! Shooting this springer at 30 and 50 yards was every bit as much fun as my PCP rifles. After a few weeks of shooting the 98, I decided to get another springer for a project. Out of all my rifles, the TX200 Hunter Carbine was probably my overall favorite. It had the accuracy of the Pro-Sport, but had a stock design that fit me better. It also had the same 9.5" LW barrel that I really liked. Hunters may like the Pro-Sports and Hunter Carbines because they are lighter, shorter and easier to maneuver in the field, but I actually prefer them over the full length TX for target shooting. I don't know what it is, but they just seem to shoot better. Tighter groups and not quite as finicky....just my personal opinion.
So.....I went to Pyramyd Air and saw they had only one Hunter Carbine .177 Walnut right hand remaining. I finally dropped it in my cart and bought it. I was apprehensive at first because my history with the Air Arms Springers was hit or miss as far as quality goes. If you read through my project reviews you will see that I have encountered numerous QC issues with the Air Arms springers.
Blemished bluing
Chipped trigger sears
Debris in compression tubes
Poor machining on outside of compression tube
Cracked stock
just to name a few.......
I was able to resolve all problems previously, and Pyramyd Air was always top notch in handling any warranty replacements.
A few days later my new Hunter Carbine had arrived....with a deep breath and slow exhale I opened the box to see what it looked like. Well, it was absolutely STUNNING!!!! It had perfect bluing and the most gorgeously detailed walnut stock that I had received to date. This stock has defined grain, stiping from front to back on both sides, and various contrasting colors that change as you move to different angles. It also had an almost checkerboard appearance at certain angles, first time I had seen that on the AA walnut stocks. Just beautiful. Ok, so it passed the first test...cosmetic appearance. The next and much larger step was to tear into the rifle to see what all the internals were like.
And so begins my project overview......
I had this week off on vacation and since I didn't leave myself much time for everything to come together in time for the Christmas Holiday. I quickly ordered the following supplies;
Maccari QX4600 spring (.120") - ordered preset from James Maccari
Maccari FAC spring (.125") - ordered preset from James Maccari
Royal London Oil
Stainless machined forearm bracket
Rowan setback trigger
Rowan Trigger Guard
Rowan Cocking Handle
New tub of Vortek Moly 70+
Vortek Moly Seal
Not having a lathe, I send all my springs to Motorhead (Scott) for his precision work on making delrin guides and top hats. Being that I was down to the wire in pulling this project off, I had to ship the springs to Scott 2-day express with a prepaid return label so he could turn them right around and send them back. I first contacted Scott to see if he was available, and if he would be able to turn the springs around in time. Scott was available and was more than willing to turn them around for me in the short time frame. East Coast to West Coast and back in less than a week...and a weekend in between! Scott, a big THANK YOU for your willingness to help me out, and for the fine craftsmanship that goes into your guides and top hats
While waiting for remaining parts and supplies to arrive, I removed the stock, prepped and coated with 5 hand rubbed coats of Maccari's Royal London Oil. After 5 days of curing time I then lightly rubbed finish with Maccari Stock Mud, followed by 2 coats of Minwax Finishing Paste.
I have had several AA walnut stocks over the past couple years that were very light in color. While they had nice detail, they lacked color. As a result I had to deepen them using Behlen Solar Lux dye. However, this stock was nice and dark, and had great coloring so I did not have to use the dye.
So, the day before I started my vacation I finally had all supplies ready to go!
Here is the rifle - straight from the box
First step was to take the rifle from the box and right to the chronograph to document out of box performance.
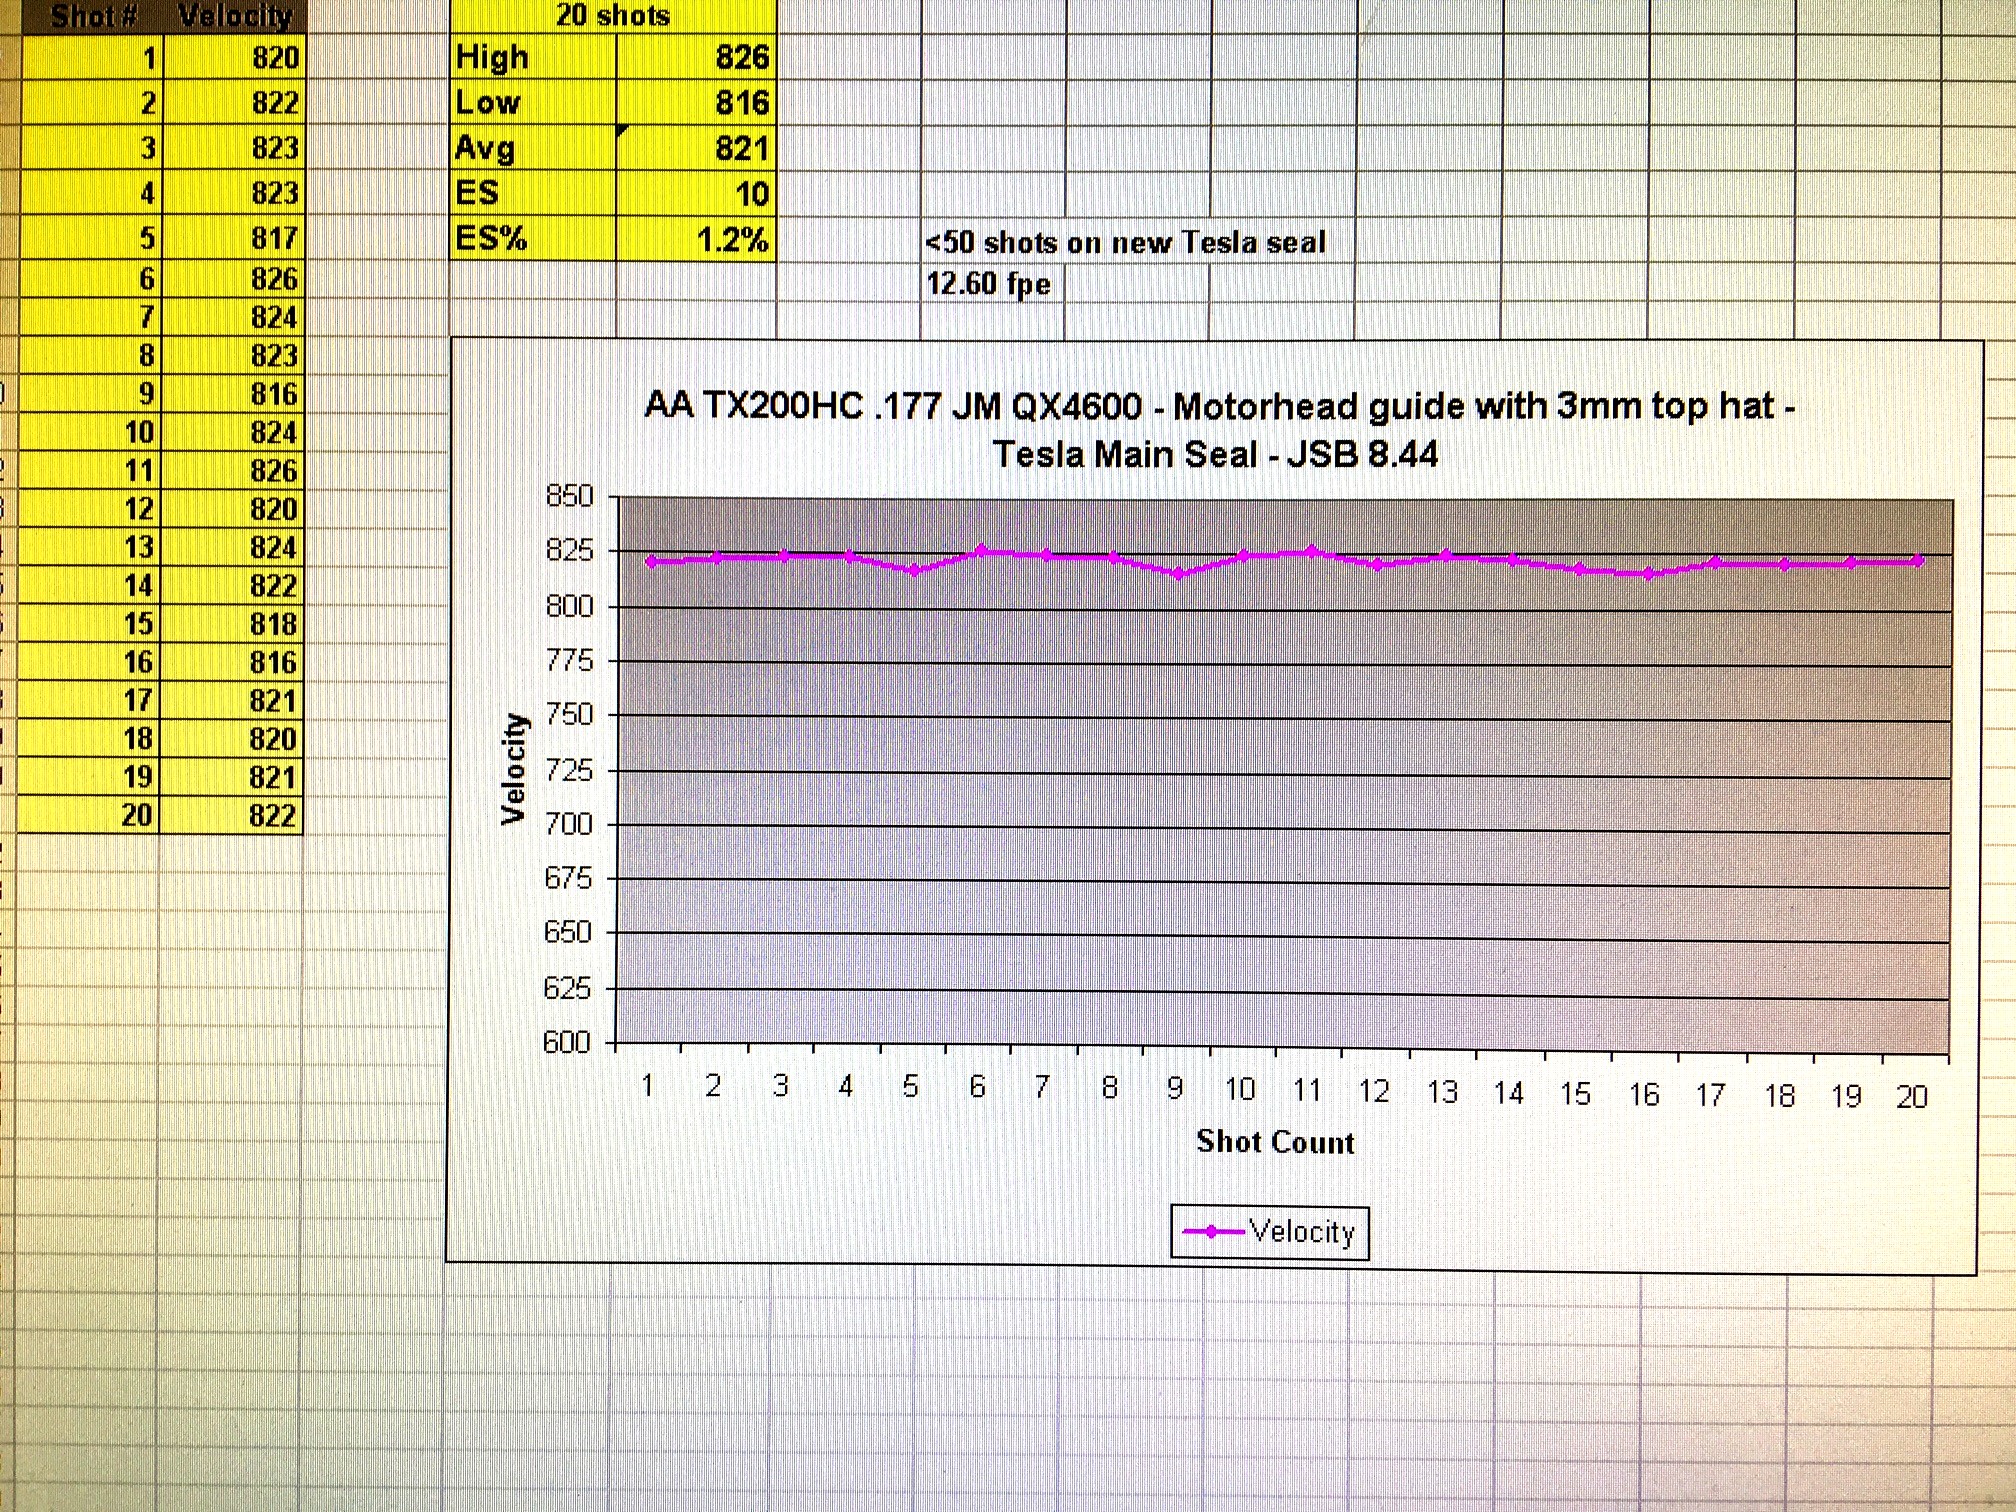
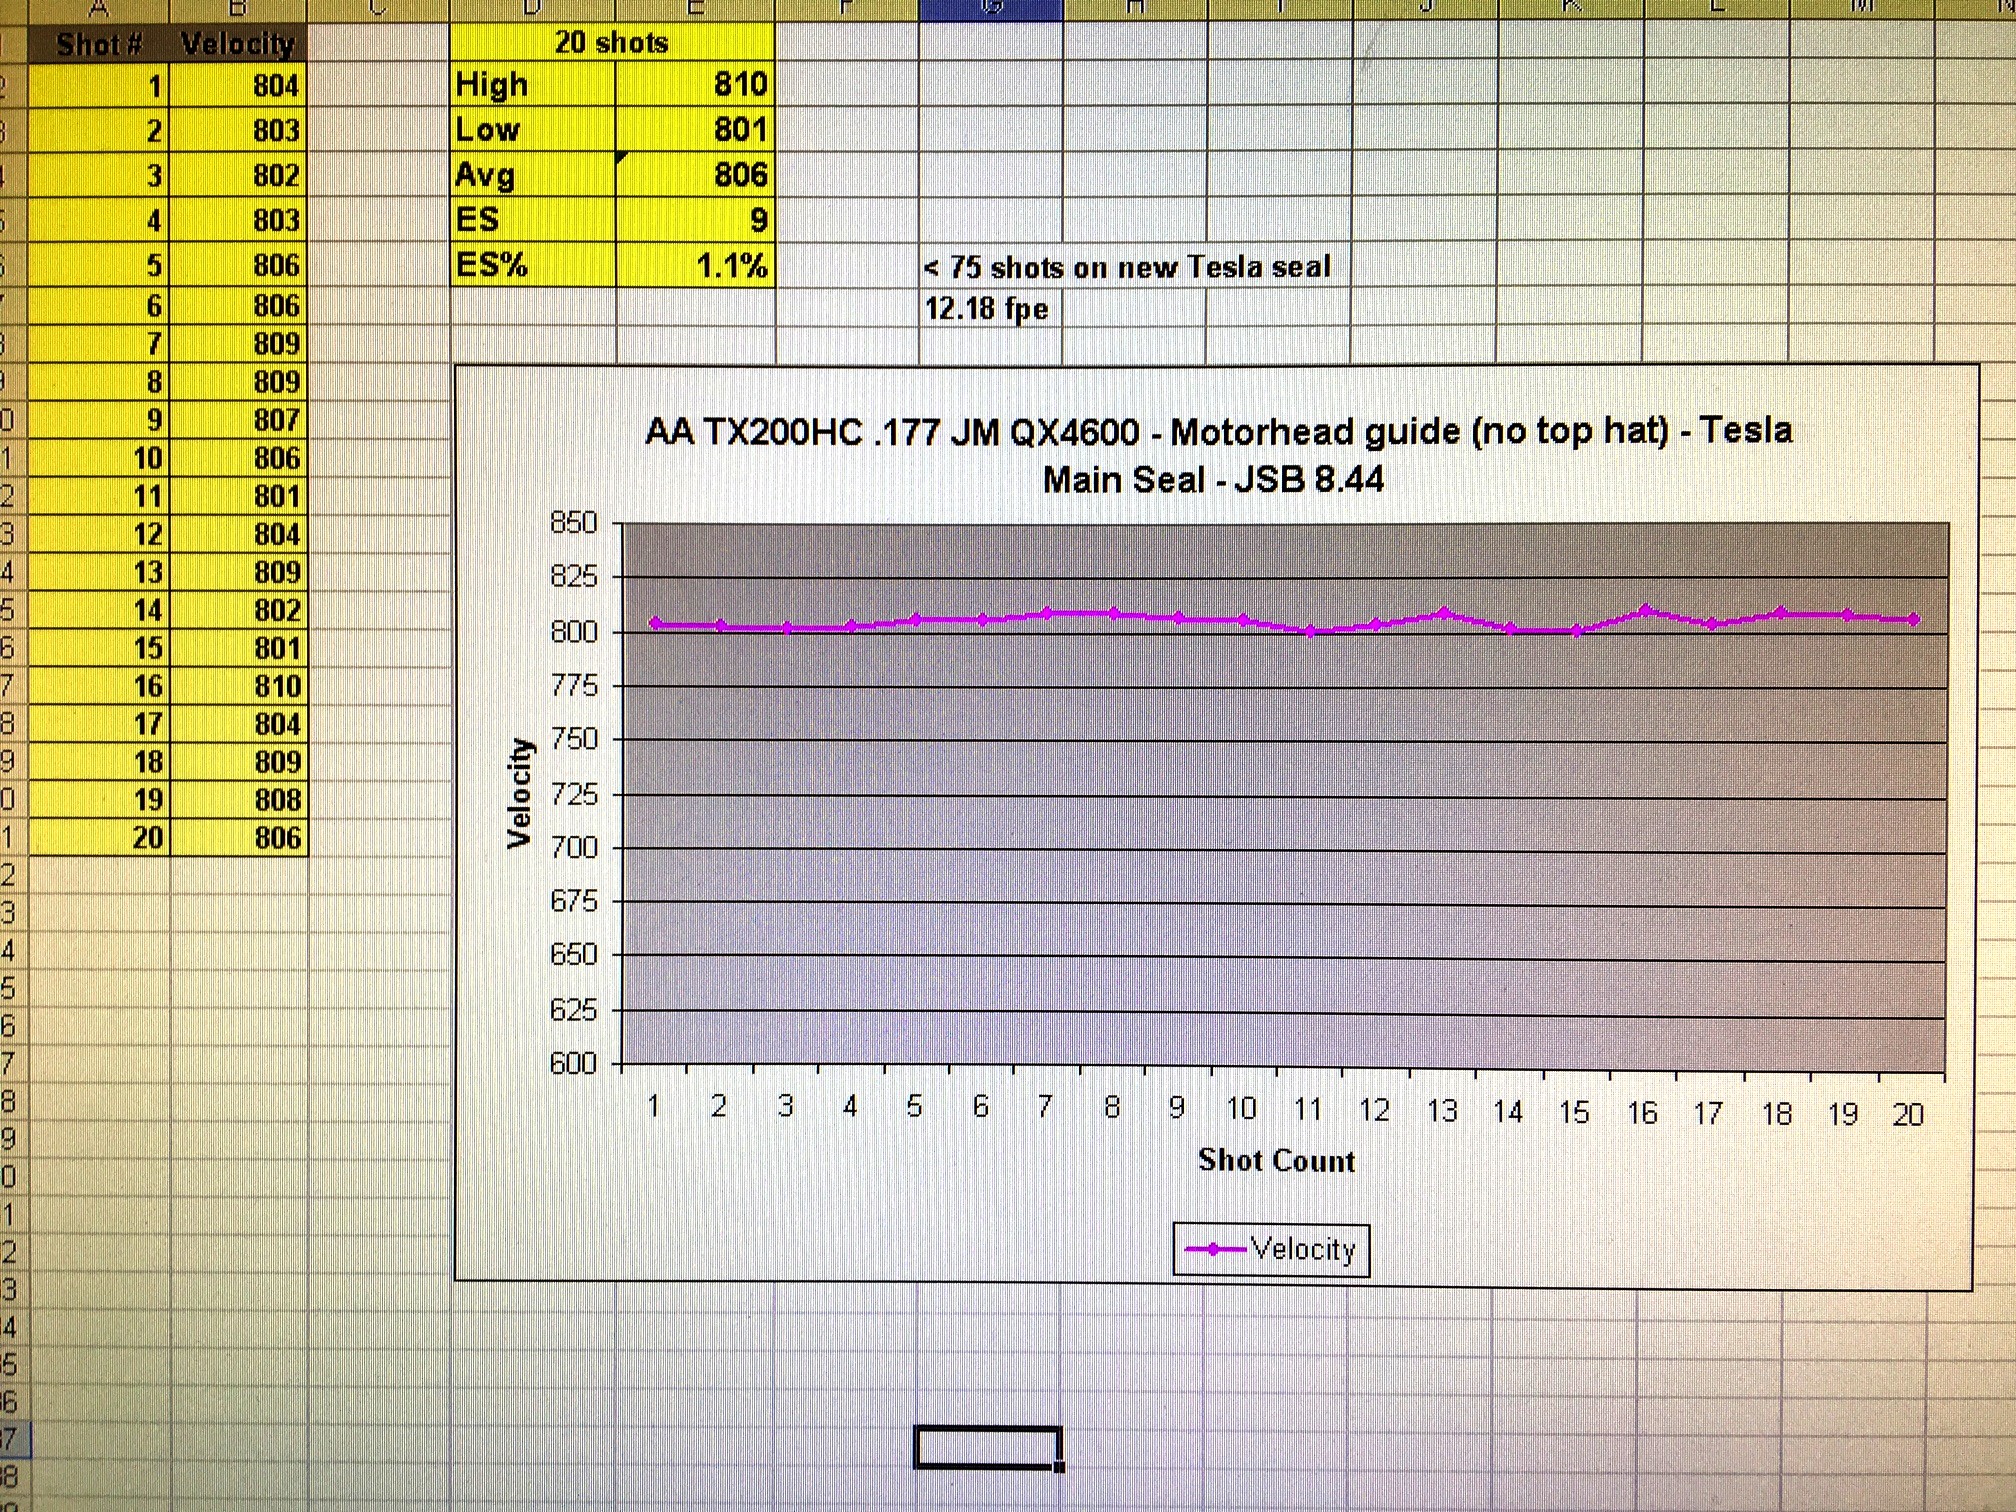
After a handful of shots in the beginning, the velocities had settled nicely around 878fps using the Air Arms 8.4gr 4.52 for about 14.4 fpe
Notes on out of box performance;
Absolutely no spring twang, but there was a very noticeable buzzing feel on each shot
Very firm, sharp recoil
A slight grittiness across the first stage of the trigger pull
Stage 2 of the trigger pull was very crisp with no creep whatsoever
Trigger Pull was 1lb 2oz.
Solid cocking cycle, but rather noisy with a dry rubbing sound as the rifle was cocked
There was a slight hint of dieseling smell in the air
After reading some posts about rifles that arrived with a brown rust like residue in the breech of the barrel, I took a good look at this one. It was perfect!
Time to tear the rifle apart and inspect each part
The spring guide had a snug, press fit within the trigger block. I saw this on a recent post as well, but it was the first time I had experienced it. A little wiggling of the guide and it pulled right out.
On my previous Air Arms rifles the guide was a loose fit
The factory spring had quite a bit of grease. That would explain why I had no spring twang.
A quick check on the factory seal fit revealed that it was on the loose side with the piston quickly dropping under it's own weight. Here is the factory seal as it was pulled right from the compression tube. Only a small amount of moly lube, which was good.
Nice cross hatching in compression tube
Compression tube was nice and clean inside with no burrs or debris
Factory spring end was a little rough. I like mine polished up quite a bit more than this
Compression tube and piston
Let's get to polishing and tuning!!
Piston and Comp Tube after polishing and deburring
Carefully removed factory breech seals, cleaned around transfer port and then installed a set of Maccari standard breech seals lightly coated in 100% divers silicone
Removed factory seal and installed a Vortek Moly Seal - Lubed with tiny film of Vortek Moly 70+
I also smeared a very thin film down into the inner walls of the compression tube and outside of piston.....almost like a dry rub
Careful not to get any moly on the leading edge of the seal
While most seals I have installed required hand fitting, this one did not. It dropped in and gave me just the right amount of resistance. I like to start them out with s little resistance so the seal can break in over a couple hundred shots or so. But this one had just the right amount of resistance with no fitting necessary.
Piston and comp tube lubed with new seal, ready to drop in the rifle