Taipan Mutant Shorty custom stock in 24 hours challenge

zebra

Member
Sep 29, 2015
1,779
58
New York
Over the holiday weekend I set myself the ambitious challenge of making a custom stock for my Mutant Shorty in under 24 hours so I can use it while waiting for my replacement stock to arrive. 

My self imposed rules were that it had to be a new design (I.e. no pattern to work from), it had to be finished and ready to use in 24 hours or less (including drying and curing time) and hand carved. I also had to start from scratch with the exception of a bedding block I made in advance, a recoil pad I made for my Cricket stocks and an AR grip (plus AR grip adapter). 

Anyway, I didn't totally succeed as it has a bunch of finishing work left to do but I got fairly close and I could technically use it now:


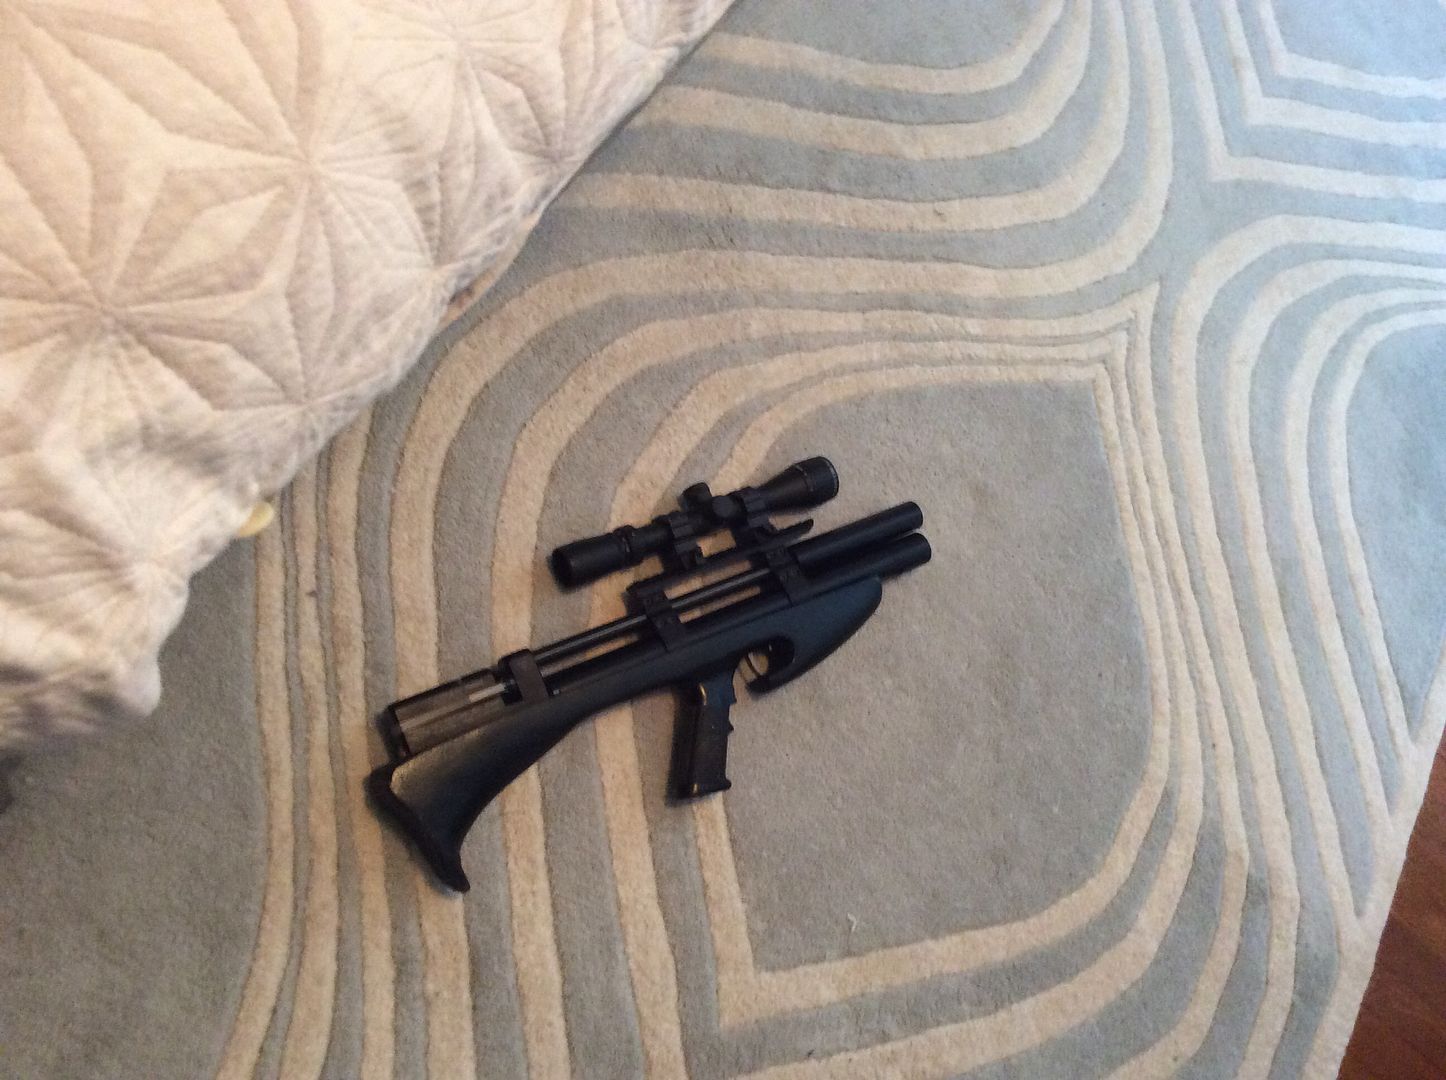
It's not my best work but I don't totally hate it. Here's another pic:


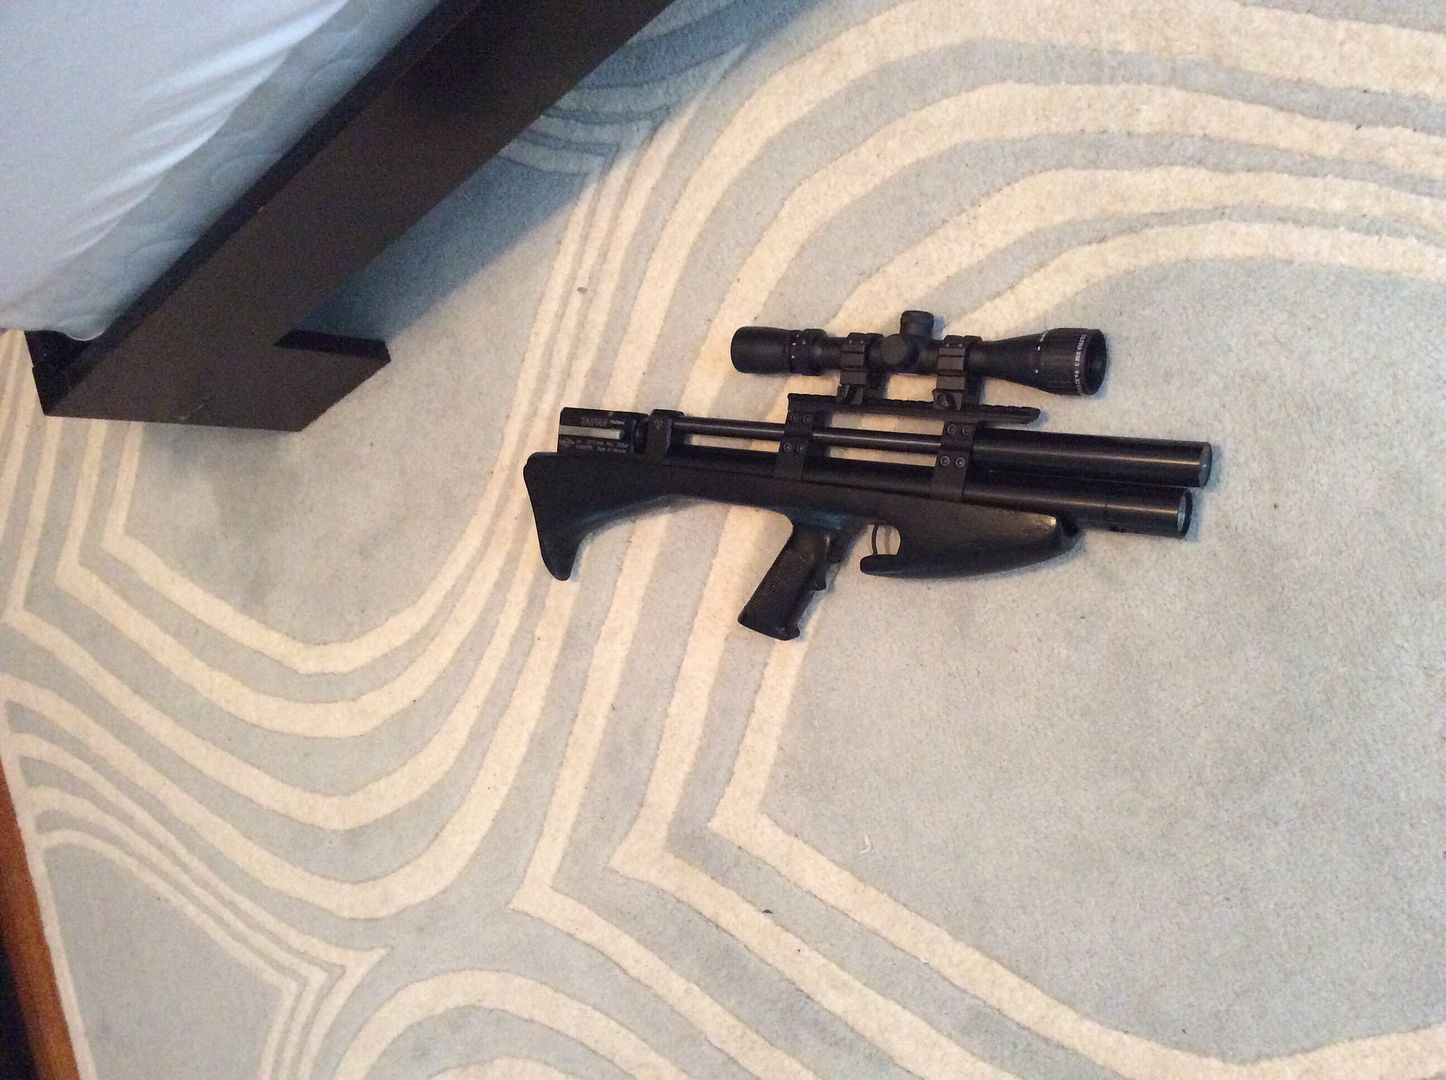
I think the design has potential once I have time to replace the recoil pad (I don't think it should say Kalibrgun on my Mutant). I think I might simply fit a modified AR stock instead.

It was sculpted using carbon fiber clay (which is my own little creation). The resin blend has a flexoral strength of over 100,000 psi. It also has high temp resistance so it won't be affected by the weather like wood and the surface is hard coated. The hard coat makes it scratch resistant but it also made it a PIA to sand and shape. I had to do most of the shaping with metal files as sandpaper was ineffective. Anyway, key point is that it's very strong. Not even a hint of flex. It's light too. I haven't weighed it yet but it feels lighter than the regular Shorty stock.

I have aluminum pillars for the screw holes. 
 
"iride"That looks cool Zebra.
Different but cool.
I envy your skills,
Still waiting on my Carbon fiber Cricket stock,
Lighter than the stock Mutant, That's getting lite.
Mike
There is some thinking behind the design (although not much because I didn't have long).

The Shorty is rear-balanced and I prefer it when bullpups are center balanced or where the balance is just forward of the grip like on the Cricket and Wildcat etc. To shift the balance forward, I had to design it so there was more material in the forearm than in the middle. With this design, the balance is over the trigger guard. 

The triggerguard / forearm was designed with a flat underside around the center of balance to allow a bipod rail to be attached, or, for it to rest in the palm of my hand for off-hand shooting (which is more likely with the shorty)

The rounded forend is mainly because I didn't like the square look of the original stock so I thought I might prefer it without the corners. I do. It also feels much nicer to hold. It's a more natural grip but still very stable to rest on. 

I don't really like the back. The only real "design" with it is the angle of the recoil pad. It's at an angle instead of straight which I think works better for a bullpup. On other bullpup stocks, I find myself only using the bottom tip of the recoil pad to position it so I don't have to use high scope rings. That doesn't make for a stable hold. I borrowed this idea from the FX Bobcat. 

You should have a go. It's fun making things. This type of material is very easy to work with because it's so forgiving. If you make a mistake, you can just add more material and try again. Much easier than wood.


"sniperlabyo"WOW Zebra,

I'm impress -- look like you took a pound off, whats the weight now without the scope and mounts?
Thanks Ernest. 

I'll weigh it later on today when it's finished drying as I added some extra surface coats. The Shorty isn't that heavy to begin with though, so the main goal was to shift the balance and make it look better. It definitely weighs less but it feels even lighter with the balance centered. 

The next thing I want to work on is adding a forward cocking lever. I took a bolt extension assembly from a Tavor X95 stock and I'm using your YouTube clip (on moving the side-lever to the left side) to try and figure out how to attach it to the Mutant. 

Btw, I've nearly finished making your custom cf grip. I've just got to add the internals so it can be attached to the AR grip adapter on your Impact.
 
"iride"Zebra,
Did you say try yourself, Ha Ha,
I am well known around these parts as hacksaw mike, Hammer mike,
Even out famous LDC maker Neil Clague expressed fear if I had a drill in my hands, LOL.
Mike
I didn't need to use any power tools in making this one so I think you'd be safe. 

The majority of the shaping was done with my hands and a set of $10 metal files from HomeDepot. 
 
"AZBOBCAT" Zebra very cool, how are the fumes from the materials you are working with? I tried a couple things in the garage with just some fiberglass and resin, wife won't let me ever do it again. LOL house smelled just from doing it in garage.
There's no fumes from any of the materials I work with.

The polyester MEK resins most commonly used for fiberglass are particularly nasty. I wouldn't use those inside. I learnt that lesson the same way as you. My wife was so mad at me. I tried it in an apartment in Manhattan when she was out.... It took weeks to get the taste out of my lungs. 

The epoxy resins used for carbon fiber have no perceivable smell. You can use epoxy laminating resins for fiberglass too btw and you get better results without the smell. Just don't use epoxy with with fiberglass strand mat as it won't work without the MEK to activate it. 

If you stick to epoxy products (resins, putties and pastes) and urethane (plastics and foams), you should be fine working inside in most cases. The ones that give off fumes have clear warnings. Most are wife friendly. Silicone is also ok to use inside. 

 
"JDShapp"Great looking stock Zebra. Also if you find a way to move the cocking lever forward I'm thinking you'll become just about every mutant owners hero.

I can see how to do it fairly easily. The challenge is making it work without it looking home-made....

The basic mechanic is similar to the trigger linkage rod. Inside the Tavor X95 stock is a spring-loaded rod with a cocking handle on one end and the other is attached to the bolt.

Side-lever guns have the cocking handle attached to cam-pins which, when pulled back, engage the hammer sear. The side lever can be extended. I did a simple version of this for my Cricket where a carbon fiber rod was attached to the side-lever using some mini clamps. It kinda worked but looked messy. To make it look neat, I need to remove the side lever and attach the rods directly to the cam-pins. Then the rod needs to be hidden inside the stock. 

Ideally, I want to use a Winchester under-lever to operate the cocking rod extension (that sounds wrong...) but I'll probably use as straight pull-back bolt-action motion initially. 
 
This type of material is very easy to work with because it's so forgiving. If you make a mistake, you can just add more material and try again. Much easier than wood.


What is the material you are using or how do you make it... I have some expirence using resins from Reynolds Advanced Metairels 

http://www.reynoldsam.com
 
"X27"
This type of material is very easy to work with because it's so forgiving. If you make a mistake, you can just add more material and try again. Much easier than wood.


What is the material you are using or how do you make it... I have some expirence using resins from Reynolds Advanced Metairels 

http://www.reynoldsam.com
It's mostly made out of carbon fiber sheet molding compound which I turned into a paste of sorts to make it like a lightweight but strong modeling clay. I then molded it around a bedding block which was cast from an imprint of the original stock's inletting to make sure it fit. I made the basic shape with my hands. The resin was a heat cure epoxy so that stage was finished in the oven. 

I then carved the rest using a $10 set of metal files from Home Depot. You can see that the rounded trigger-guard is the same shape as the round file from the HomeDepot set. 

It's pillar bedded using $7 aluminum pillars off eBay. I believe the pillars were sold for use on a Remington 700. I cut the pillars to size using a cheap $40 angle grinder (but I could have used a dremel cutting wheel if I had more patience).

The grip is a standard AR A2 grip I had lying around. The recoil pad is cast in urethane rubber with a drop of black resin dye added. The mold was made from the recoil pad on my Cricket so I filed off the Kalibrgun logo. 

The outer layer is hard-coated with a high shore hardness urethane plastic to make it somewhat scratch resistance. 

It's not the best way of making a stock or the easiest but I needed / wanted to make it in one day so I could use my Mutant while waiting for my replacement stock to arrive. This method is definitely the quickest way I know of to make a custom stock from scratch. I kinda like it though. The rounded forend is a noticeable improvement over the original. It's lighter with better balance too.

If I had more time, I would have used a different grip. I've never been a fan of those cheap A2 grips (which is why it was lying around unused). I'm making another 2. The first will use a hogue grip with finger grooves and the other will use a custom grip made from a cast of my hand. 

 
"X27"Do you have a YouTube channel. This is fascinating to me and I would love to learn from watching if you do have one.
I don't but I was thinking about starting something. It would be better to have a tutorials section here though. They tend to get lost in the general discussion sections and they take so long to make that it's not very motivating to see them disappearing like last week's takeout. I keep meaning to make the suggestion but it's on my to-do list. 

I've seen a few people's projects that I wouldn't mind having for reference when I need them.

In most cases, the best way to learn is to give it a try. With the right tools, most things aren't as difficult as they seem.