Surprise closet find!

unionrdr ....
To say I'm a bit confused would be an understatement.
  • The valve you sent be is in superb condition.
  • The screw you provided fits the bottom threads perfectly, and the threads are tight, uniform, non-mangled, straight and have never been cross-threaded or stripped.
  • The valve stem seat is uniform
  • The valve stem with the brass head is .124" in diameter, straight, and fits in its passage very very well
  • The spring and piercing assembly are in great shape
  • The upper hole is NOT a stripped hole. It is suppose to be a smooth passage for CO2 to flow through breech gasket (130-29)
  • Barrel set screw (160-33) shoves the barrel down against the breech gasket. That set screw remains on TOP of the barrel, and does 3 things... keeps the barrel in the breech, keeps the front sight vertical, keeps the breech seal compressed
In your message to me you seemed to indicate that you believe the 160-32 screw goes into the valve ???... it does not. It goes into the TOP of inner plug 160-7 if I'm not mistaken.


Please forgive me if I'm missing something here.
Standing by for your reply :)
 
Yes, that should be the spacer I need that does go in that spot. Ziabeam, It appears you're right, looking at the diagram for the umpteenth time. So It appears I had the valve upside-down? The threaded hole should face down, the smooth hole facing up toward the breach/receiver? I know the barrel set screw doesn't go all the way through. I merely used it as a reference point. It also appears I put the breech gasket in the wrong place. The breech gasket goes in the gas tube hole forward of the locating screw, spacer & hold-down screw. oops. got the newer, stiffer one from Archer to install that came with the assembly kit.
​The spacer looks like it's flat on one side, though. Shouldn't it be curved on both sides? Can't remember what the one I inadvertently tossed looked like. It was only a couple inches long, if I remember right? * Looked at the website, & the spacer does have a shallower curve on the bottom. All the seals & piercing spring have been replaced with kit parts. So it seems like it's good to go? I just had it installed up-side down? Sounds like it's ready to reinstall, so I guess you can send it back. Thanks loads for all your help. Ordered the spacer strip a lil bit ago.
 
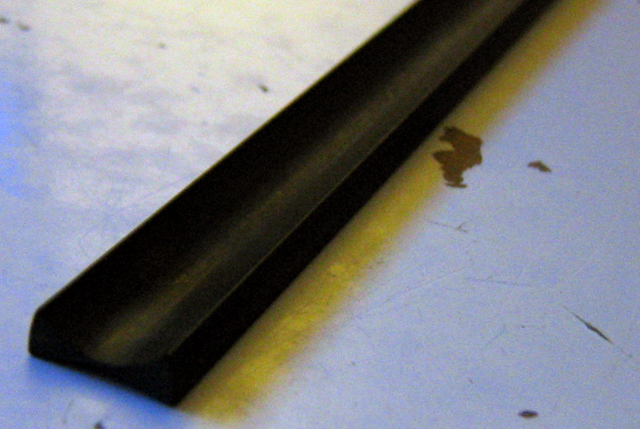
Yes the strip in the photo does have both sides curved with different radii though. The larger radius mates with the receiver, the smaller radius mates with the barrel. The spacer will need to be cut to your required length.

If your barrel is 7/16" diameter, and your tube is 7/8" diameter, and there is a .020" gap (roughly the thickness of 7 pieces of paper) between the barrel and tube, then that spacer will be ideal !!

Correct on the valve. The threaded side aims down, for the one locating screw in the "blind" threaded hole. The smooth hole aims up and lets CO2 pass through the gasket, into the bottom of the barrel, right in line with the hole in the underside of the barrel.

All 3 of the following components are perfectly in-line with each other top-to-bottom;
  • Barrel set screw 160-33 (pushing down on barrel)
  • Gasket 130-29 (sandwiched between barrel and top-side smooth valve opening)
  • Valve set screw 160-26 (screwed into bottom threaded valve hole which keeps valve in position) will all be in-line with each other in the forward hole...
______________________________________
The next hole further to the rear is where the inner plug is captured by two in-line screws top and bottom;
  • Hold Down Screw 160-32 goes (passing through Lock Washer 160-37, through bottom hole in breech 160-4, and into top threaded hole of inner plug 160-7)
  • Locating screw 160-10 (goes into the bottom of inner-plug 160-7)


I will get this valve screwed back together and shipped out to you on Monday.
No charge for the inspection.

My advice on the valve is to remove it and clean it out occasionally. The newer valves made room for a filter to keep powerlett impurities from fouling the valve stem seal which causes slow leaks. Your older valve is solid aluminum in the area where the newer valves had the filter material. Still a good valve, just higher maintenance.

Also your brass valve stem has a seal material that looks a LOT like what MAC-1 uses. It is great stuff, but needs to be warmed up to properly mate with its new valve. This only has to be done once. If you want me to I can do that for you. I won't have any way of testing it since I don't have the airgun here, but am confident it will be done right. Trick is to get the seal to conform without overheating it.

Let me know.
 
Got it, thank you. With all my mechanical ability, fixing Ford's automation equipment, that I'd make such an obvious mistake. Darn aging brain. And to think I got A's in blueprint reading, drawing, etc. lol. Glad I sent the service drawings. Good to have another person give a look. Go ahead & send it back while I wait for the spacer strip to come in. Time for more Airgun Shooter videos. Going into sight-in/accuracy videos at the new range will be great, finally. Too bad it's only 25yds. Need 50, 60, 75 & 100 yards for the Hatsan Striker 1000x .22 & Winchester 1400cs .177 magnum.
​I thought that heating up the seal thing was for the outside edge of the seal to the gas tube? Anyway, do what you can to improve things.
 
"unionrdr"
​This rifle definitely needs more velocity. And since it carries more FPE to POI, being .22cal, that should be a good thing. I'd like to push POI from some 37.6yds to 50yds, long story short. I hope the package does get to ziabeam tomorrow. I'm obviously interested in it's being able to be put back into service as an original part. Making the rifle a bit more original, let alone more valuable. Not like I'm going to sell it or anything. But it will eventually be inherited by one of my sons. Not to be morbid or anything.
​Just can't wait to shoot again. Just shooting them out the patio door a couple times after first time bore cleaning put a smile on my face once more...


I tinker with old Crosman air guns at times but not really played with a 160. But have had a number of 180's. They are the single co2 cartridge Crosman rifle from the 50s and 60s. You can get a rifle from the Crosman custom shop that looks very much like the 160 and 180.......... the 2260.

Of course you can still buy a copy of the Crosman 160 that is a Chinese version sold under the name Beeman QB78. I have the Crosman 2260 and its fun to shoot but not sure I would expect it to do much past the 25 yard mark. These rifles shoot around the 550-600 fps and if you do get them to shoot faster you have to give up shot count(which is easier to do on the twin co2 cartridge rifles). Long ago Crosman was selling them for 10 meter rifles.

It should be interesting seeing what @Ziabeam can get the ol' beast to do.


I used figures from Chairgun software at 500FPS & 12.65gr H&N Baracuda Green Domed alloy pellets. His saying the valve is in superb condition is a good sign. I'm going to get over to Harbor Freight store that took over the Sears tool center up the corner from me. They have some nice, small lathes some use for machining small parts. I was thinking of cutting .004" out of the dished end of the valve by the seal to allow a lil more gas to be sent through the system. The firmer Archer breech gasket, 130-29, is said by them to give a little more gas flow? Gotta get a chronograph to check out all this stuff, & get more accurate numbers from Chairgun. And I'm fine with decreasing shot count from around 50 to 30-40 shots to get more muzzle velocity. And some of the seals, gaskets & assembly parts are Archer's 160 replacements, mixed with QB78 equivalents. They were copied from the early Crosman's & many parts, including their gas valve, fit the 160, 167, 180, 187, & 400. But you need their seal kit to install there 160 replacement gas valve assembly. I got their assembly kit too. All the screws, washers, breech gasket, etc. Just ordered the spacer strip from Alliance hobby a lil while ago. Can't wait to get the old girl back together! I even have a two-gun case to take the Crosman & Hatsan both to the range.
​By the way guys, what should I uses as an assembly lube/grease with this old rifle? It seems like the Pellgun oil ain't gonna last long on internal parts? Please post what the proper assembly lube would be...
 
Assuming your barrel is at least 18" long, the main limiting factors are the port size, the valve capacity, and how long the valve stays open or "dwells". You're going to open a can of worms getting a lathe, but the 160 is a good gun to tinker with. Do plenty of homework before you start whittling. Like Goodtogo said, if you want to go with off the shelf performance, a 2260 could be decked out for much less than the cost of a decent bench lathe. I had a 2260, still own a QB79 repeater, and also have a pair of 2400KT's from Crosman. A 2400KT with an 18" barrel is my current favorite CO2 plinker. Lots of aftermarket support at reasonable costs, and typically accurate as heck.
 
Yeah, there's a lot to look into to increase gas capacity. Then getting it all to flow right. Ported & polished cylinder heads in my time, so I understand some basics of airflow. This is a bit more involved though. Wanna get it shooting first, & establish some baselines while enjoying the rifle. Robinson said it's a tack driver, & I do hope he's right on that point. 25-35 yards to POI on small game will be okay to start with. Or maybe field trials after hip surgery.
​By the by, I just called Crosman about an assembly lube. He said to just lube the seals with Pellgun oil when reassembling. Almost there...got a pack of Shoot-n-see targets to sight in with too! Should look good on video, if they'll let me shoot inside the range.
 
I realized earlier today that I'd need to move on a chronograph sooner rather than later. I do, after all, need to get all the numbers, targets, printouts, etc for that state report I need to hand in at DNR open house next month. So, with that in mind, I went to midwayusa.com once more, & ordered this;

https://www.midwayusa.com/product/628006/caldwell-ballistic-precision-chronograph-premium-kit
Should be here about the same day next week the 160's gas valve comes back home. The I'll finally get to sight in the Crosman & Hatsan both. That'll be great to shoot again, after all this time.
 
The gas valve just arrived in today's mail. Looks good! It looks like you maybe cleaned it up a little on the outside? Since Crosman said to just use Pellgun oil on the seals during reassembly, that's the way it shall be. Thanks for the help ziabeam. I'll get to reassembling it in the morning. Hopefully, the chronograph will arrive Thursday, so my son can drop me off at the range when he takes my wife to the dentist. Wanna sight in the Crosman & Hatsan. And give some initial impressions on video. Got a batch or two of beer to get brewed as well. Time for some warm-weather beers to get ready. Gotta give a look to what can be hunted in spring/summer with air rifles? March 20 is left hip surgery day.
 
"unionrdr"The gas valve just arrived in today's mail. Looks good! It looks like you maybe cleaned it up a little on the outside? Since Crosman said to just use Pellgun oil on the seals during reassembly, that's the way it shall be. Thanks for the help ziabeam. I'll get to reassembling it in the morning. ....

That valve was remarkably clean and shiny for its age. The outside was left alone. All I did was straighten both valve stems, and swabbed out the debris from inside with a Q-Tip, and screwed it back together. Polished the tip of the brass sealed stem since they were both a tad boogered up for some reason. 

She ought to shoot if the rest of the parts look as good as that valve. 
 
The rest of it turned out pretty darn good for a rifle at least as old as I am! Gonna finish my coffee & get to reassembling it. The brass part of the stem was cleaned up, but I didn't sand it or anything. Wasn't sure if chucking it in the Dremel would be okay? Gotta chrony them after sighting in to generate some numbers to use in my state report I worked on a bit more today. I'm finding it slow going in finding what FPE is needed to kill what animals. Found a few pages to sight. It seems 12FPE is the excepted minimum muzzle velocity to humanely kill at a given air rifle's particular range capabilities. This one's being some 25-35 yards. I'll see how she looks when the numbers are in. Ron Robinson is also interested in what my handiwork can do.
 
After getting the gas valve back from ziabeam, I reassembled the rifle, complete with barrel spacer, part # 160-11 in place. Available here; http://alliancehobby.com/spacers.htm It can be seen in this pic, between the bottom of the barrel & top of the gas tube;
IMG_0341.jpg