FX Impact Valve Tube O-rings & Quad Rings Leak - Fixed (thanks Ernest)

Verve

Member
Mar 19, 2016
239
6
RCT
Firstly, thank you Ernest for your excellent videos. These make repair jobs for novices like me relatively easy along with some decent tools.

Impact developed a slow leak a few weeks however a few days back when I reconnected the bottle, there was a heavy leak coming from the gap next to the power adjustment wheel. At first I assumed it was the leak from the regulator so pulled it all apart and replaced all the o-rings in there. The two 2x1nbr90 o-rings on the adjustment nut were a nightmare to get on, broke 20+ in the process until I figured the right way to get them on! Rest of the o-rings were easy. Leak persisted so decided to disassemble the whole thing to replace the rest of the o-rings on and around the valve stem. There goes the warranty in the bin but hey-ho!

If you done a bit of car servicing or house DIY and are good with tools, all this should be straight forward. One a scale of 1-10 (10 being extremely difficult), this is around 3-4 imo. I say 3-4 because of the regulator adjustment nut o-rings. Otherwise it would be 2-3.

Tools needed:
0.9mm Hex Key (for grub screw on the hammerseat)*
2.5mm Hex Key (for most screws)
4mm Hex Key (for picatinny rail, valve-tube nut, rear block grub screw)
8mm Hex Key (for grip nut)
11mm Wrench (valve adjuster screw)
8mm Wrench (quad o-ring stop screw)
Rubber strap wrench (valvehouse)
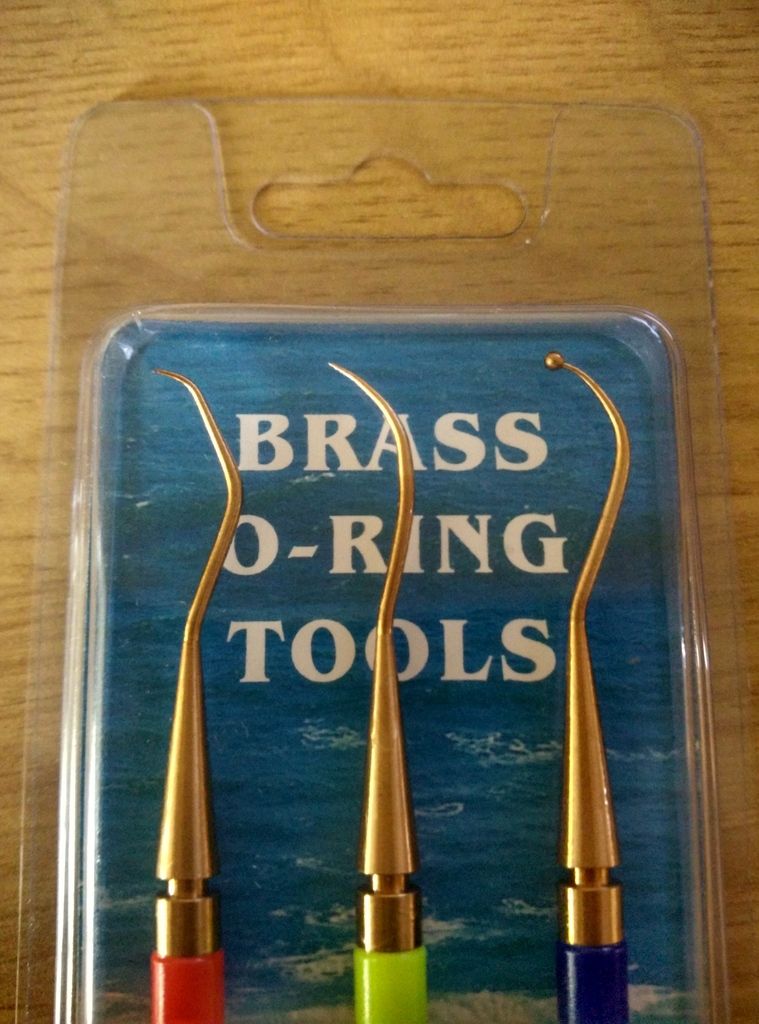
Brass (or steel if you are daring) O-ring Pick set
Good quality lube
Small torch

* Ordered 1mm hex key as per Ernest but it didn't fit. Maybe FX changed this to 0.9mm in later production. 
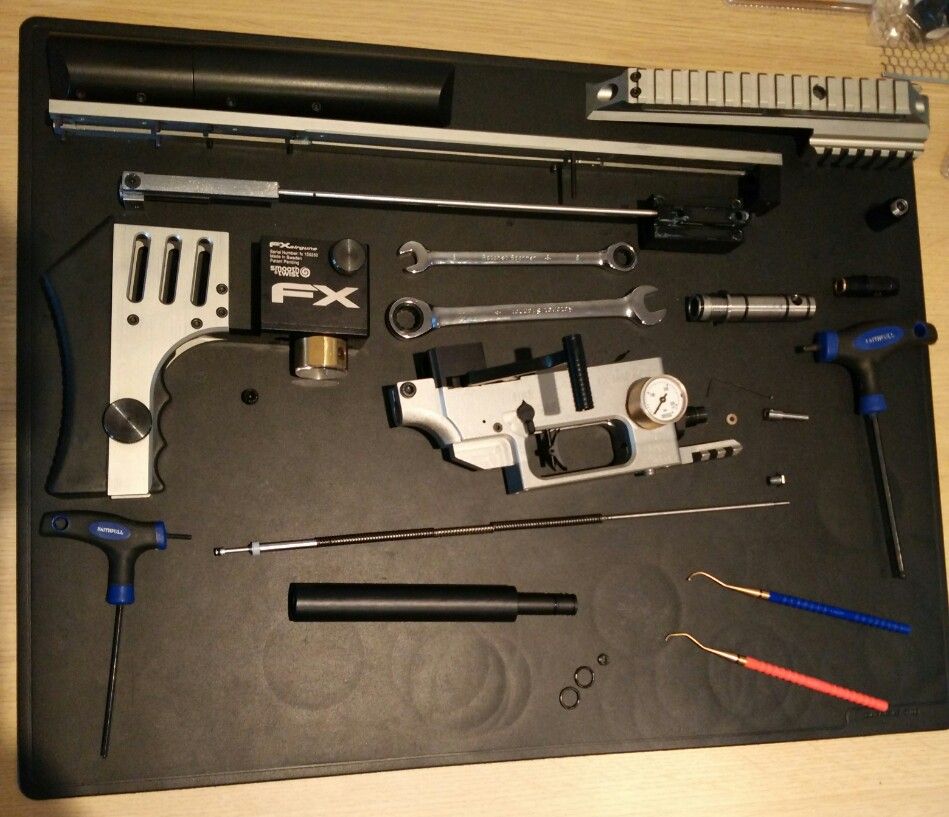
Everything apart:


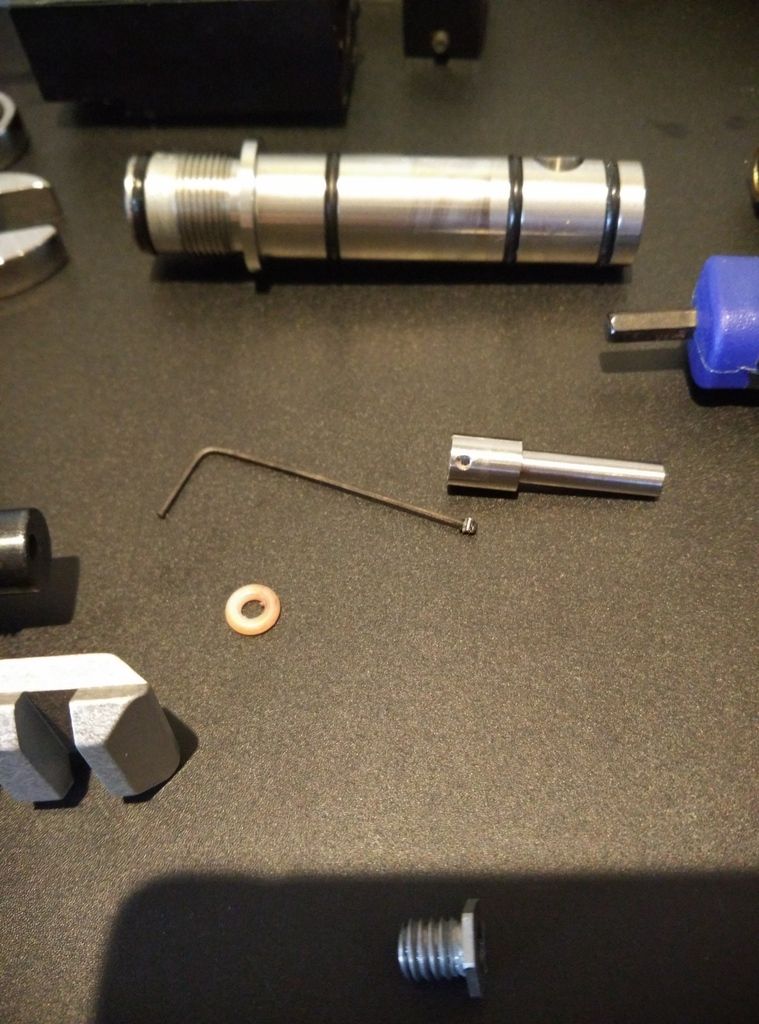
Valve tube o-rings and quad ring:


Hammerseat:


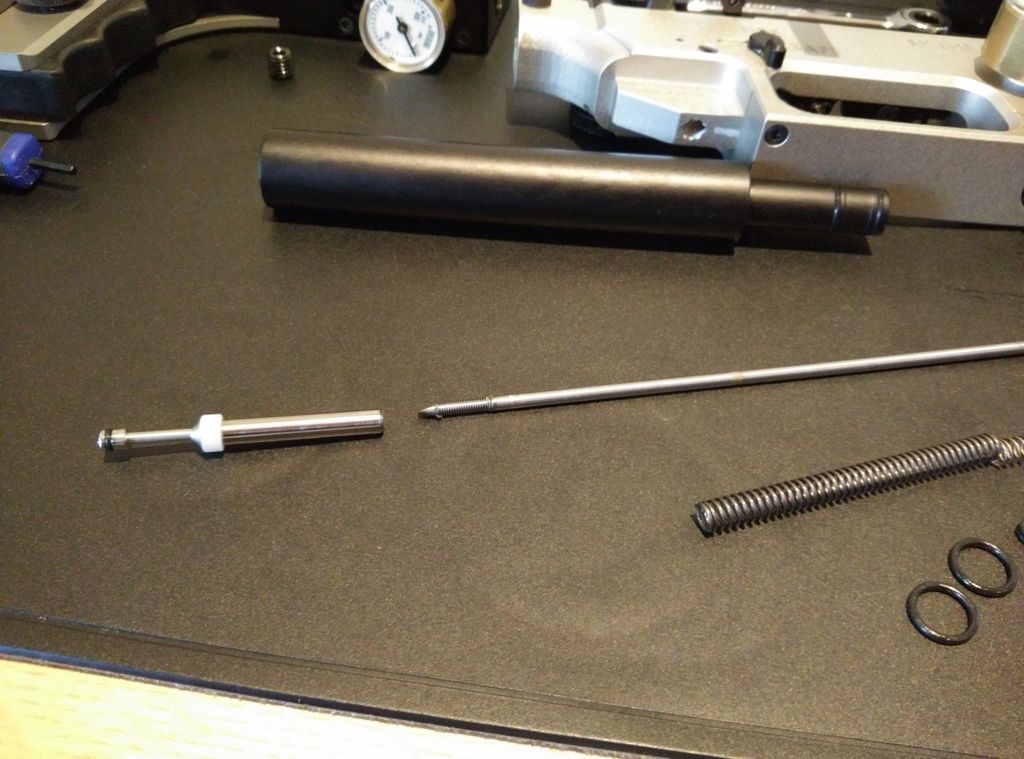
Valvestem: Main stem is threaded on both ends so it can be screwed off from the rear block side and pulled out from the valve adjustment side, if removing the hammerseat grub screw becomes an issue. Light loctite from factory on both ends.


How to's (by Ernest):
Disassembly 1:
Disassembly 2:
Reassembly 1:
Reassembly 2:

The only thing I did different upon reassembly is to to tighten the screws on the main plate and the 4mm valve tube screw only after inserting the barrel (for complete alignment). FX could have designed the front barrel bushing in a different way so that it slots in plate instead of having play in the screw holes. Hence inserting the barrel before tightening everything down is probably a good idea.
 
Having a willingness to master mechanical contraptions like this is a talent. It's in you. Or it is not. I'll fix a thing if I have to. Been in the construction trades all my life. Maybe that's why I hate fiddling with stuff like this now. It just irks me no end. If I ever buy an Impact I'm gonna get two of them. One to use and one to be in transit to a good tuner probably most of the time.
 
Thanks guys. I put this up to show that if a need is a must, and having watched the videos a few (many) times, it's not difficult. Patience is a given in all this.

This rifle is a bit of a money pit for me so I'd rather spend on tools etc and learn doing things myself if I'm to continue in this hobby.

In all honesty, I hate changing the mounts and setting the scope. I'd rather do this whole disassembly and reassembly than mount a scope.

Leak test complete with no change in bottle pressure over night. So this seems to be a success. Now to fire and check for POI change and zero.
 
Verve, one of the major reason for me buying an Impact is the way it is all bolted together, this in conjunction with Ernest's great videos anyone with an inkling of mechanical aptitude and minimal tools can completely strip and rebuild their Impacts if necessary in the future. This is very important when the distributor as in my case, is 2,000 km from where I live.
You mentioned that fitting the small O rings to the regulator adjustor screw was fiddly. You destroyed 20 or so O rings before you were successful, what was the secret replacing these O rings?
Ross
 
Ross, my reasons were similar for the purchase. It's a lot simpler rifle to repair than the Wildcat that I also own. But it has a lot more to go wrong on as well.

Re the reg adjuster screw o-rings. Fitting the top/first o-ring is straight forward by hand. Once that's seated, you'd need to move it down to the second seat. Getting the second o-ring over the first one seated is next to impossible as o-ring will not stretch that much and snap. So don't even bother trying that.

Moving first o-ring to second is very tricky unless you have a rubber vice to secure the screw in and the type of brass picks in my picture. Damaging the screw was my biggest concern as it's brass. Once you get the first o-ring out of its seat (most difficult part), it rolls over easy in second seat.

I broke so many as the stretch limit of the 2x1nbr90 o-ring is very low. Brass pick with a seating pick (ball on end of it to de-seat evenly) is a must have if you don't want to break as many as I did. I used a steel pick to pull the o-ring out enough (left hand) and a fine ball point pen (in right hand) to push the rest of it out - never again this way. Will use proper picks next time.

 
Verve thanks for the heads up on replacing the regulator adjuster screw O rings. I have never had my reg apart but have an idea of it's make up from Ernest's video.
Now if I read you right the problem is the O rings can only be fitted from one end of the adjuster screw. Once the first O ring is fitted to the shaft it has to be moved over the first O ring groove then slipped along the screw shaft and into the second O ring groove. Then the second O ring is mounted on the adjuster screw shaft and rolled into the first groove. I assume the difficulty is when the first O ring is fitted and drops into the first groove the problem is getting this O ring out of the first groove again so it can be moved along the adjuster screw to the second O ring groove. Is that right?
If so, could you not temporarily "fill" the first O ring groove by wrapping sewing cotton around and around the shaft until the groove eventually fills, and is level with the shaft of the adjuster screw. Then mount the first O ring, roll it along over the groove filled with cotton and along the shaft of the adjuster screw where it is positioned in the second groove. Then unwrap the cotton from the first groove and mount the second O ring on the adjuster screw and roll it into the now vacant first O ring groove?
Just a thought.
R
 
Yes, fit o-ring in first seat and then move that o-ring own to second seat.

I did try filling up first seat with cotton string and even PTFE tape but it makes fitting the first one very difficult and removing out of the slot more so.

First o-ring only goes in if one part of it is fully seated in the seat and then rest is rolled over. If you fill the seat with string etc, it will not work - didn't for me at least - and few o-rings snapped that way too because the moment you fill the seat, the stretch required to get it over fully will cause it to snap. It needs to be seated to be pushed over.

Took me 2hrs to get the second o-ring on trying all sorts of ways including filling the first seat. The least difficult way and only successful one was the one I detailed.

Ernest has changed them, maybe he can advise how he did.
 
Great job Verve,

its great to see a video of your journey before going---kinda know what to expect and give you courage for the challenge. 

I been using D70 hardness on those 1x2 orings they have more stretch and have no issue with them.

some impact don't have that 1mm set screw, I just tighten it down while holding the VS rod from turning. 

Have a lot more videos for the impact to clearfy some key points.

me also have 2 impact, one I shoot a lot and the other is for testing new parts/mods fitting custom parts---making requested videos.

it's like a bench test impact/ even test the limitations. 

Like don't back out the reg adjuster to much-- it will dump all the pressure.

 
Thanks Ernest. Yes, seeing the journey before embarking on it sums it all up very well.

My Impact is for everything including testing. Got 5 shrouds (Inc 2xFX ones) and 2 mods, plus bits everywhere. It's fun, so far .. I think.

I'm thinking of the plate under the bottle, like the one on FX Royal BR, for bench rest shooting that I mostly do. That would allow for the bipod to move forward and allow other type of rests to be used instead of weight of the rifle on the bottle. Are you looking at machining something like that by any chance?

Thanks for confirming that nbr70 o-rings work on the adjustment screw. Should make it easy for many that. I hope I don't have to change those anytime soon.

Eagerly waiting for other videos.
 
Great. Are you also looking to include any configuration that the rifle moves horizontal (recoil) instead of vertical (recoil jump that's a common problem with the Impact due to location of the bipod mount)? Was thinking of a spring loaded setup for horizontal movement ... such as the rest mount like this: =----= = springs and --- is mounting plate that the under the bottle plate secures on to. If that makes sense?


Have also just set the rifle at 920fps on 25.4gr. Valve adjustment position now is just touching the outer edge of the 2nd line. 900+ was always around 3rd line before. This is likely because the hammer seat was not fully screwed in the valve-stem from factory or it was not screwed in fully on the other side.
 
My supplier is in an another country hence I have to fix most things myself or take it a local tuner. I get parts under warranty but o-ring replacements and any changes etc I do myself.

It's a hunting rifle and for that purpose it fits the bill. I want to shoot it bench rested in a populated neighboorhood hence changes are required.

Plus being an early bird, issues were expected so being mentally prepared is a must. Waiting for my Edgun Leshiy to arrive and thats a new rifle too hence expecting an issue or few with that as well in due course.