What The FX Pocket Chrono Should Have Been - Rechargable

My gut feeling here is to say No. Even though there is no shielding on this unit at all (Except for ground planes on the boards, but that is a stretch), I don't think consistent magnetic flux being present will mess with the detectability of the unit as long as they aren't on the front. That said, I would tape a few onto the chassis (more than you plan to use) where you plan to mount them before permanently mounting them just to make sure.

Looks like things are good to go for magnetic battery hatch. I attached 12 magnets, each 1 1/8" in diameter. The first 5 of this string are without the magnets, the last 5 are with the magnets.

Screenshot_20230108-103623.png


PXL_20230108_162742151.jpg


Considering I'm going to be using 2 magnets measuring 3/16" OD x 1/16" thick, I think we're gonna be just fine!
 
  • Like
Reactions: txcomp
Swapping to LiPo was a success. Started by removing the battery contacts

PXL_20230110_140839336.jpg


Soldered in the PH2.0 connector

PXL_20230110_142527220.jpg


Cleared some room so the wires didn't get pinched upon reassembly

PXL_20230110_142844679.jpg


All assembled and powered up. Batteries were longer than I thought, so the battery area just became a storage area and I'll need to figure out where I want to located the plug. Showing low battery due to LiPo being at storage voltage of 3.8v. Charged the battery to the LiHV voltage of 4.35v and it worked!

PXL_20230110_152253385.jpg
 
Awesome @UCChris!!

I‘ve got a flat replacement cover designed if you can’t make something work. It already has a slot in the side to feed wire from inside the battery tray to outside the unit.

I know I’ve been quiet the past few days because I’m back to driving thumbtacks with sledgehammers. I’ve improved my original design posted earlier and integrated a buck in to the design so you can use any DC power source from 5VDC - 30VDC and still power with at least 4.5 volts. I’ll post some pics soon.
 
From the thread about building a Homebrew Chrony Display, That white plug on the board is a serial port.
Since I have some Prolific UART's from doing Shooting Chrony cables? May as will build a cable and try it out.
Why not? I haven't looked to see who is the master or the slave. Also dunno if you need to account for TTL or RS-232 levels, but you may want to put a scope on there to see if you get anything >5V or <0V on that line. By definition (or at least the most common definition), RS-232 is +-12VDC.

Swapping to LiPo was a success.
Great work! This may be a dumb question, but you are able to read shot results with the battery hooked up, right? The reason why I ask is because the low battery light is lit too. I wasn't really watching that when I was doing my testing because the sun was shining on my Chrony when I was doing most of my testing, so I couldn't really see the LEDs.

I'm doing some more testing tonight, and the Chronograph seems to not recognize when the battery gets low while it is operating, but will recognize it when powered off and back on. If you drop the power to it while it is on, the green power LED will just go dim, but the low battery LED will not come on.

On the reverse, I went from 3.2V with the Low battery light being on, and brought it up all the way to 4.75V, and the Low battery light is still on. I have let it go for at least 10 minutes and the light is still on, so it is my belief that this system only evaluates the battery power when first powered on. It turns off after a few minutes of inactivity, so it will re-evaluate the batteries when powered back up.

I will have to re-evaluate the system to see how the battery update happen relative to a shot string, but as it sits idle, it has no clue that the batteries are changing.

More to come, apparently...
 
I went from 3.2V with the Low battery light being on, and brought it up all the way to 4.75V, and the Low battery light is still on.
The same was true with my earlier rev board. A fairly common design practice is to latch a low battery condition so the indicator LED doesn't vacillate on and off with changing load conditions right around the threshold, and because there would normally be no circumstance where the battery's voltage would actually climb. I assume that is what FX's code is doing.
 
  • Like
Reactions: UCChris
While I had the Chrony hooked up on on the variable power supply, I tested it to see when the low battery light turns on.

It is 3.8V. At that number or above, the Low Battery light is off. In the <3.75V range, the light is on. This is on my version 3.1 board.

Good catch. IIRC, the charger I use for these batteries uses 3.85v as the storage target. I'll have to measure my 1s batteries at various voltages and see when my low battery light trips, as I believe I have Rev 3.1 as well. I was able to successfully read shots when charged to 4.35v, but I haven't tested lower yet.
 
  • Like
Reactions: txcomp
After much designing, redesigning, printing and repeating a dozen or so times, I’ve come up with Rev 2 of my original design for the battery eliminator.

CB55E514-6845-425A-B83B-D5ADFF303FCB.jpeg

Here is the contact carrier and buck. This unit will take from 3-32 VDC and output 1.5-30 VDC and is adjustable. A side benefit is the insertion loss is about 1/2 a volt so my 5 VDC batteries output 4.5 VDC to the unit. I adjusted the buck to output 4.8 VDC and hooked up multiple batteries from 5 V an 18V drill battery and still got 4.5-4.8 on the output. I could only imagine how long an 18v drill battery would last powering something with this low of draw. 😊

FB84F1B5-1CCE-44DE-B1DB-B29DB03FAC52.jpeg


This is the unit installed in the chronograph. I switched from aluminum to copper for terminals because……copper is always better, right?

E4BAC8B0-E0AB-4719-90EF-CB09D0A0B9D7.jpeg


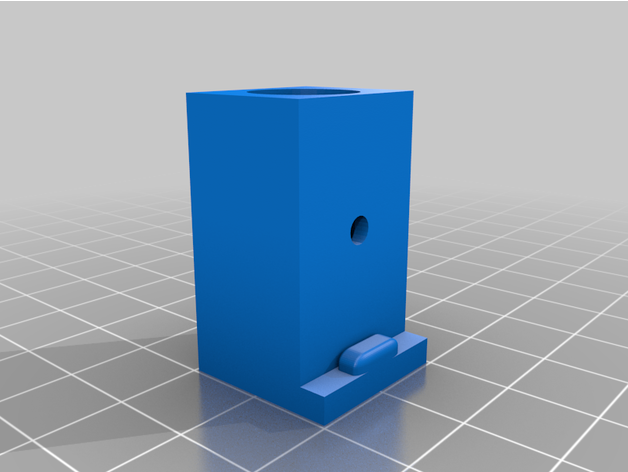
This is the modified case back to allow the buck to mount directly in the unit to keep the entire assembly as small as possible. I’m using a USB plug still because all of my batteries and wall chargers are USB. It also allows you to use a laptop to power the unit if you’re graphing the shot strings as you shoot them.

I’ve considered using a project box to house a 2S battery, charger and buck and just have an umbilical cord tying the battery box to the unit. @SkeeterHawk I believe is planning to use a small lithium jump box to power his since that’s what he has available and handy.

At the end of the day, this design opens you up to use pretty much whatever power source you want and still fall back to AAA batteries if you have to.
 
  • Like
Reactions: SkeeterHawk
Man, I didn’t mean to kill this thread.

I enjoyed your last post! Minimal added bulk for a pretty huge increase in versatility! Considering the USB cable setup, I think it would be very cool to 3D print a small block that replaced the curved mount and has a little threaded insert for a micro tripod. That would make it the ultimate tabletop chrono!
 
I enjoyed your last post! Minimal added bulk for a pretty huge increase in versatility! Considering the USB cable setup, I think it would be very cool to 3D print a small block that replaced the curved mount and has a little threaded insert for a micro tripod. That would make it the ultimate tabletop chrono!
I can certainly do that but I don’t have one of the little tripods so I don’t know how it mounts. I seem to remember seeing @heavy-impact jad already designed something like that though. Check his files on Thingiverse.com. I’ll look and see if I can find it also.
 
  • Like
Reactions: UCChris
I just had to kinda laugh while reading through these latest posts. I can picture a couple of engineers in Sweden reading through this and thinking “why do they keep taking our toy apart and keep trying to figure it out?!?!” 🤣
We aren't ones they have to worry about, watch eBay for a Fxx Chrono for $35.
 
Here are some files I found on thingiverse.com.

The base I was thinking about by Heavy-Impact
https://www.thingiverse.com/thing:5265108

A neat Chronograph stand

A mount for an air cylinder which is really cool
A client and I were chatting yesterday, he was telling me about a metal laser printer, they prototype for the auto industry and I'm going to guess anything else. I wish I could remember the name of another client, he was VERY VERY deep into cutting edge printers, some kind of a really smart dude. Oh my...."These carbon fiber 3D printers, such as the Onyx range, offer exponentially stronger parts than is possible with PLA filament or ABS". I'd give almost anything for a carbon fiber chassis for my Maverick. Of course these printers aren't cheap.
 
Last edited:
A client and I were chatting yesterday, he was telling me about a metal laser printer, they prototype for the auto industry and I'm going to guess anything else. I wish I could remember the name of another client, he was VERY VERY deep into cutting edge printers, some kind of a really smart dude. Oh my...."These carbon fiber 3D printers, such as the Onyx range, offer exponentially stronger parts than is possible with PLA filament or ABS". I'd give almost anything for a carbon fiber chassis for my Maverick. Of course these printers aren't cheap.
You can print infused filament with a “normal” printer as long as your hot end will reach the temp and you use a hardened nozzle. Check out Matter Hackers (https://www.matterhackers.com/). That’s where I get all of my off the wall filament.
 
Nice tip using the lipo battery. I also like the idea of not attaching the Chronograph to the barrel like bamavet55 did. Would strapping it to the air bottle of an impact work as well?

I don't see why not. The only difficulty would be making sure you can position it well enough to get consistent readings.