I have a new piston seal for my RWS 45 and would like to find a youtube video describing the disassembly of a break barrel springer before I attempt it. I've searched for a video describing the process but can't find much. Does anyone have a link or two to share? Thanks!
- The AGN App is ready! Search "Airgun Nation" in your App store. To compliment this new tech we've assigned the "Threads" Feed & "Dark" Mode. To revert back click HERE.
You are using an out of date browser. It may not display this or other websites correctly.
You should upgrade or use an alternative browser.
You should upgrade or use an alternative browser.
video needed for seal replacement in an RWS 45 or similar
- Thread starter tiptop
- Start date
Well I looked around but all i can find is some pics and a blog here
http://anotherairgunblog.blogspot.ca/2011/10/rws-diana-model-45-disassembly-part-1.html
Its a leather seal in the post not sure what you have. Hope that helps.
I took My Diana 34 apart to change the main spring and guides its similar but different I did It without a spring compressor it was difficult but not impossible but I'm good with my hands that way. You might want to google air-rifle spring compressor/ build your own or diy air rifle spring compressor. There's some YouTube vids on how to build one, Unless you want to buy one? Either way useless your good with your hands I suggest a compressor.
Upvote 0
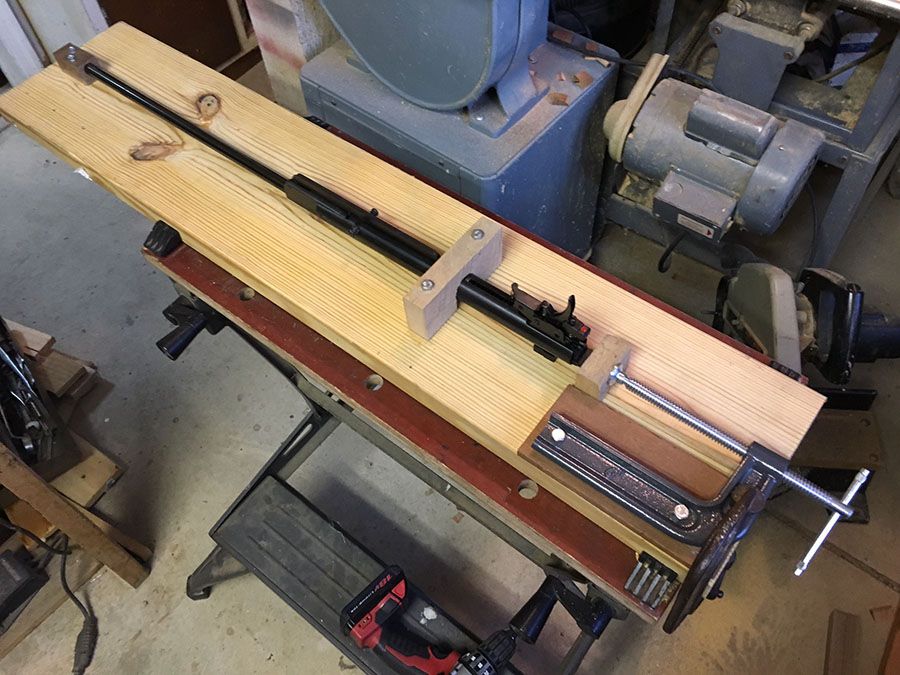
Made my own spring compressor for a Diana 34. Pretty simple to make using part from a bearing removal tool.

Upvote 0
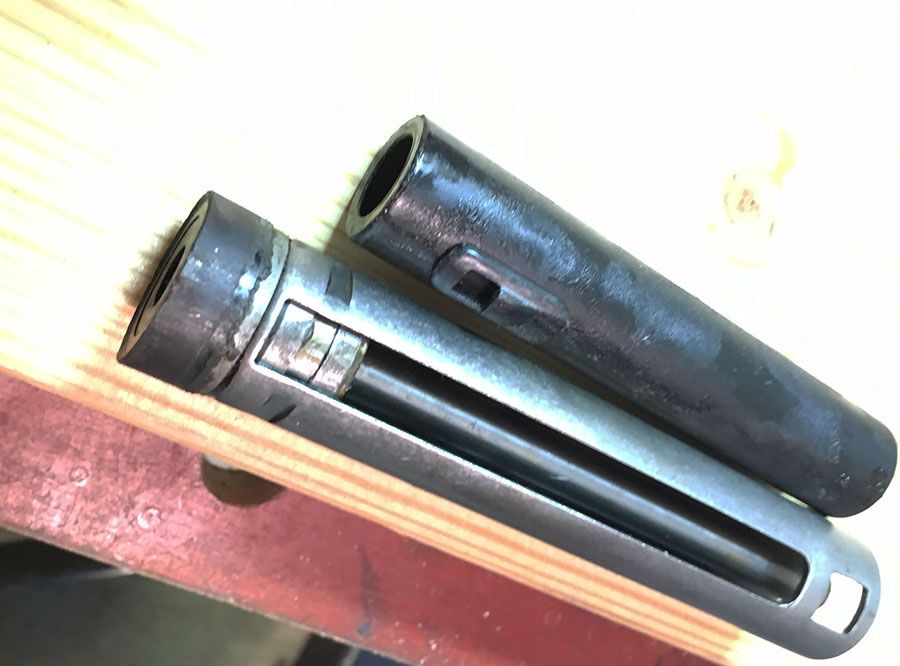
Thanks guys for the input! I did some more complete web searching after my first post and was able to find more than originally. I went ahead and put together a spring compressor and disassembled the gun. It actually went pretty easy. This gun does have a leather seal which is "riveted" to the end of the piston. I put that in quotes because that's how it's been referred to in all the links I've been able to find on the RWS/Diana 45. It's not my idea of a rivet, in fact it's a hefty pin with a substantial head on it. I think it's pinned into the side of the piston with a blind pin which isn't removable. My guess is that it was never meant to be replaced without replacing the entire piston. The replacement plastic seal kit from Vortex mentions that when used with the RWS/Diana 45 modification is necessary. What that amounts to is drilling out the pin and tapping the end of the piston to accept a flat head machine screw to hold in the replacement seal. I found one reference online about someone doing this where he simply drilled it out with a drill press. The critical thing here is that the hole had better be dead on center or I'm screwed - to put it bluntly. I haven't received the kit yet from Vortex and don't know the size screw they provide so I haven't attempted it. Here are a couple photos of the piston with the old seal in place and with it removed. I'll post a followup when/if I'm successful.


Upvote 0
Damn dude ;!! That's some dark ages looking stuff . Hey man take a pic of the spring compressor you made ...I been thinking bout making one too
Upvote 0
Very easy to make. I put this one together specifically for this gun so it's not adjustable like some - but simpler. The only expense was the C-clamp for $7 or so which I cut the end off of. If I ever need to compress another spring, it would be fairly easy to shim the C-clamp up or down and I'd probably need to change the height and/or shape of the hold-down clamp and barrel end stabilizer. Or I could take the time to make it more easily adjustable. With this gun the compressor was hardly necessary for taking it apart but will probably be more helpful for reassembly -- if I get that far. :^)

Upvote 0
Hi, Tiptop,
Rather than replacing the leather seal, try soaking it in a combination of neatsfoot oil and silicone chamber oil. It looks to be in excellent condition from the pics
Rather than replacing the leather seal, try soaking it in a combination of neatsfoot oil and silicone chamber oil. It looks to be in excellent condition from the pics
Upvote 0
John - It's too late for that because I already removed the leather seal (second picture). Before I did that however, I put an excess of chamber oil in the chamber and stood the gun vertically for a couple days. I drained out what was left and ran a bunch of pellets through the gun using a chrony. At first the fps was up where it should be but quickly fell back down into the mid 600's as the excess oil was ejected. It might have worked better if I had soaked it with the piston outside of the gun.
Upvote 0
Some accounts say the rivet is an interference fit.
If that's the case I'd be inclined to at least "try" to secure the piston in a vise, next to a flat plate laid across the jaws, allowing the end of the washer under the rivet to be a hair below the resting plate, then see if you can get a nail-pulling pry-bar under the rivet head, and pluck it out. Might be able to twist it out... BUT if that shears the head off you're forced to chuck it in a lathe and drill it out. While the latter is a good option, I'd still rather have the rivet come out intact, leaving behind its original hole that is not molested by a drilling operation.
If that's the case I'd be inclined to at least "try" to secure the piston in a vise, next to a flat plate laid across the jaws, allowing the end of the washer under the rivet to be a hair below the resting plate, then see if you can get a nail-pulling pry-bar under the rivet head, and pluck it out. Might be able to twist it out... BUT if that shears the head off you're forced to chuck it in a lathe and drill it out. While the latter is a good option, I'd still rather have the rivet come out intact, leaving behind its original hole that is not molested by a drilling operation.
Upvote 0
... or BETTER yet...
Find a pair of smooth pins slightly larger in diameter than the gap under the rivet head, and squeeeeze them under the head (one on either side of the rivet head)... find a slightly larger set of pins and repeat, until the pin emerges enough to coax the rest of the way with your teeth. This method will side-step clamping the piston in a vise mentioned in my previous post.
Guaranteed if it is just a friction fit, that would be the least destructive way to remove the rivet, and the ONLY part that would be marred in the process would be the pry-pins and the rivet head.
Upvote 0
Zia - Very good idea. On close inspection the pin does have three slight vertical grooves in it which could indicate it's a rivet of some kind. The pin is .199" which is very close to 5mm which is the right drill size for an M6 tap. I'll wait until I receive the seal kit to see what size machine screw is provided. Hopefully it will be M6.
Upvote 0