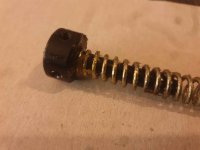
Seneca/Sam Yang Sumatra 2500 leak, Disassembly

Hey!

I have recently bought an Eun Jin Sumatra 2500R .22 with unkown function.
This will be my first PCP I'll have to disassemble and fix myself, before I've only owned already functioning ones.

The check valve was broken, so first thing I did was to get the Best Fittings foster fill upgrade with the non return valve.
- So atleast now I can fill the rifle.

However, I have now noticed that it leaks from atleast two places, one just in front of the receiver and the other from the upper tube end cap.
- Not too troublesome to fix I hope, there is a good teardown video and I see O-ring kits are available.

Now for the part I fear can be troublesome:
While I had the rifle filled before it leaked out, I tried to cock the action and dry fire.
I tried a few times but I would just hear the action click, no puff of air was coming out at all..

So I wanted to check here if this is a common and easily fixed problem with these, or if I have some real work ahead of me..

I will update the thread when I have disassembled the rifle and can show pictures of the inner parts and maybe someone here can identify something looking weird or broken.

Nordic

AirgunNation_Sumatra2500.jpg
 
  • Like
Reactions: 1handwill.gc
Nordicair, The clunk you hear when trying to shoot can be caused by a few items.
1. Hammer spring broken or insuffiecient to open valve.
2. Valve stem is sticking in the speed adjuster, (make sure speed adjuster moves freely and is opend all the way.)
3. Rear of poppet that acts as guide for spring is broken and preventing valve from opening. ( have seen this multible times with them in for repair at our shop.)
4. Valve stem bent preventing clean opening of valve.
Look those things over and do an inspection.
Perfect, thank you!

I will check those things when disassembling!

Since you seem used to these, how do I bleed the rifle empty the best way?
It seems to have stopped leaking at around 70/80 bar (1000-1100psi).

..my plan was to shoot it empty in case it all didn't leak out, but since that is not an option.. :)

EDIT:
Tried the adjustment wheel just now, it doesn't move at all!
It moved before filling the rifle.

Nordic
 
Last edited:
  • Like
Reactions: 1handwill.gc
Perfect, thank you!

I will check those things when disassembling!

Since you seem used to these, how do I bleed the rifle empty the best way?
It seems to have stopped leaking at around 70/80 bar (1000-1100psi).

..my plan was to shoot it empty in case it all didn't leak out, but since that is not an option.. :)

EDIT:
Tried the adjustment wheel just now, it doesn't move at all!
It moved before filling the rifle.

Nordic
Sounds like your power wheel is set way too low.

If you have already tried to increase power via the power wheel and it had no effect, it’s possible the power wheel is broken. Remove the forestock and inspect the power wheel.

As a last resort, you can remove the rear stock so you can take out the hammer spring. Use a 3/4 wood dowel and a mallet to manually smack the valve open until all air is bled.
 
Last edited:
Sounds like your power wheel is set way too low.

If you have already tried to increase power via the power wheel and it had no effect, it’s possible the power wheel is broken. Remove the forestock and inspect the power wheel.

As a last resort, you can remove the rear stock so you can take out the hammer spring. Use a 3/4 wood dowel and a mallet to manually smack the valve open until all air is bled.
After some additional time and a miniscule more leakage I tried the adjustment wheel again.
It was very stiff, but this time I got it moving about halfway (it was set at absolute lowest setting).
I cocked the action and it actually fired air!

After the shot I was able to spin the wheel freely again.
I've now shot a couple of shots, now the wheel moves freely and I can fire in any setting from absolute max to absolute minimum!

To avoid this happening again, I guess I should not leave the power wheel on minimum when filling the rifle with air?

Nordic
 
Filling should have nothing to do with power wheel sticking. It is simple round nut that moves back and forth around valve pin to reduce the stroke on valve.
I would still check the valve pin and also check the detent ball for the power wheel to make sure it has not dislodged and stopping power wheel from turning correctly. You can drain air by slowly unscrewing the air gauge. Do not remove it it should only take a couple turns to bleed air. You can shoot it down but be careful and only use half cock to prevent damaging valve.
We work an a lot of Seneca here in the shop great gun when configured properly. You are welcome to contact me if you have any questions. If you need parts let me know.
Veradium Air
 
  • Like
Reactions: 1handwill.gc
After some additional time and a miniscule more leakage I tried the adjustment wheel again.
It was very stiff, but this time I got it moving about halfway (it was set at absolute lowest setting).
I cocked the action and it actually fired air!

After the shot I was able to spin the wheel freely again.
I've now shot a couple of shots, now the wheel moves freely and I can fire in any setting from absolute max to absolute minimum!

To avoid this happening again, I guess I should not leave the power wheel on minimum when filling the rifle with air?

Nordic
Power wheel should spin freely no matter what pressure is in the rifle.

Interesting facts about the Sumatra: The power wheel on the Sumatra is adjusting the amount of valve stem that protrudes from the valve. Hammer spring tension is not adjustable.
 
  • Like
Reactions: 1handwill.gc
Filling should have nothing to do with power wheel sticking. It is simple round nut that moves back and forth around valve pin to reduce the stroke on valve.
I would still check the valve pin and also check the detent ball for the power wheel to make sure it has not dislodged and stopping power wheel from turning correctly. You can drain air by slowly unscrewing the air gauge. Do not remove it it should only take a couple turns to bleed air. You can shoot it down but be careful and only use half cock to prevent damaging valve.
We work an a lot of Seneca here in the shop great gun when configured properly. You are welcome to contact me if you have any questions. If you need parts let me know.
Veradium Air
Ok, I will check those things when I disassemble it tomorrow!

Thank you, very much appreciated!
I will let you know here when I undoubtedly get stuck or run into problems after disassembly.. :)

I have found a few exploded view diagrams of the rifle, but none with specifications of the parts.
To maybe save some time and money on replacing the o-rings, is there anywhere available a list of o-ring sizes in the rifle?

I will drain the rifle by unscrewing the pressure guage then!
- Just a question since you mentioned it, how do I half cock it?

Nordic
 
Power wheel should spin freely no matter what pressure is in the rifle.

Interesting facts about the Sumatra: The power wheel on the Sumatra is adjusting the amount of valve stem that protrudes from the valve. Hammer spring tension is not adjustable.
I see.. I guess there is something loose or broken inside then perhaps as has been suggested here.
 
Great rifle. One that’s been on the wish list for quite some time although I’d prefer in .25 cal. Limiting valve stroke is pure genius. Much more effective than let’s say a transfer port restriction. Wish you luck with it. I think you’ll find the older Korean rifles prefer heavy pellets and bigger diameter than you average pellets. Get yourself some Seneca 28 and 32 grain pellets. Or better yet some Eun Jin pellets if you can find them, I’ve got a good stash of them for one of my Evanix guns.
 
From my Sumatra ownership I recall that adjusting the power wheel must be done while the rifle is cocked.
I read that in the forums back then.
Can anyone (especially @bthurman?, @Pale_Rider ?) corroborate that?

@NordicAir
Good luck
Mine was a great shooter and expect yours will be also

Edward
I remember the manual did state that. However I never had an issue adjusting the power wheel when not cocked. I also seldomly adjusted it especially after getting a full tune from the master Korean airgunsmith, Will Piatt. It’s funny when some tuner down played Will’s work and claimed their tune is way better. Still have yet to see anybody make a flatter shooting, unregulated Korean air rifle. And BOY was that cocking lever smoooooth. What an a** I am for selling that rifle.
 
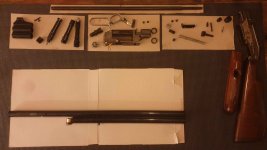
Update:

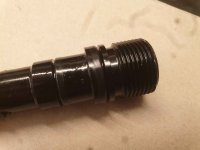
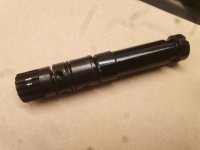
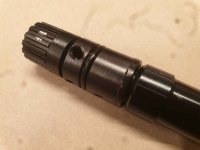
I have now successfully disassembled the rifle!
1.jpg
Loosening the giant flathead screw inside the upper tube to release the main valve assembly was a major pain..

Some things I've noticed is that this one appears to be of an older model than the ones I find video guides of.
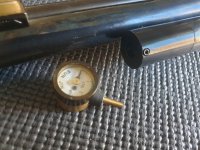
My rifle has the pressure gauge marked in kgf/cm2, the gauge is not screwed in, just slides into place and held by a grub screw.gauge1.jpgView attachment 591534
Also the main valve assembly looks different than those I've seen in videos.

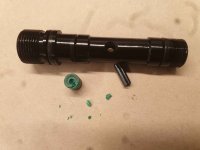
Managed to dig out the green remains of what was once a check valve aswell. :)
9.jpg

Anyways, now for my questions:
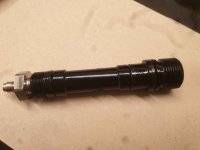
- Are these tough plastic rings the orings on the screw-in-parts that goes into the front of the tubes?
Can these be replaced with normal orings, or do they need to be of squared profile?
3.jpg4.jpg
The main valve assembly has one of these tough plastic rings aswell, but also a normal oring:
2.jpg6.jpg

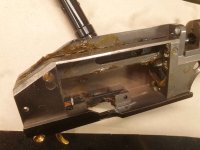
- The whole rifle was absolutely covered in some thick grease.
Is this normal for air rifles? Is this recommended?
7.jpg8.jpg

Nordic
 
@NordicAir
About the O-rings
Just because the O-Ring groove on a part has squared sides is not an indication that "square" O-rings are needed
Unless of course you removed square ones
Which is highly unlikely
Just make sure you replace them with the proper (matching) size, material, & hardness (durometer)

When you say grease all over the gun,
Do you mean internal, external, or both?

Grease inside the tubes and barrel could easily be there from the manufacturing process.
The aim to keep things from rusting/corroding
I'm sure other members have a theory as well

Have you gotten to the firing valve yet?

Edward
 
About the O-rings
Just because the O-Ring groove on a part has squared sides is not an indication that "square" O-rings are needed
Unless of course you removed square ones
Which is highly unlikely
Just make sure you replace them with the proper (matching) size, material, & hardness (durometer)
The current ones can be seen in the images I attached to the post, those are all square ones except one on the main valve assembly.

When you say grease all over the gun,
Do you mean internal, external, or both?

Grease inside the tubes and barrel could easily be there from the manufacturing process.
The aim to keep things from rusting/corroding
I'm sure other members have a theory as well
Check the last two images attached to see the grease all over the internal action.

Have you gotten to the firing valve yet?
Is that what is inside this part with further disassembly?
2.jpg


Nordic