Starting an informative thread to showcase the rebuild of the mighty Bantam HR Sniper Mag. While this pcp is not as common as others and target audience may be slim, I hope to showcase the feasibility of minimal repair/rebuild procedures with this fine tool.

You are using an out of date browser. It may not display this or other websites correctly.
You should upgrade or use an alternative browser.
You should upgrade or use an alternative browser.
Tuning Rebuilding the Brocock Bantam Sniper HR Magnum (pic heavy)
- Thread starter Apohlo
- Start date

Let me preface - I am thoroughly impressed by the form, fit, function, and overall accuracy with the previous tune of 25.39gr JSB Jumbo Monsters. My desire to tune this rifle to 21.14gr H&n Baracuda Match is likely a cause to some issues below. However, if I have this and can't appropriately tune it - why are the tuning functions there?
Since owning this beast, I have encountered a few issues:
1. Blown breech seal
2. Trigger release when on "SAFE"
3. Gurgle noise post-shot
4. Occasional inconsistent shot strings
5. Air loss at fill port
Out of the above, the latter three are related to making adjustments with the reg and hammer spring. Once I started adjusting is when I noticed these issues.
Issue #2 was solved in this previous thread:
 www.airgunnation.com
Since owning this beast, I have encountered a few issues:
1. Blown breech seal
2. Trigger release when on "SAFE"
3. Gurgle noise post-shot
4. Occasional inconsistent shot strings
5. Air loss at fill port
Out of the above, the latter three are related to making adjustments with the reg and hammer spring. Once I started adjusting is when I noticed these issues.
Issue #2 was solved in this previous thread:
Malfunction - Brocock Bantam HP Sniper Magnum
Hello all, I was shooting some airguns with my cousins this weekend. When my cousin was shooting my Bantam HP Magnum, there were four times where the gun went off on its own. The first time, he had a pellet chambered and was lining up for the shot, but hadn't placed his finger on the trigger...
www.airgunnation.com Upvote 0
In regards to issue #5 - I will tackle that first. Once I de-gassed the gun by loosening the fill port, I noticed that the dowty bonded washer was not looking so hot. Easy fix - ordered up some 1/8# BSPP Bonded Seal washers from Pyramyd Air and will be replacing that tonight.

Upvote 0
Regarding Issues #1, #3, and #4, I removed the HUMA Reg and gave it a thorough inspection. 2 of the 4 exterior o rings were flattened and definitely needed replacing, so I ordered up the following to rebuild in full:
OUTER
(1x) 1.78mm X 17.17mm (NBR) Buna-N 70 Duro
(1x) 1.78mm X 14mm (NBR) Buna-N 70 Duro
(2x) 1.5mm X 15mm E70 EPDM 70 Duro
INNER
1.5mm X 3.5mm E70 EPDM 70 Duro
1.5mm X 9.5mm (NBR) Buna-N 70 Duro Metric O-Ring
I am planning on building up a few "reg & fill rebuild" kits to offer to the forums here as I ordered plenty extra dowty washers and o-rings. Will update this thread tonight with the rebuild progress and more pictures!
Upvote 0
I have one in 25 cal. (bolt action). The gun has been consistently accurate and dependable, the only issues I have encountered:
Issue#1 - Lost a breech seal when gun was only a few weeks old, replaced it and have not had a failure since in over 2 years.
Issue#5 - I suspect I have the same issue with the fill seal, but it's intermittent so I'm still uncertain. The gun loses pressure occasionally, then when refilled it holds pressure, so...
I noticed the O-ring sizes you listed for the regulator and I recorded them for future use. Do you have a source for part descriptions, part numbers, O-ring sizes etc.? The exploded view drawings in the manual are pretty useless.
Upvote 0
I will post a picture of the regulator and the corresponding o-ring sizes tonight! Like I said, I plan on putting together a kit for rebuilding these guns with the dowty washer and all reg o-rings you need for fellow AGN members. (I had to buy large qty of rings to hit MOQ).I have one in 25 cal. (bolt action). The gun has been consistently accurate and dependable, the only issues I have encountered:
Issue#1 - Lost a breech seal when gun was only a few weeks old, replaced it and have not had a failure since in over 2 years.
Issue#5 - I suspect I have the same issue with the fill seal, but it's intermittent so I'm still uncertain. The gun loses pressure occasionally, then when refilled it holds pressure, so...
I noticed the O-ring sizes you listed for the regulator and I recorded them for future use. Do you have a source for part descriptions, part numbers, O-ring sizes etc.? The exploded view drawings in the manual are pretty useless.
I watched this video
Upvote 0
Thanks, I'm still wondering about the other parts and O-ring sizes too. Daystate is pretty closed lips when it comes to detailed info. So far my reg. has been fine, so I don't fix what isn't broke.I will post a picture of the regulator and the corresponding o-ring sizes tonight! Like I said, I plan on putting together a kit for rebuilding these guns with the dowty washer and all reg o-rings you need for fellow AGN members. (I had to buy large qty of rings to hit MOQ).
I watched this videoon the commander and confirmed measurements when the reg was apart.
Upvote 0
@Apohlo,
Thank you for sharing your rebuild, especially since you are providing useful data (O-ring sizes) and nice photos. I enjoy these types of posts the most; they add a lot of value to the forum.
I watched the video you embedded. I'm impressed with the design for how easy it is to access and service the regulator. As far as the regulator itself, I was impressed that it has a replaceable piston seat (the white part), instead of a permanent, pressed in place part.
If you look very carefully around 5:14 in the video, you can see an indentation in the face of the white piston seat, indicating it may need to be replaced. It will be interesting to find out how yours looks and see your pics.
While you have the regulator apart, I would polish the O-ring seating surfaces that the piston moves on, such as the bore inside the regulator body, using Flitz or Simichrome paste. I just did this on my Edgun regulators. My method was to chuck wood shafted cleaning swabs in my hand drill, spin them at a high speed, and move them around the interior of the bore in a circular motion to polish the entire ID. Also, you can polish the mating circular edges of the Belleville washers by applying some polishing compound to a piece of t-shirt on a flat surface and rubbing the washers back and forth across them. Because of their dished shape, the actual mating edges (when they're sandwiched) will receive the most polishing. These are tips I picked up from some of Ernest Rowe's tuning videos.
Last edited:
Upvote 0
Starting by chucking the Sniper in the vise.

Step 0. Remove the stock and scope.

Undercarriage work, here we go...
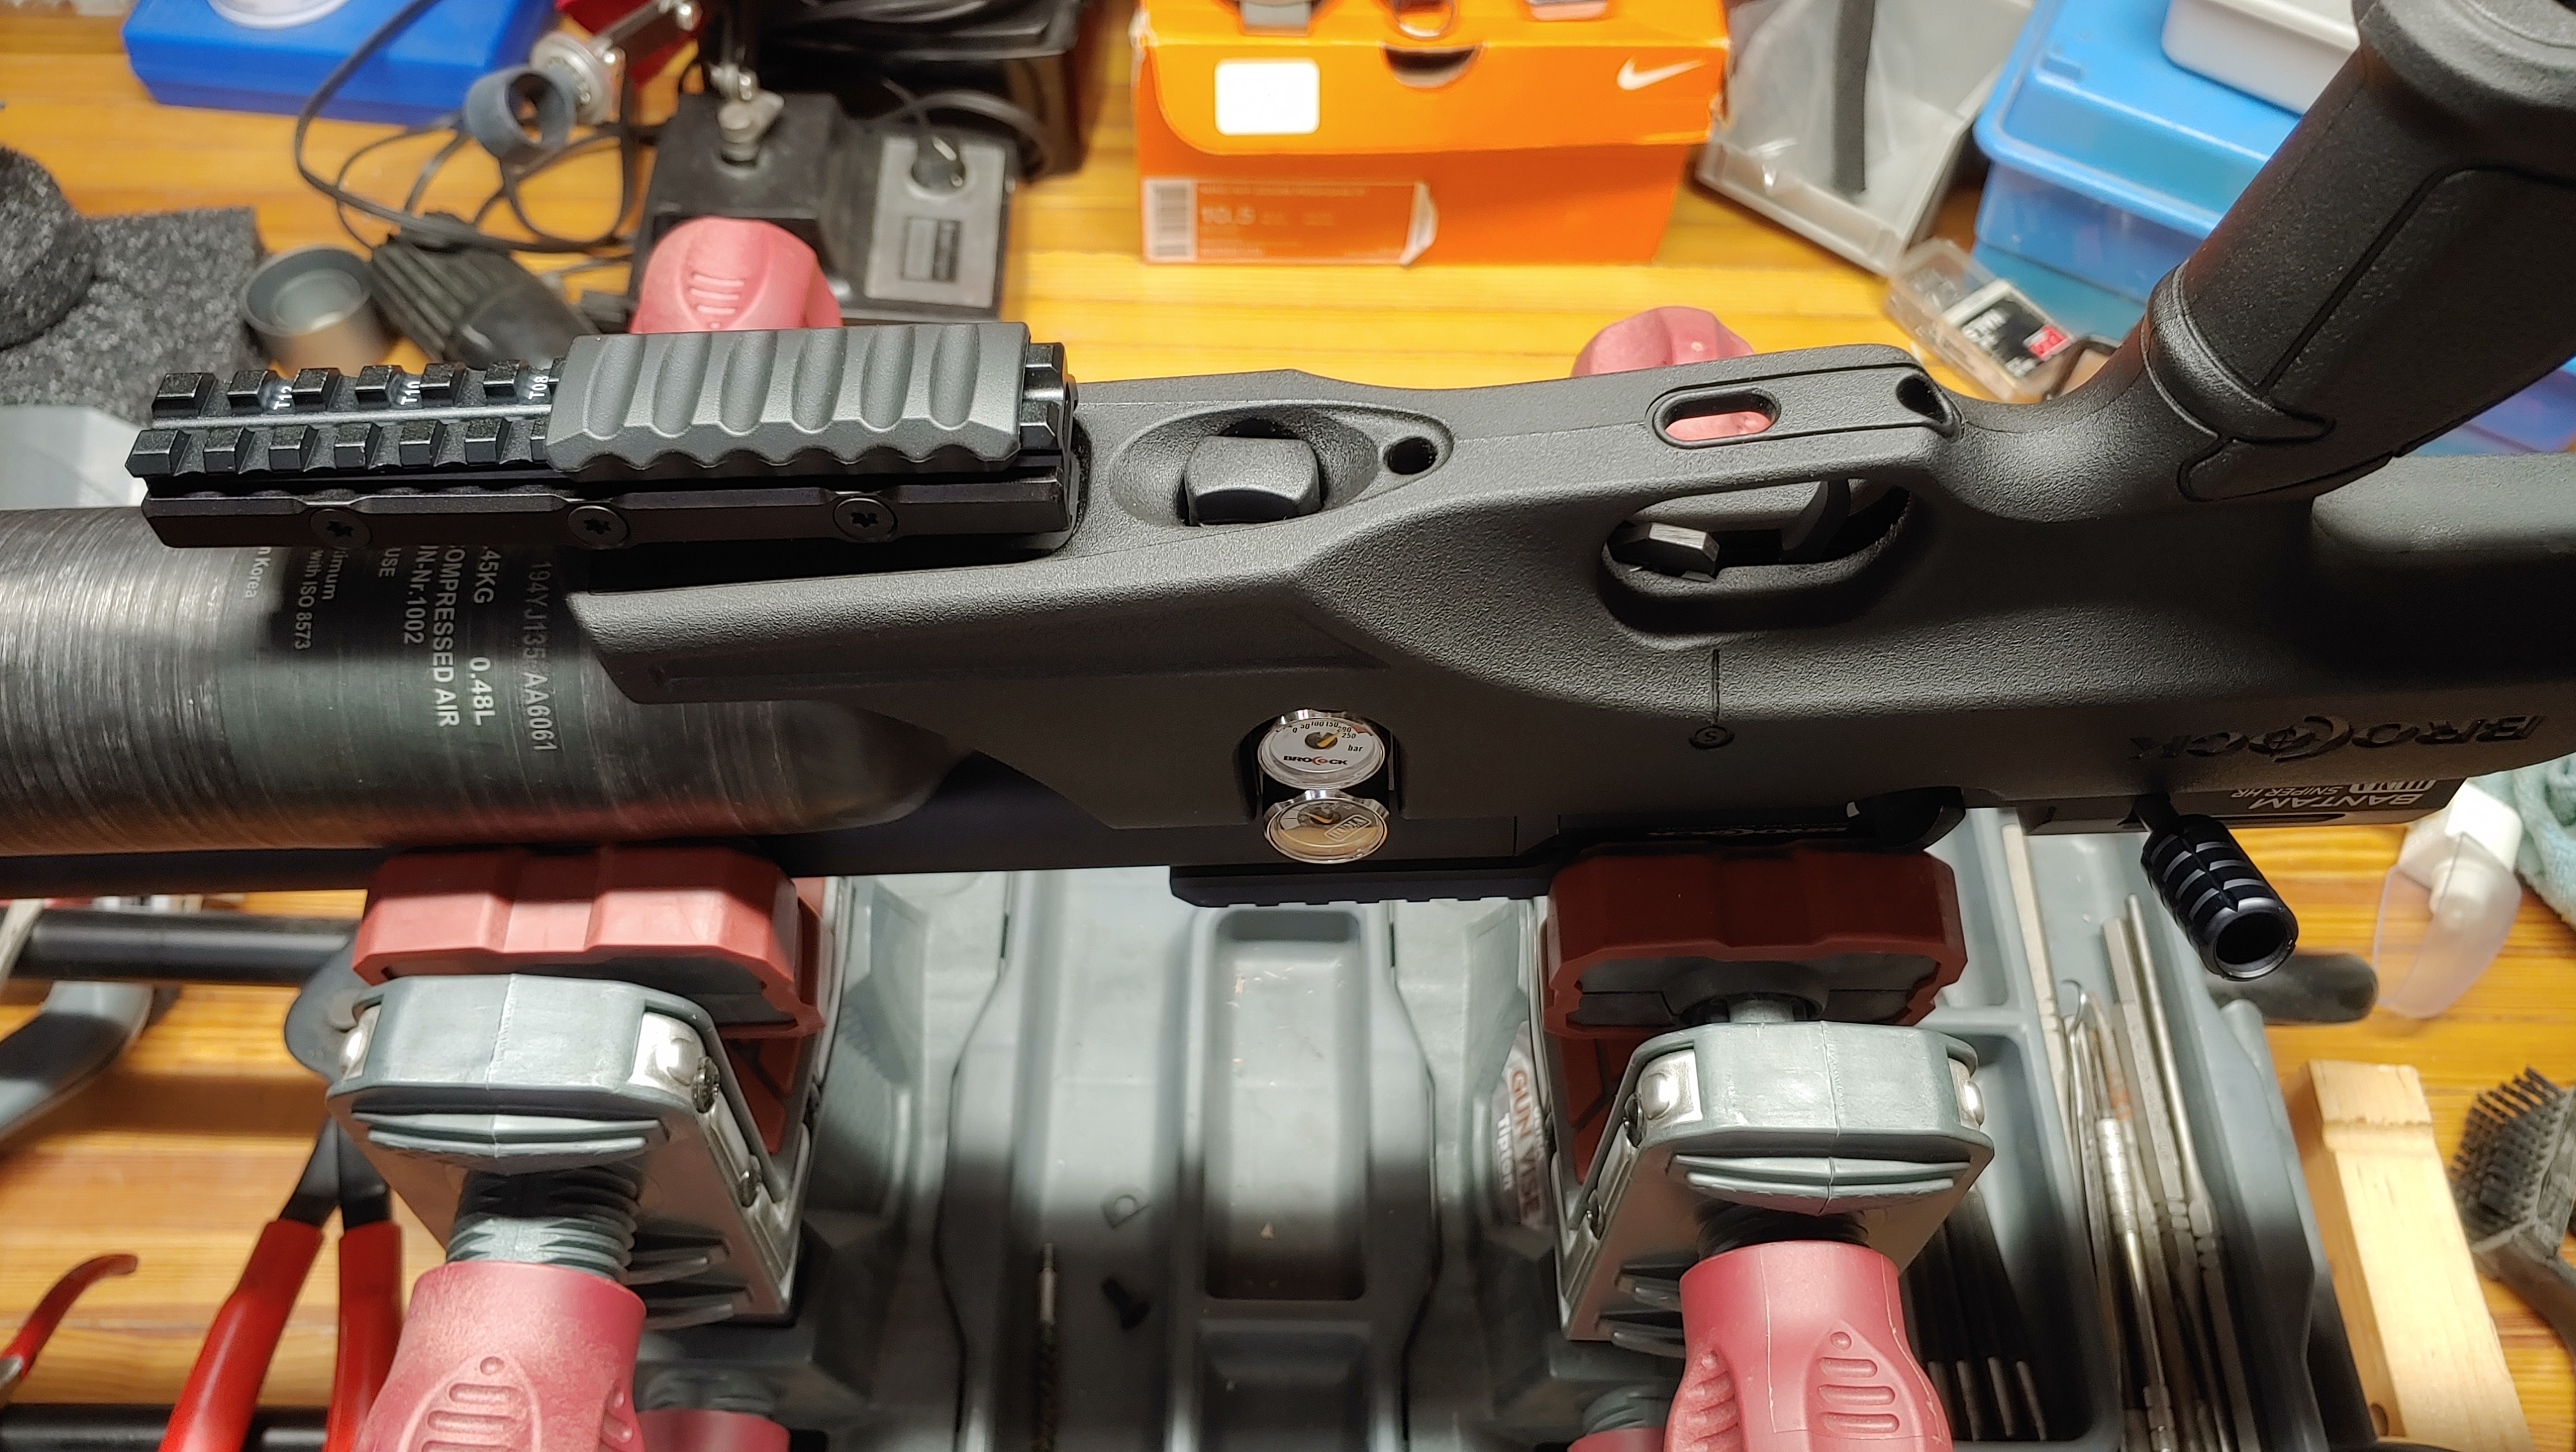

Step 0. Remove the stock and scope.
Undercarriage work, here we go...
Last edited:
Upvote 0
Removed the hammer weight. Looked clean to me, but I'll be honest, I didn't know what to expect on this. Ran a clean cloth and made sure all was dry before re-assembling.


After 5 minutes or go I ran the tank empty and dry fired 5 or 6 times to relive pressure in the HUMA reg. Time to replace the crusty Dowty washer.

So much better. Little bit of sili Super Lube...

Reinstall and tighten properly. Time to remove the reg.


After 5 minutes or go I ran the tank empty and dry fired 5 or 6 times to relive pressure in the HUMA reg. Time to replace the crusty Dowty washer.
So much better. Little bit of sili Super Lube...
Reinstall and tighten properly. Time to remove the reg.
Last edited:
Upvote 0
Time to attack the mighty reg. Zoom in and notice how squared off the third and fourth o-rings are. Yeesh.

Let's pop these nasty rings off.

On the innards:

Note- check your delrin spacer! If it has this indent, flip it so you have a new flat surface against the piston. See mine:


Let's pop these nasty rings off.
On the innards:
Note- check your delrin spacer! If it has this indent, flip it so you have a new flat surface against the piston. See mine:
Upvote 0
All new o-rings across the board!

I decided to take off the trigger group housing for kicks. Four bolts and she comes right off. Be careful of the small spring under the bolt below the power adjustment knob - it pressurized the detent for the adjuster.


I had some oil seepage under mine - wiped the majority off and re-assembled. I decided not to remove the trigger group pins.

I decided to take off the trigger group housing for kicks. Four bolts and she comes right off. Be careful of the small spring under the bolt below the power adjustment knob - it pressurized the detent for the adjuster.
I had some oil seepage under mine - wiped the majority off and re-assembled. I decided not to remove the trigger group pins.
Upvote 0
Final steps - reinstall the reg, pressurize the tank (slowly) and do a couple of test fires. I set the reg low as it will allow me to test and hopefully tune Baracuda Match 21.14gr lead to 900fps via a 95% knee tune!

Upvote 0
As far as a parts list and descriptions are concerned here is something (in pdf format) I came up with back in Dec 2020. It may or may not be accurate so use it only as a guide.
View attachment Bantam parts list and schematic.pdf
View attachment Bantam parts list and schematic.pdf
Upvote 0
That's totally wicked. Thank you!!!As far as a parts list and descriptions are concerned here is something (in pdf format) I came up with back in Dec 2020. It may or may not be accurate so use it only as a guide.
View attachment 273045
Upvote 0
Wow nice right up and photos. This rifle sure looks like it's designed for easy maintenance.
Upvote 0
Update post - rebuild!
1.Blown Breech Seal
About 100 shots through today with no issues! Fixed.
2.Trigger release when on "SAFE"
Fixed prior to rebuild by adjusting trigger.
3.Gurgle noise post-shot
Gone - determined the issue to be too much hammer spring
4.Occasional inconsistent shot strings
Standard deviation now at 2 fps. I'll take that.
5.Air loss at fill port
Fixed with new dowty washer.
As you can see, a couple new o-rings and all issues are gone!
Here's how today went down-
My target was 900-910 fps with the 21.14gr Baracuda.
Started out with the reg low, around 130 bar. Was getting a max velocity (hammer all way in) around 920, so I increased to 150 (gradually, chronoing in between) to get to 950fps. With the hammer spring in, I was still getting a gurgle (fluttering of reg needle) post-shot. By then turning the hammer adjuster down to hit 905 fps, the gun sounded beautifully and most of my shot strings had an extreme spread of less than 10fps.
I noticed a HUGE increase in shot count with this tune as after 35 shots, my tank pressure dropped from 250 to 225 bar. Doing a basic calculation, I am seeing close to 1.8 fpe/CI factoring in the 480cc tank.
I started noticing shot variance around 160 bar, 10 bar over the reg pressure. I'll be doing more testing with longer shot strings... because who doesn't like math?
I'm extremely happy with this and I plinked a bit at 100yds (45mil on the Optisan) with great results. Overall, this rebuild was a success and I hope this helps someone else with this beast of a pcp!!
1.
About 100 shots through today with no issues! Fixed.
2.
Fixed prior to rebuild by adjusting trigger.
3.
Gone - determined the issue to be too much hammer spring
4.
Standard deviation now at 2 fps. I'll take that.
5.
Fixed with new dowty washer.
As you can see, a couple new o-rings and all issues are gone!
Here's how today went down-
My target was 900-910 fps with the 21.14gr Baracuda.
Started out with the reg low, around 130 bar. Was getting a max velocity (hammer all way in) around 920, so I increased to 150 (gradually, chronoing in between) to get to 950fps. With the hammer spring in, I was still getting a gurgle (fluttering of reg needle) post-shot. By then turning the hammer adjuster down to hit 905 fps, the gun sounded beautifully and most of my shot strings had an extreme spread of less than 10fps.
I noticed a HUGE increase in shot count with this tune as after 35 shots, my tank pressure dropped from 250 to 225 bar. Doing a basic calculation, I am seeing close to 1.8 fpe/CI factoring in the 480cc tank.
I started noticing shot variance around 160 bar, 10 bar over the reg pressure. I'll be doing more testing with longer shot strings... because who doesn't like math?
I'm extremely happy with this and I plinked a bit at 100yds (45mil on the Optisan) with great results. Overall, this rebuild was a success and I hope this helps someone else with this beast of a pcp!!
Upvote 0