• The AGN App is ready! Search "Airgun Nation" in your App store. To compliment this new tech we've assigned the "Threads" Feed & "Dark" Mode. To revert back click HERE.

AEA Post Your AEA Challenger Mods (Not Pro Version)

One of my sons picked up this preowned AEA Challenger bullpup in .30 cal with the 32" barrel and I've been fiddling with it the last few weeks making modifications to correct some of it's shortcomings. I've posted some of these in other threads but I thought I'd put it all in one thread to make the info easier for other challenger owners to find.
If you own an AEA challenger (not the Pro versions) with modifications post yours here too, any caliber.

One bad thing about the .30 cal is that it doesn't have a cocking lever. It has a short little bolt handle that can be difficult for some people to use especially with the heavy hammer spring installed. The gun doesn't cock until the last mm of travel and most people have to put their thumb on the back of the receiver to get the job done.
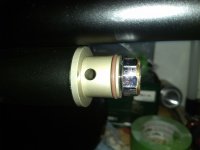
My fix. I turned a new handle 18mm x 60mm from 6061T6 aluminum and the shaft 7.25mm M6x1.25 thread from 303 stainless. I tried a knurled one but smooth feels way better.
Callenger H.jpg


These unregulated airguns make big power with 100+ grain slugs and they're loud without a suppressor. I turned this one from 6061 aluminum measuring 40mm ID x 194mm.
It's an open can style using air stripper baffles 3d printed from PETG material for toughness. I tested the baffles with different clearances and settled on 8.2mm for the first 5 and 8.3mm for the exit baffle. Sounds like a 60p nail gun when you keep the slugs subsonic. Clear view and cutaway pics of the baffles to see how high velocity air gets stripped away from the slug and delayed via a longer travel path. This type has much less turbulence and is more effective than the aluminum core type with felt wrap because the high velocity air passes the projectile in those. If you have access to a lathe this type suppressor costs less than $20 to produce.
1703540413377.jpeg

1703540497818.jpeg
1703540469816.jpeg
1703540534297.jpeg

1703540599711.jpeg


Next problem was PING. I designed this de-pinger and spacer to take the ping out without affecting power.
The depinger must be printed solid/100% infill. The spacer keeps it 150mm above the valve. I printed this in PETG material for toughness.
Printers vary so be sure both parts fit in the tube just slightly snug. You need to resize in your slicer and reprint if not.
Installation...
1- Degass the gun by backing the gauge out until the air leaks out.
2- Unscrew the air tube cap that the gauge is in.
3- Put the spacer in, put the de-pinger in next then push them down the tube carefully until they stop.
4- Reassemble in reverse order.
5- Cock the gun and put the safety on to keep the valve closed when airing up from empty, otherwise air will go out the barrel without building pressure.
Download from thingiverse
1703541695197.jpeg
1703541714676.jpeg
1703541734397.jpeg


I wanted to use a bipod and have better barrel support so I designed this barrel band with a picatinny rail. It's printed in carbon fiber nylon material to make it almost as strong as aluminum and is free to download and use as you wish. https://www.thingiverse.com/thing:6273712
Call Pic BB.jpg


The trigger on these airguns is super heavy so I did a trigger job to bring the single stage trigger down to less than a pound but I didn't take pictures.

I'll be designing a cheek rest soon.
 
Last edited:
This man has a trigger job video for AEA Challengers so I'll put it in to save me some time. One thing I would do different is glue a strip of 150 grit sandpaper to a rigid bar of metal about a foot long to remove material from the sear and then polish with a rotary tool using a felt wheel with compound.
 
This man has a trigger job video for AEA Challengers so I'll put it in to save me some time. One thing I would do different is glue a strip of 150 grit sandpaper to a rigid bar of metal about a foot long to remove material from the sear and then polish with a rotary tool using a felt wheel with compound.
My trigger wasn't nearly as bad as the man had it in that video. I still had it polished and it breaks crisp, however at full tank pressure it is still a very heavy trigger.
 
  • Like
Reactions: RM.510bigbore
My trigger wasn't nearly as bad as the man had it in that video. I still had it polished and it breaks crisp, however at full tank pressure it is still a very heavy trigger.
Tank pressure wouldn't affect trigger pressure since they're not connected to one another. After you pull the trigger the hammer strikes the valve poppet, there is no connection beforehand. Trigger pull should be the same from 0-4500psi.
Remove material to shorten sear overlap/engagement (while keeping it square) to minimum safe engagement so that the gun won't fire if bumped hard then polish and add a dab of silicone grease. You should have a consistent trigger of 1 pound or less following those steps.
 
  • Like
Reactions: Dogowsky
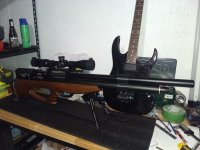
  • Applied blue Loctite to every damn bolt
  • Trigger polished
  • Fixed sock to avoid sporadic interference with action
  • Straightened the barrel https://www.airgunnation.com/threads/shot-my-510-challenger-bullpup.1297761
  • Replaced barrel O-rings with Nitrile ones (better for cold weather)
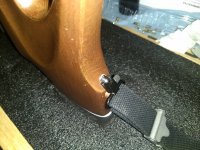
  • Installed swivels
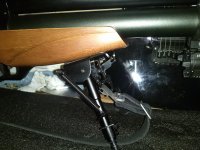
  • Swivel-mounted bi-pod
  • Sling
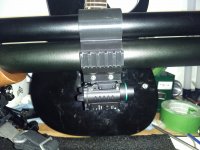
  • Crappy barrel band that does not band anything together, but has a Picatinny rail for flashlight/laser pointer
  • Replaced air tank O-ring with a thicker version, so the cap does not fly away after every shot
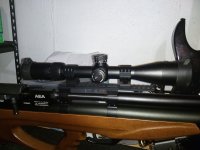
  • 1-16x scope
It weights "only" 19 lbs with the scope 😅 Which is 3x more than the scout rifle weights, but takes down anything at 100 yards.

_IMG_20231223_113413709.jpg_IMG_20231228_124938961.jpg_IMG_20231228_124947264.jpg_IMG_20231228_124954790.jpg_IMG_20231228_124959682.jpg_IMG_20231228_125010031.jpg_IMG_20231228_125051581.jpg
 
Tank pressure wouldn't affect trigger pressure since they're not connected to one another. After you pull the trigger the hammer strikes the valve poppet, there is no connection beforehand. Trigger pull should be the same from 0-4500psi.
Remove material to shorten sear overlap/engagement (while keeping it square) to minimum safe engagement so that the gun won't fire if bumped hard then polish and add a dab of silicone grease. You should have a consistent trigger of 1 pound or less following those steps.
Well, at least 2 persons who shot that gun noticed it. The trigger breaks over noticeably easier when the tank is half empty.
 
I don't know what could cause that because they are no more connected than the gun and a target. There is no physical way for tank pressure to increase trigger pressure.
I can speculate it's because of metal shrinkage/expansion. Were shooting it in 13 degrees weather. The gun had more than enough time to cool to ambient temp while filling up. Then it shot a full magazine (6 slugs). Friction may have heated it up sufficiently for metal to expand and reduce strain.
 
I can speculate it's because of metal shrinkage/expansion. Were shooting it in 13 degrees weather. The gun had more than enough time to cool to ambient temp while filling up. Then it shot a full magazine (6 slugs). Friction may have heated it up sufficiently for metal to expand and reduce strain.
The only way that could be possible is for the trigger rod to be adjusted to hold the trigger in it's forward most position. Otherwise the trigger itself would pivot on it's fulcrum without affecting sear engagement.
 
I couldn't find a .30 caliber single shot tray stl. file for 3d printing so I designed a tray.
Free to download and use as you like. https://www.thingiverse.com/thing:6409185
You'll need to glue a washer into the spot provided underneath to utilize the magnet in the gun's receiver.
I just published it so if you don't see it at the link provided just check back in a while.
Chall.SST.30 -.jpg
 
  • Like
Reactions: Dogowsky
Let talk about a little power increase. You'll need to shoot 100-120gn slugs to reach this airgun's full power potential. .303 diameter.
If you don't have the hammer spring for 4500psi I recommend you order one from Fox Airpower. They have them for $15 even though the site says sold out so you have to email them. Here's the part link.


The challengers have a reduced diameter section of the barrel directly over the valve transfer port with 6 little radial ports in the barrel rather than one large port like most airguns. The tiny radial ports have an unintentional raised burr around them that impedes airflow. For a bump in power open each one of the six ports to double it's original size and give them a generous chamfer. This can be done inside and out by holding your rotary tool at an angle and orbiting around the hole while maintaining the angle.
The barrel is removed by loosening the 4 little allen bolts that clamp the barrel and air tube under the picatinny rail and then loosen the 19mm barrel nut and screw the barrel out. Use the magazine to set the barrel depth when reinstalling and don't make the gap too tight.
Here are some quick and dirty renders of the barrel and port arrangement to help visualize them.
Chall30Ports -.jpg
2Chall30Ports -.jpg
 
Let talk about a little power increase. You'll need to shoot 100-120gn slugs to reach this airgun's full power potential. .303 diameter.
If you don't have the hammer spring for 4500psi I recommend you order one from Fox Airpower. They have them for $15 even though the site says sold out so you have to email them. Here's the part link.


The challengers have a reduced diameter section of the barrel directly over the valve transfer port with 6 little radial ports in the barrel rather than one large port like most airguns. The tiny radial ports have an unintentional raised burr around them that impedes airflow. For a bump in power open each one of the six ports to double it's original size and give them a generous chamfer. This can be done inside and out by holding your rotary tool at an angle and orbiting around the hole while maintaining the angle.
The barrel is removed by loosening the 4 little allen bolts that clamp the barrel and air tube under the picatinny rail and then loosen the 19mm barrel nut and screw the barrel out. Use the magazine to set the barrel depth when reinstalling and don't make the gap too tight.
Here are some quick and dirty renders of the barrel and port arrangement to help visualize them.
View attachment 420587View attachment 420588
I did this as one of my first mods to the 457 bullpup a few years back, using a center drill to simultaneously enlarge and taper the holes. It works great for adding airflow because each hole is creating a venturi of sorts where airflow is increased.
 
Non-pro woodworking and refinish to put the 457 Challenger Bullpup's heavy stock on a needed diet and balance the weight some...

Tools and chemicals: antique electric jig saw and thin wood bit, electric drill with 50 grit sanding disk, Dremel Tool with long spiral carbide bit, Diablo SandNet sandpaper sheets 120-320 grits, paint and varnish remover used with 00 steel wool, oil based stain and Minwax polyurethane.

I cut almost 1 1/2" of wood off the back end and contoured it so the length of pull is close to 14" now, and nearly as short as I could make it with the mounting screw hole The jig saw was used to cut the excess center wood out, following the contour lines. The drill and 50 grit sanding disk hogged wood off the fat fore stock, loosing about half inch of width total, and helped to round and flow the inside corners to match the contour lines. The Dremel Tool and long spiral fluted carbide bit was used in the center section to work the radiuses and angles smooth that could not be gotten with the sanding disk. With everything close to the look I wanted, I broke out the new Diablo sandpaper sheets I found at Ace Hardware. The Diablo SandNet sandpaper is a sweet bit of Swedish technology that really helped to remove wood and get the profiles and grip corners rounded smooth and in a hurry too.

I left the factory stained finish on until the end to use as a working guide to keep the sides even, stripping it before the final finish sanding. I stained the white beech wood with my golden oak and dark walnut oil based stain mixture and put the Minwax polyurethane on it in several coats. The finish is really the hardest part to get right, because I am not a woodworker. I've gone over it a half dozen times now and it's drying again after this picture. We'll see in a few days if I looks good enough to hunt.
Screenshot_20240102-203400.png
 
I’m thinking about keeping my challenger to play around with. I noticed when you pull the lever back to load the mag, there’s an extra 1-2mm on the tip of the bolt that makes it difficult to actually get the mag to slide in. I didn’t understand how the transfer port worked until I saw your render @heavy-impact. Would you say the holes are actually that close to where the projectile gets seated or is it not to scale? Maybe I’d need to drill new ones a bit further back. Of course I’d take measurements first but this is great info. Thank you!
 
@Bernie7 where a picture of where my probe sits when cocked, recessed about .015" clear of the magazine well. This is as far back as it can go. You're bolt probe length may need to be addressed, or whatever it is hitting against that prevents it from going back further. Alternatively, the barrel can be recessed a little bit more to give the magazine more room.

IMG_20240103_003044397~2.jpg


Here's a picture of my enlarged and modified port holes. My slugs sit quite a ways inboard of them, just over 1/4". Looking into your breech with a seated slug will tell you how far your slugs are away from the port holes, and will give you an idea of how far to go in enlarging or angling them towards the bore. With these guns, every one of them is likely going to be a little bit different based on how far the barrel is threaded into the magazine well (and as evidenced by the bolt probe in your gun).


Screenshot_20240103-003535~2.png
 
Last edited:
  • Like
Reactions: Bernie7
I’m thinking about keeping my challenger to play around with. I noticed when you pull the lever back to load the mag, there’s an extra 1-2mm on the tip of the bolt that makes it difficult to actually get the mag to slide in. I didn’t understand how the transfer port worked until I saw your render @heavy-impact. Would you say the holes are actually that close to where the projectile gets seated or is it not to scale? Maybe I’d need to drill new ones a bit further back. Of course I’d take measurements first but this is great info. Thank you!
My render was just a quick and dirty visualization, not to scale.