A lot of people are getting there new FX rifles in and to keep any one from messin up there new guns, I thought I would share how I mounted my Atlas Bipod Rail.
This is not the only way to accomplish this, put I am very certain you will not be pulling any fasteners out using this method.
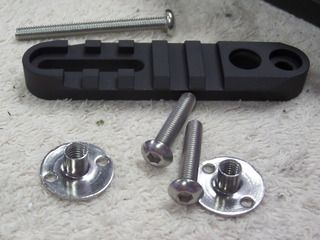
Here’s what you need:
- 2, 10-32 T-Nuts as shown in the Photo 1 – get 3 one extra in case you lose one or mess one up. If you can only find the ones with the sharp points on them that ok - you will have to remove them.
- 2, Button Head - Socket Cap Screws, 10-32 x 1.00 Lng
- A hand drill or if you are lucky a drill press
- A couple drills – I used a .234 and center drill. The size will depend on the outer diameter of the barrel of the T-Nuts
- A file or grinder
- A sharp pointy object like an awl or scribe
- Something small and square - a playing card - T-square - credit card
- Black electrical tape
[/LIST=1]
Photo 1
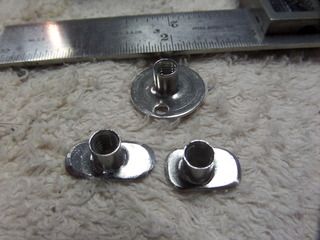
Alright let get started - You need to modify the T-Nuts as shown in the photo 2. One of the T-Nuts may need one of the ears shortened to clear the set screw in the stock where the little rubber ball gets tightened up to hold the reservoir tube. You may not need to do that depending on how you orient the rail where you want it positioned.
Photo 2
Next – Locate the rail so you will have access to the reservoir set screw – I positioned mine to gain access through the large hole. When you get it exactly positioned, using your sharp pointy thing, scribe around the small hole hard enough to leave a mark. Remove the rail and use the pointy thing push it in to the stock to mark the center or the scribed circle. Mark only this hole at this time.
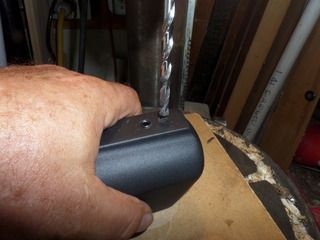
Now take a small drill, say 1/8 dia and drill down about 1/8 inch only. I used a center drill that drills a small hoe and counter sink it at a 60 deg to help lead a larger drill. Photo 3. Now find a drill that is just slightly smaller than the barrel of the T-Nut. My T-Nut was .236 and the closest drill was a .234. If you only have a hand drill then you might have to ask for some help here to drill this hole straight. I know, I hate it when I have to ask the wife for help, so just go next door and ask the neighbor. You are going to drill a hole through the one surface and you want it straight, so if you have something like a small T-square then that will work. If not a credit card will work, if you still have one after buying this rifle, haven’t cut it up or the wife hasn’t taken it away. Have the neighbor hole it up to align the drill and tell you if you are straight and SLOWLY drill straight through the stock. The stocks material is fairly soft and may try to grab the drill and pull it through, so go slow. I am lucky enough to have a drill press. Photo 4.
Photo 3
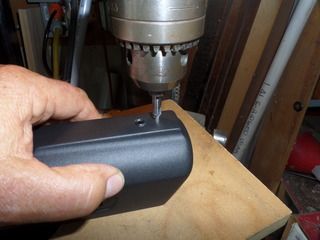
Photo 4
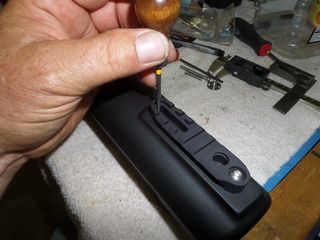
That done, install one of the modified T-Nuts into this hole and install the rail to the stock using one of the Button Head Screws and lightly tighten it down after precisely positioning the rail exactly where you want it. Now scribe a mark at the radius of the slot. Photo 5. Remove the rail and using the pointy thing press it into the stock at the center of the radius and drill the hole as you did before. You'll owe the neighbor a beer if he has waited around for this.
Photo 5
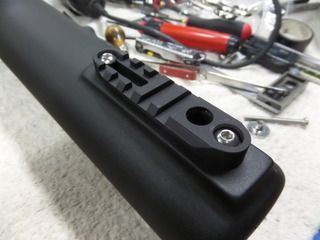
Now install the T-Nuts – check that the set screw is not being blocked by the T-Nut – install the rail with the screws and snug up the screws. Photo 6. The last thing to do is, replace the rubber ball into its hole and using a piece of black electrical tape cover the T-Nuts and ball with the tape so you won't be dragging your reservoir tube across the T-Nuts and scratching it up, reassemble your rifle – You are done – good job – now go shoot.
Photo 6