Picatinny Top Rail Sorry on the recent lack of posts, been doing a lot of travel in the last few months.
As I have mentioned previously, I prefer a scope. For those who like a red dot site, the very popular mount seems to be great. But I prefer some magnification--in which case the dovetail really doesn’t reach back far enough on the pistol.
In fact, my favorite scope is my Hawke Airmax Touch--this scope you put your eye right up to the back of the scope, so it needs to be mounted really far back.
There are various dovetail to picatinny offset rails on the market.
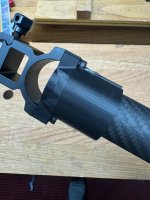
I started off with this one, but really I wanted a picatinny rail that pretty much runs the length of the pistol, even past the back, beyond the iron sights (red line).
So I started to plan my design:
There are a few important clearance points. Obviously you have the dovetail mounting area to the left in order to land a dovetail clamp.
There is a raised bump at the red circled screw.
The blue arrow is the back mount, where I will utilize the iron site screw mount, M3 threaded.
I also discovered that the iron site rises a little just past the screw mount, so that it is not exactly flush with the top of the pistol (green outline).
Here was my design:
Off to the 3D printer.
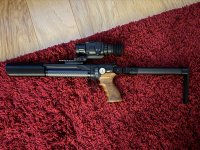
And mounted up with my scope.
By the way, this scope--the Hawke Airmax Touch--is just awesome. I don’t have decades of hunting expertise, but I feel like this scope is a bit of a gamechanger. Specifically designed for rifles with minimal recoil, the eye relief is super short (technically 30mm). Basically you put your eye right up to the scope. It’s so easy to use--I don’t find I need a butt plate to index my face, and search for the proper eye relief. Just put your eye up to the scope.
The close eye relief apparently gives it its super large field of view. It’s large enough that I often work with both eyes open.
The focus is 10 yds to infinity, obviously it has a side wheel for parallax focus.
Mounting can be a little challenging, as it needs to sit way back, in order to be closer to the shooter's face.
The only downside I find, is that I can’t find flip up scope caps that work well with the super close eye relief.

