Hey Guys,
Since there a a couple of questions about installing QF into Rapid.
I decide to help everyone out who is interested..
This will be a post on How I install the QF kits by Dr Bob and RAW.
This includes any mods I do!
For installing the RAW QF: Part 2...
First let’s get started, who is Dr Bob.. And what is different about his QF kit.
Dr Bob is a friend of mine I have never met face to face. He lives in the UK!
He is a retired QA Engineer with a passion for Rapids!!!
Once Martin move operation over here. This left a big hole in the UK!!
Especially since Airguns is basically the only thing you can own without a license(under 12fpe)
So Dr Bob start a company to make parts for the Rapid!!
Now abit about his version of the QF..
If the part is in contact with pressure or involves the trigger/hammer system...
A Licensed gunsmith has to install it or you have go to one to purchase the part/s....
The quirk is the bottle!!!!!
You are permitted to freely purchase and "Bottle" parts...online through the mail...
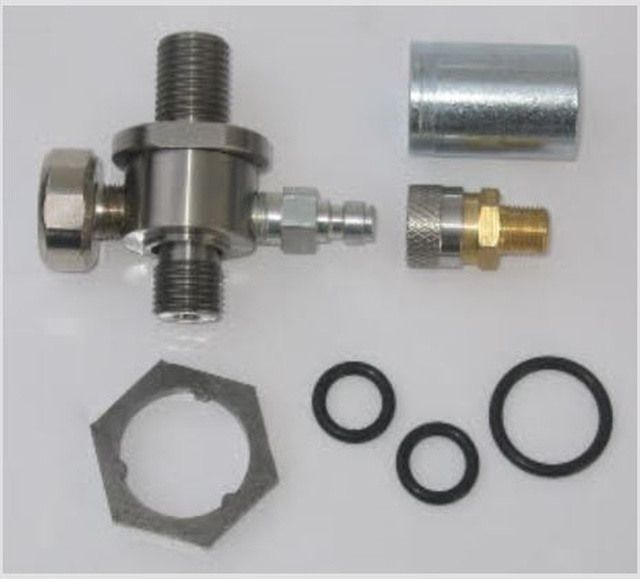
So Dr Bob's QF kit has a stem that replaces the stock valve assembly, and a banjo fitting.
Then this assembly screws directly into the Rapid’s FF or Reg Bottle adapter.
I used a tool I had made up to remove the stock Rapid valve. You can use the tool that Dr Bob
Includes in his kit.
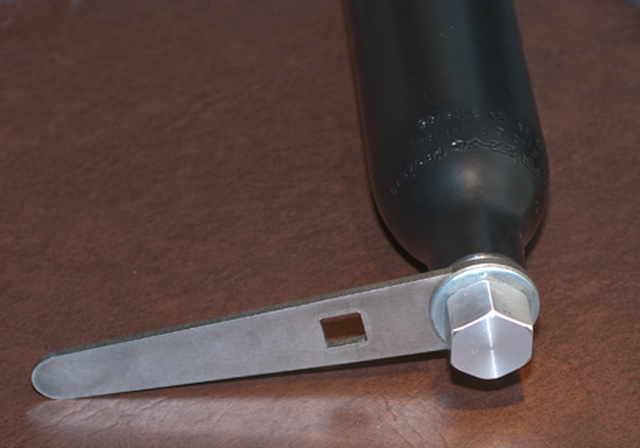
Mine has a square hole so I can use my ½” breaker bar.
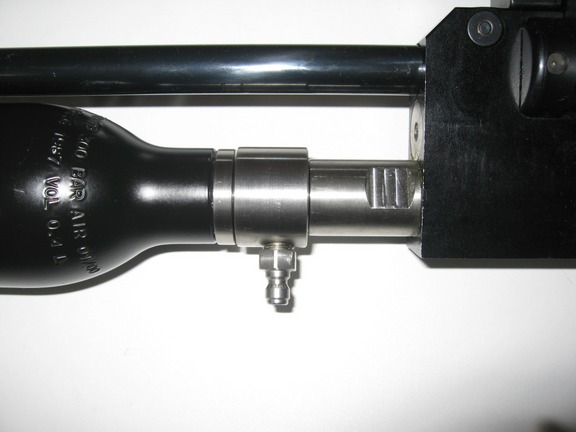
Next come installing of the QF stem into the bottle and slide the banjo fitting on.

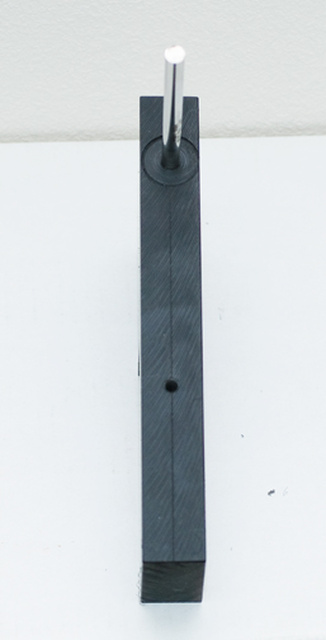
Now come the sweaty palms… Drilling the Stock for the QF access.
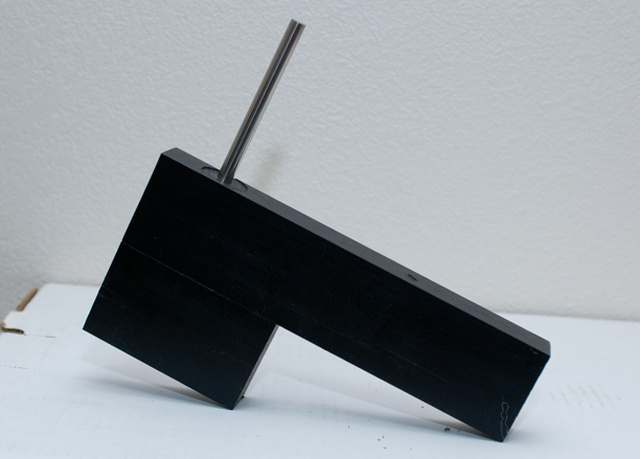
I made a drilling jig out of Delrin.
It has threaded hole to use the standard stock securing cap screw. Then I precisely measured
the locating hole for the guide pin where QF nipple access hole need to be.
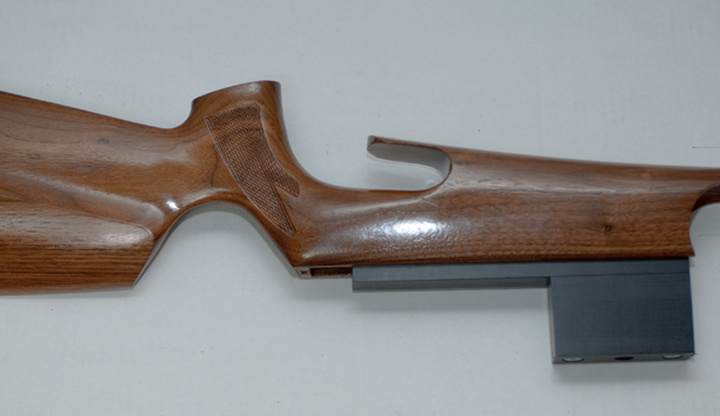
So I would clamp my jig in my vise on my Mill. Next position the table so the guide pin
Easily slip into the hole in the jig. Then you screw the stock onto the jig.
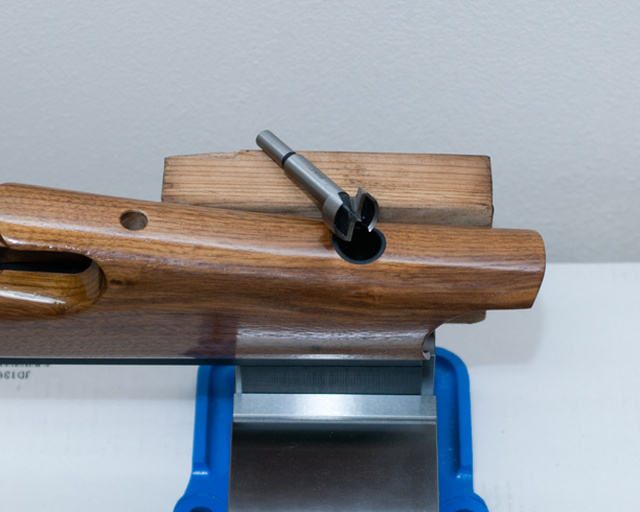
To drill the access hole, I use a sharp 1 inch Forstner Bit.
Now come the technical part.. I machined and contoured a Delrin liner, cap and grip extension for the QF socket

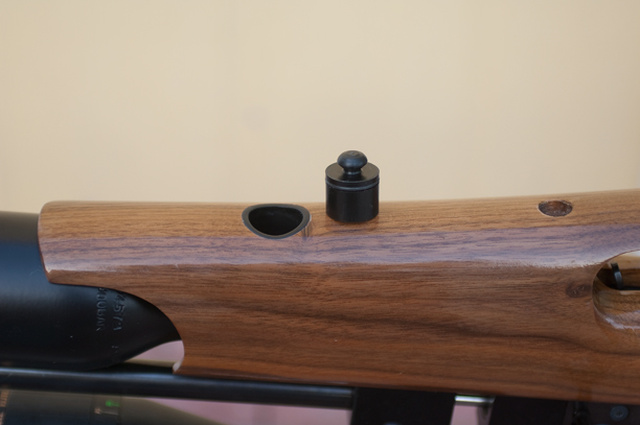


Btw… I did plug the hole for the gauge, since I have a shroud, I don’t use one.
No to bad for my first one…..
Stuart
Since there a a couple of questions about installing QF into Rapid.
I decide to help everyone out who is interested..
This will be a post on How I install the QF kits by Dr Bob and RAW.
This includes any mods I do!
For installing the RAW QF: Part 2...
First let’s get started, who is Dr Bob.. And what is different about his QF kit.
Dr Bob is a friend of mine I have never met face to face. He lives in the UK!
He is a retired QA Engineer with a passion for Rapids!!!
Once Martin move operation over here. This left a big hole in the UK!!
Especially since Airguns is basically the only thing you can own without a license(under 12fpe)
So Dr Bob start a company to make parts for the Rapid!!
Now abit about his version of the QF..
If the part is in contact with pressure or involves the trigger/hammer system...
A Licensed gunsmith has to install it or you have go to one to purchase the part/s....
The quirk is the bottle!!!!!
You are permitted to freely purchase and "Bottle" parts...online through the mail...
So Dr Bob's QF kit has a stem that replaces the stock valve assembly, and a banjo fitting.
Then this assembly screws directly into the Rapid’s FF or Reg Bottle adapter.
I used a tool I had made up to remove the stock Rapid valve. You can use the tool that Dr Bob
Includes in his kit.
Mine has a square hole so I can use my ½” breaker bar.
Next come installing of the QF stem into the bottle and slide the banjo fitting on.
Now come the sweaty palms… Drilling the Stock for the QF access.
I made a drilling jig out of Delrin.
It has threaded hole to use the standard stock securing cap screw. Then I precisely measured
the locating hole for the guide pin where QF nipple access hole need to be.
So I would clamp my jig in my vise on my Mill. Next position the table so the guide pin
Easily slip into the hole in the jig. Then you screw the stock onto the jig.
To drill the access hole, I use a sharp 1 inch Forstner Bit.
Now come the technical part.. I machined and contoured a Delrin liner, cap and grip extension for the QF socket
Btw… I did plug the hole for the gauge, since I have a shroud, I don’t use one.
No to bad for my first one…..
Stuart
Last edited:
