Next step is to move over to the mill to machine the flat for the set screw and open up a transfer port.
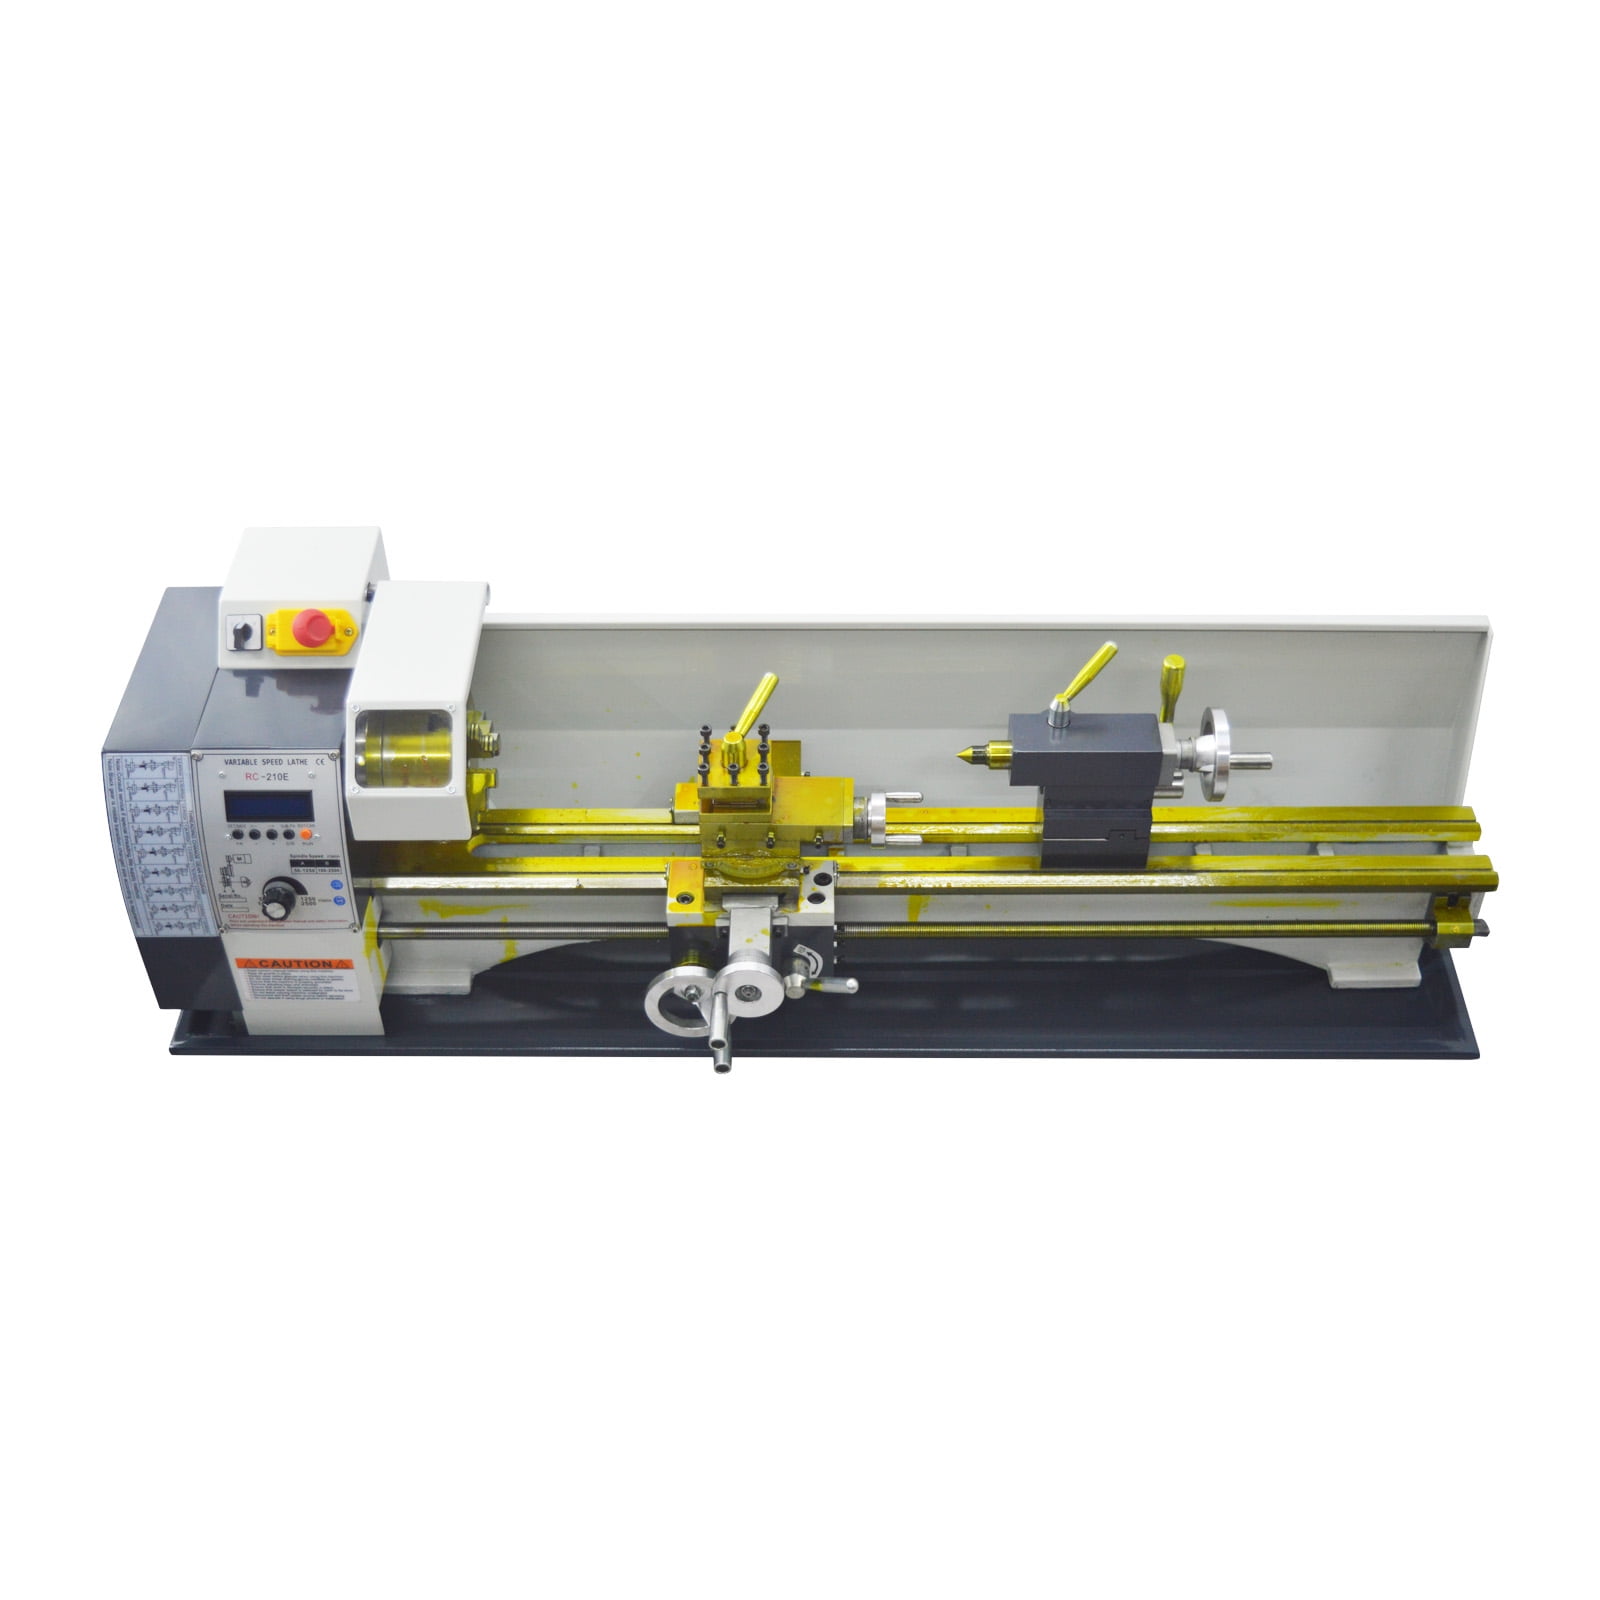
Due to the stick out, to reduce chatter I supported the end of the barrel.
Transfer port was cut to similar dimensions as my .22 FX barrel.
I skipped a picture of the process, but you can also see the .055" deep locating boss on the end of the barrel. I cut that on the lathe. Dimensions matched the .30 cal BRK barrel.
I ordered a .22 BRK Ghost magazine from AoA to check the recess cut for locating the magazine. The .22 mag and the .30 mag both had the same size features so I sized it accordingly.

Back to the mill for the O-ring groove on the ID. This was the trickiest part. Its very hard to cut an accurate internal o ring groove (gland) in a bore so small.
I was able to find a suitable solid carbide cutter from McMasterCarr that fit the bill.
With light cuts, it did a great job.
For o-ring grooves (glands). To get proper "squeeze," the standard is to have the O-ring groove depth 10% shallower than the O-ring cross sectional diameter. I inteded to use a 1.5x5.5mm O ring. I made a mistake here and cut the groove depth 10% shallow based on the ID bore of the rifling. When I test fitted the pellet probe. It was loose. I should have factored in the diameter of the pellet probe instead. Fortunately, I had some larger o-rings and ended up widening the groove to accommodate a 1.78x5.28 o-ring. Perfect!

Now the trickiest part. Cutting the chamfer where the treads start (just after the transfer port). I couldnt find much info on the internet on this, but the sub12airgunners channel indicated he had used a tapered dremel stone to grind the leade. I went to my dremel cutter assortment and was disappointed to find out that all of the dremel stones I had were horribly off center on the stem. I fixed this by ordering some quality dremel stones off McMasterCarr with the taper specs I was looking for. They spun true. Its hard to get a good photo of this, but you can see in the picture below the taper ground into the start of the rifling. I took this photo mid-grinding as I continuously checked on my progress with the bore scope. The final result was ground smooth so the transition line just before the taper was eliminated. I followed up with some polishing. I used Wheeler's 600grit lapping compound on a fluffy .22 bore cleaner, followed up with some JB bore paste to refine it further.

The pic below shows the position of the leade in relation to the transfer port. The rifling starts tapering just after the hole.

I should have put this pic in the beginning, but I bore-scoped all 3 LW barrels. They were in superb condition! The rifling was fantastic and there were no defects, chatter marks, or evidence of dull tooling, etc. Here's a pic of the .22 bore.
Here's the finished barrel on the bench. The last step was to clean it out and push a pellet through to make sure there is no deformation or defects imprinted into the pellet which would cause instability.

Very happy with that result! Pardon the dirty fingers.

Next up will be the machining of a .22 pellet probe. I found the factory Ghost .30 probe didnt fully seat the pellet skirts all the way into the rifling.
I'll be fixing that with my custom probe. I'll take some pics a make a short write up on that process as well.
I plan to have that done tomorrow so I'll also follow this up with some 100y groups.
This has been a lot of work, so this thing better shoot!
Brian
Due to the stick out, to reduce chatter I supported the end of the barrel.
Transfer port was cut to similar dimensions as my .22 FX barrel.
I skipped a picture of the process, but you can also see the .055" deep locating boss on the end of the barrel. I cut that on the lathe. Dimensions matched the .30 cal BRK barrel.
I ordered a .22 BRK Ghost magazine from AoA to check the recess cut for locating the magazine. The .22 mag and the .30 mag both had the same size features so I sized it accordingly.
Back to the mill for the O-ring groove on the ID. This was the trickiest part. Its very hard to cut an accurate internal o ring groove (gland) in a bore so small.
I was able to find a suitable solid carbide cutter from McMasterCarr that fit the bill.
With light cuts, it did a great job.
For o-ring grooves (glands). To get proper "squeeze," the standard is to have the O-ring groove depth 10% shallower than the O-ring cross sectional diameter. I inteded to use a 1.5x5.5mm O ring. I made a mistake here and cut the groove depth 10% shallow based on the ID bore of the rifling. When I test fitted the pellet probe. It was loose. I should have factored in the diameter of the pellet probe instead. Fortunately, I had some larger o-rings and ended up widening the groove to accommodate a 1.78x5.28 o-ring. Perfect!
Now the trickiest part. Cutting the chamfer where the treads start (just after the transfer port). I couldnt find much info on the internet on this, but the sub12airgunners channel indicated he had used a tapered dremel stone to grind the leade. I went to my dremel cutter assortment and was disappointed to find out that all of the dremel stones I had were horribly off center on the stem. I fixed this by ordering some quality dremel stones off McMasterCarr with the taper specs I was looking for. They spun true. Its hard to get a good photo of this, but you can see in the picture below the taper ground into the start of the rifling. I took this photo mid-grinding as I continuously checked on my progress with the bore scope. The final result was ground smooth so the transition line just before the taper was eliminated. I followed up with some polishing. I used Wheeler's 600grit lapping compound on a fluffy .22 bore cleaner, followed up with some JB bore paste to refine it further.
The pic below shows the position of the leade in relation to the transfer port. The rifling starts tapering just after the hole.
I should have put this pic in the beginning, but I bore-scoped all 3 LW barrels. They were in superb condition! The rifling was fantastic and there were no defects, chatter marks, or evidence of dull tooling, etc. Here's a pic of the .22 bore.
Here's the finished barrel on the bench. The last step was to clean it out and push a pellet through to make sure there is no deformation or defects imprinted into the pellet which would cause instability.
Very happy with that result! Pardon the dirty fingers.
Next up will be the machining of a .22 pellet probe. I found the factory Ghost .30 probe didnt fully seat the pellet skirts all the way into the rifling.
I'll be fixing that with my custom probe. I'll take some pics a make a short write up on that process as well.
I plan to have that done tomorrow so I'll also follow this up with some 100y groups.
This has been a lot of work, so this thing better shoot!
Brian