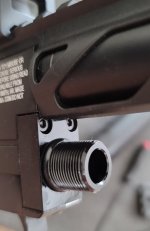
Tuning Umarex Notos has arrived.

i think you should go with a 22ci carbon fiber bottle. Smaller diameter bottle. I really wanted to build the bottle. But I got 5 project guns and not building any more. I need to tears stuff up and sell all the project parts. I sawed out that angle like your gun hate it hitting my wrist all the time.
I'm using 17 ci First Strike bottle on my second Notos. I like this bottle and reg combo, shortest regulator and bottle diameter is 2" only. I did have to change the reg springs to disk type to get the pressure up to 2200 psi. getting close to 940 f/s on crosman 7.9 gr out of 16" .177 cal barrel.
 
Thanks for the response. Looks like you got around 40 shots before you came off the regulator which is very good for 700 plus fps. I guess you did not adjust your regulator but did you turn your hammer spring adjuster to minimum and what type and spec compression spring did you use. Thanks Bill
I did adjust the reg bout 1/8 turn CW on the reg. couple more adjustments CW down to 490+. now working CCW back up to 675fps hopefully
 
So my hammer spring setup top spring in pix is original HS. added a 5mm shim in the hammer in front of the softer spring I had.

DSCN0308.JPG
 
Guage block has arrived - do I need any o-rings or just take apart and attach?
Make sure everything is clean first as they come from the machine shop, machined, and sand blasted. So there can be sand and aluminum burrs floating around. I think mine had o-rings and a gauge. Make sure gauge is sealed up against oring otherwise it will leak. You will most likely need to notch the bottom of the moderator a bit so it does not rest against the tube. Or just leave the cap off.

Allen
Thanks - no o-rings in mine unless that thick white plastic circle is supposed to be it... Guess I need to order some parts which would be disappointing if correct ...
 
Gotta say guys I'm getting spoiled with this little gun. Alittle over 4lbs with my red dot. My Evol mini isn't heavy at 8lbs 3oz fully decked out ready to shoot. I've had many over 10lbs but man a little 4lb gun is really nice to quick grab.
It shoulders fast and easy and can drive tacks at 30 yards - crazy for the money and weight!
 
Gotta say guys I'm getting spoiled with this little gun. Alittle over 4lbs with my red dot. My Evol mini isn't heavy at 8lbs 3oz fully decked out ready to shoot. I've had many over 10lbs but man a little 4lb gun is really nice to quick grab.
I must agree. It’s just about the handiest little thing out there. Looking forward to seeing what emerges as aftermarket upgrades in the near future for it.
 
Thick white plastic circle is the seal that goes in the hole where the gauge goes. One of mine did not seal that well. Re use the ones that came with the gun for the other missing orings. And better yet measure and buy some extras


Allen

Thick white plastic circle is the seal that goes in the hole where the gauge goes. One of mine did not seal that well. Re use the ones that came with the gun for the other missing orings. And better yet measure and buy some extras


Allen
20230607_133030.jpg

Three screws hold the block that I can see... 1 on bottom and 2 in front as shown here.

To get these out, it looks like the handguard rail is in the way. Does anyone know if / how to get those screws out?

edit: Seems like the screw on top of the rail and then potentially a screw underneath that for the barrel would allow the whole assembly to come off - is that was has to be done?
 
Last edited:
The bottom flat head screw on the bottom in front the trigger guard helps hold the trigger guard. With the the stock off and under the hammer spring adjuster is a round Allen key screw think it’s 3mm unscrew that the bottom pistol gripe detaches.. I haven’t figured out how the barrel detaches.
Appreciate that info. If I understand correctly, that will still leave those 2 screws blocked.
I thought I remembered reading that the top screw on the handguard/rail can be removed. And underneath that was a loctite'd grub screw which secured the barrel. Maybe I am remembering incorrectly...was hoping there was a way to put in the gauge block without removing the barrel. Maybe that is not possible ... or maybe there is another way.
 
  • Like
Reactions: Genob
I'm using 17 ci First Strike bottle on my second Notos. I like this bottle and reg combo, shortest regulator and bottle diameter is 2" only. I did have to change the reg springs to disk type to get the pressure up to 2200 psi. getting close to 940 f/s on crosman 7.9 gr out of 16" .177 cal barrel.
I have 3 first strike bottles 15 and 2 13ci . would have bought a 17 but it would have looked funny on either one of my bottled shooters.
 
  • Like
Reactions: Genob
Appreciate that info. If I understand correctly, that will still leave those 2 screws blocked.
I thought I remembered reading that the top screw on the handguard/rail can be removed. And underneath that was a loctite'd grub screw which secured the barrel. Maybe I am remembering incorrectly...was hoping there was a way to put in the gauge block without removing the barrel. Maybe that is not possible ... or maybe there is another way.
Take a look at the new block I believe there are 4 actually maybe 5 holes for bolts I am not at home right now, but from memory 2 in front one from the grip (actually have to remove the rear for the grip too) then 2 more under on the backside once you remove the grip.

Allen
 
View attachment 362741

Three screws hold the block that I can see... 1 on bottom and 2 in front as shown here.

To get these out, it looks like the handguard rail is in the way. Does anyone know if / how to get those screws out?

edit: Seems like the screw on top of the rail and then potentially a screw underneath that for the barrel would allow the whole assembly to come off - is that was has to be done?
That block holds the poppet valve spring. There are 4 allen screws holding it. First you have to remove the barrel and shroud as a unit. Top rail has a screw you remove this first, then under it is another set screw for the barrel retainer. It is a 1.5mm allen and has a thread locker, you may need to heat it if too tight. After this you can slide the barrel and shroud forward. Then you have to remove the trigger and grip assembly, one screw in front of trigger guard and on the beaver tail. Then you will see the two allen screws facing forward. After removing all 4 screws, you can slide the block out. While you have it out you can drill the air way bigger to 5mm if reusing this block. It will reduce the pressure deferential between plenum and valve during firing moment resulting in speed gain. Note be careful when reassembling trigger assembly. It's easy to kink the sear lever spring if not properly aligned.
 
That block holds the poppet valve spring. There are 4 allen screws holding it. First you have to remove the barrel and shroud as a unit. Top rail has a screw you remove this first, then under it is another set screw for the barrel retainer. It is a 1.5mm allen and has a thread locker, you may need to heat it if too tight. After this you can slide the barrel and shroud forward. Then you have to remove the trigger and grip assembly, one screw in front of trigger guard and on the beaver tail. Then you will see the two allen screws facing forward. After removing all 4 screws, you can slide the block out. While you have it out you can drill the air way bigger to 5mm if reusing this block. It will reduce the pressure deferential between plenum and valve during firing moment resulting in speed gain. Note be careful when reassembling trigger assembly. It's easy to kink the sear lever spring if not properly aligned.
Appreciate those detailed instructions. The plan is to use the PP750 Gauge Block with Picatinny Rail from airgunarcheryfun. I'll need to allot more for this replacement as it seems more involved than first thought.