High Side Chinese Filter Dryer Hack

By way of follow up, I have had the filter with the mods in place for about 5.7 hours now. For details on the runs you can see my log here:

https://docs.google.com/spreadsheets/d/1oygaCsqJRjNGGTpXGPIYnAU1ZkyqWbBh5Tz7ODzHb24/edit?usp=sharing

As you will see I had a couple of issues, unrelated to the filter, but I have been able to make the corrections and all is working fine now.

I did a 900psi top off into my 44cf tank yesterday. Today I opened up the filter to examine the interior of the filter tube, the PVC, o-rings, tampons and the 13x Zeolite.

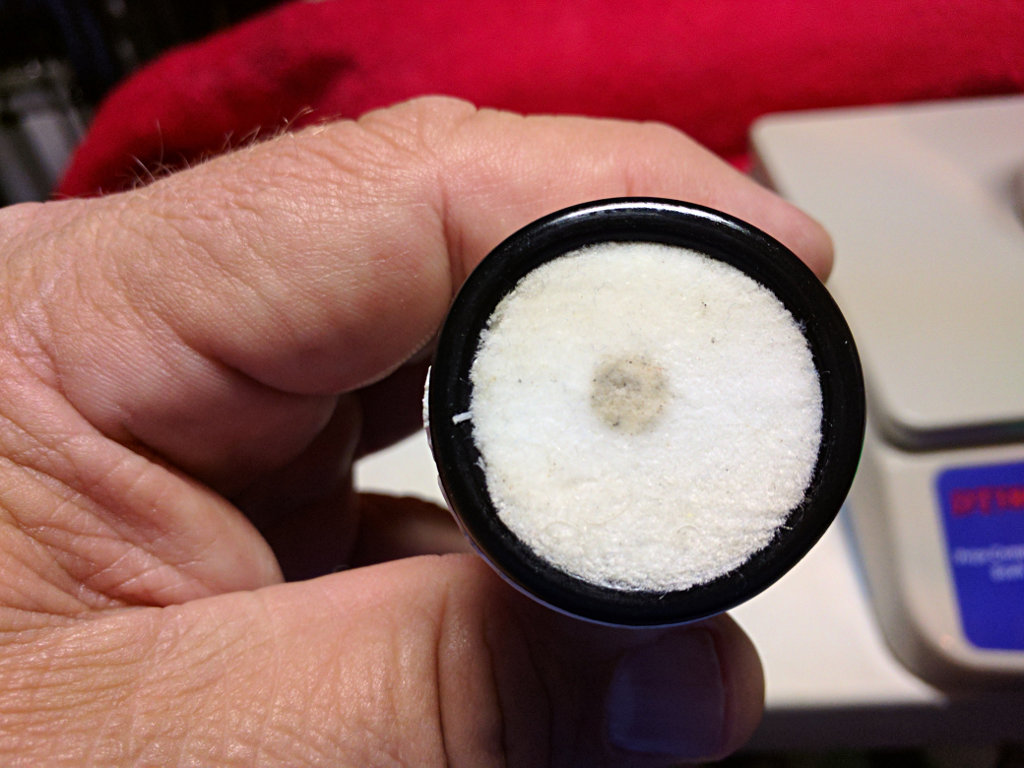
Once the PVC tube was extracted from the tube, my first observation is that the o-rings are till in place, and showing some signs of compression against the face of the caps.and PVC ends.

The tampons show no evidence of water staining. Shaking the pvc, no sound of moving granules is heard, so it is still packed as tightly as it was when placed inside.

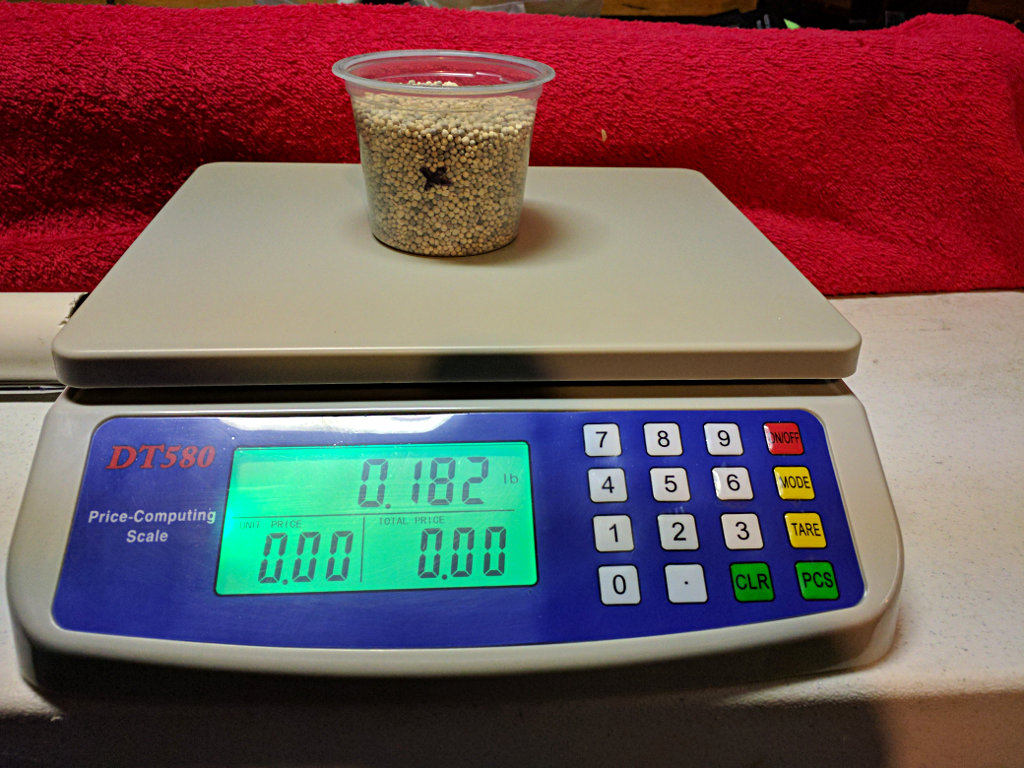
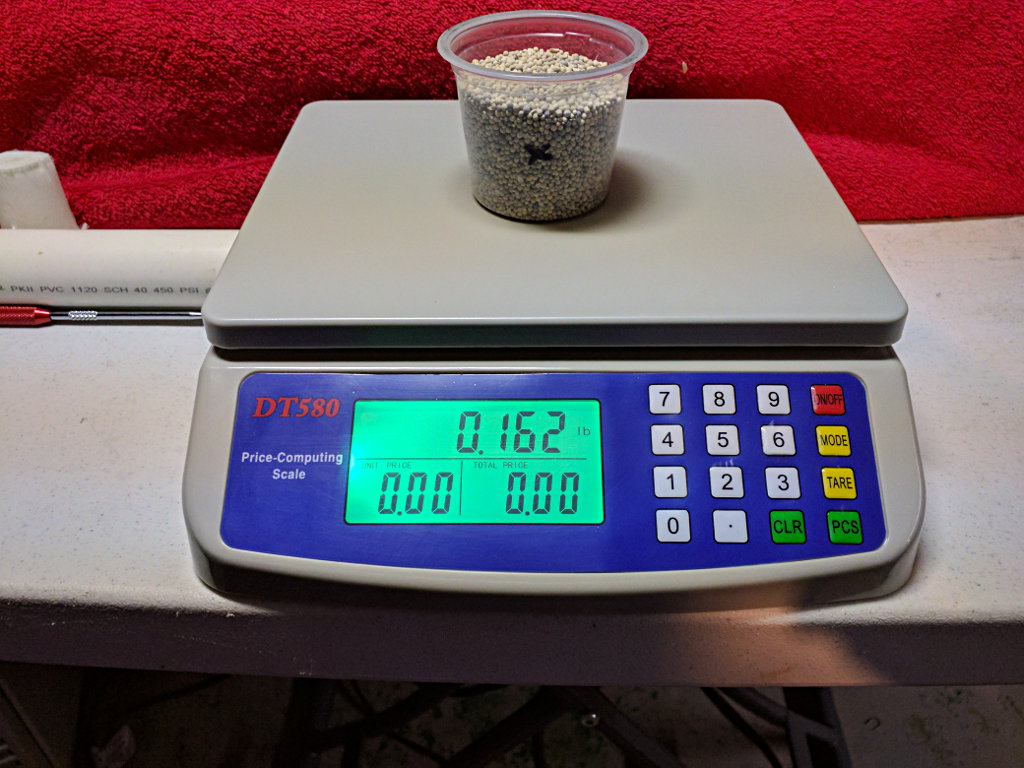
Not having a proper scale, I improvised a simple balance. I dumped the "used" zeolite into one of two identical containers. In the other I placed fresh Zeolite, matching as closely as possible the volume of the used container. Placing them on the balance showed that the used material was slightly heavier.

The inside of the filter tube was pristine, no signs of any adverse processes.

Fully acknowledging the less than scientific methodology, I am still pleased. The o-rings were in place and are showing signs of compression, the tampons also held their position, and I believe that the weight difference probably demonstrates that the used material was holding moisture.

Six hours does not make for much of a trial, but before I went too far, I wanted to check things out. I put all of the same components back into the filter and will extend their run for a bit to see how things look. In future trials I will weigh the Zeolite prior to use so that I have a baseline that might yield a more definitive result.

Submitted for what it is worth....thanks for reading.
 
I think the shoeboxes low output insures more dwell time. Its the compressors that can fill a 98 cfoot tank in 10 minutes that need to be throttled down.
Think of it this way. 
Shoebox - takes 4+ hours to fill a big tank but its the same amount of air as a bigger compressor. So 4 hours to squeeze all the water out

Big compressor - 10 minutes to squeeze all the water out of the same amount of air that the shoebox took 4 hours to do.

So the big comressors have far less time to remove all that water. And the dwell time is going to be less no matter what. So bleeding it seems would be very important as the filter can't hold it all.
 
"rnabholz"Very nice refined looking work on your casing.

If you don't have it covered using two filters, there is no hope for the rest of us.

Well done.
There are actually 3 molecular sieve filters on my setup. One on the Coltri compressor itself and the 2 pictured in my previous post. Like I said totally overkill for what I use it for. 
 
"RAJOD"I think the shoeboxes low output insures more dwell time. Its the compressors that can fill a 98 cfoot tank in 10 minutes that need to be throttled down.
Think of it this way. 
Shoebox - takes 4+ hours to fill a big tank but its the same amount of air as a bigger compressor. So 4 hours to squeeze all the water out

Big compressor - 10 minutes to squeeze all the water out of the same amount of air that the shoebox took 4 hours to do.

So the big comressors have far less time to remove all that water. And the dwell time is going to be less no matter what. So bleeding it seems would be very important as the filter can't hold it all.

Thanks Rajod

We are in agreement regarding the slower output being an advantage in dwell time. If you consider the relatively low volume displaced by the third stage piston which is 1/8" in diameter, it will take some time to output enough volume to move air through the length of the filter.

Thanks for the interest.

 
Okay fellas. So I have the Golden filter. I've got 1" sch40 pvc. There is a lot of slop placing the pvc piping into the filter. How did you guys' fit? And with the loose fit but with O-rings on both ends, aren't we not creating a pressurized pvc tube held captive by the Magnesium or whatever the tube is made of? Couldn't the internal pressure within the pvc pipe cause it to want to expand into he additional space between it and the filter I.D.? Am I missing something here, or are walls of your filters thicker than mine? Is your I.D. smaller? Do you all have lots of slop in the pvc 1" sch40 pipe?

Actually while typing this the seller told me it was 6061 aluminum.
 
Hi Bizill

Yes, there is about a 1/16" gap around the PVC in my set up as well.

And I do agree with your logic that it could create a situation where the PVC could expand to some degree and even crack. I can say that has not happened to mine so far, and I don't think it will, and here is why.

I believe that the o-rings probably leak a bit, having the effect of equalizing the pressure on both sides of the PVC contained in the aluminum canister.

So why is that not a concern for our goals of filtering the air? I believe that while the o-rings do leak a bit, once the pressure is balanced inside the aluminum canister, the path of least resistance for the air to flow through the system is the through the PVC, the tampons and sieve material. It is easier for it to go down that path than to force its way past the orings and go around.

If folks consider that space around the PVC a concern, it could probably be addressed by wrapping the PVC in an appropriately thick sheet of plastic, like Kydex, or perhaps a closed cell foam.

It is not an absolutely perfect, refined system, but I do believe it is quite effective, and leaves about $300 in the bank, which is a significant consideration.

Hope that helps.

Rod
 
  • Like
Reactions: osage
Right after I posted that I did the hack anyway. I assumed the same, the fact that air gets past the o-rings and fills up the dead space. Mine worked a charm just a few hours ago. Used my Yong Heng to fill up the HP filter and my Artemis pistol as well as top of my Taipan Veteran. My 2.17liter scba comes in tomorrow and I can't wait to fill it. Though I'll probably have to wait a few days as the valve and fill whip have not yet come in from China.
 
Bizill, I noticed the same gap as you did when I planned to use 1" ID PVC as a protective inner liner. My preference is to pack the filter without an inner liner. I cut the included factory filter tampon into 3/4" thick sections which provides 18 spacers. 3 of them are used with desiccant and activated carbon. A spacer is at each end of the filter with 75% of the interior filled with desiccant and a spacer for the activated carbon. Any moisture getting beyond the compressor's water separator is absorbed by the desiccant and shouldn't damage the anodized walls of the filter. The AofA Diablo filter works in this manner and there have been no owner reports of damage from moisture. I plan to examine the filter after every 10 hours of run time and recharge the desiccant beads. If there is any moisture damage to the interior of the filter I'll report my findings on the forum. If a liner is needed I will try 1.375" OD thin wall carbon fiber tubing. IMHO, it would take a combination of inadequate first stage water separation and serious neglect servicing the filter to create enough corrosion for it to fail.
 
Ok Guys, I am back with another update.

After 12 hours of run time on the same set of beads, I took things apart tonight for a bead drying session.

Opening the filter casing I was greeted with this view.

filterspot.jpg


The O-rings were showing signs of being compressed, and the filter was spotted in center matching the input orifice in the cap. The other end showed the same spot. So it would seem that the air is flowing as intended. The filter was not damp to the touch.

Pulling the filter out and dumping the 13x Zeolite beads out, they looked just like they did when I put them in there, which I expected to be the case, so onward with the experiment

I placed the beads in a container which I had placed on a scale and zeroed for the container (yes I bought the scale for this experiment...what can I say?).

beadpreweight.jpg


From there I transferred them to a baking sheet and placed them in a toaster oven set at 11....

beadbake.jpg


My time was limited tonight, but I baked them for 40 minutes at around 475 to 500 F

beadtemp.jpg


After they cooled, being ever so careful to not drop so much as a single bead and even capturing the dust from the sheet, I replaced the beads in the same container, having first re-zeroed the scale with the empty container in place. and here is the result

beadpostweight.jpg


Yes, there was a difference, starting weight was .182lbs and post bake it was .162lbs. I think that difference had to be moisture, not much, but definitely something.

I sealed the beads up, and will continue the bake for a couple of hours and see if there is more to be gained, but I think this is encouraging.

From the standpoint of practical observation, I have seen no moisture anywhere in the hoses, tanks or guns, so I am pretty pleased.

Back with more when I have a chance to run more tests.

Thanks for reading.

Rod
 
Great thread! Lots of creative folks here. Thanks to all who have contributed.

Rod, a couple questions if you don't mind.
What size and durometer O-rings did you use?
253mm (9.96") is the full length of the pvc inner tube?
Any updates?

Just ordered the Chinese filter and the Zeolite to build one of these for my Carette that I purchased from azccj. Thanks Chris!


I found this, pretty much the same OD as the ID of the filter housing... If you cut it true, and just a small amount longer than necessary (one or two mm), you probably wouldn't need an O-ring or gasket since the material gives a bit.

Everbilt Model # 1000017938 1-3/8 in. O.D. x 1 in. I.D. x 2 ft. PVC Braided Vinyl Tube

At Home Depot.
 
Hi,

I got the pvc tube cut to length with my miter saw. The ends are not perfectly true but close enough for me. The orings on each end should compress and seal any irregularities. Like rbanholz mentioned, a little leaking helps equalize the pressure between the pvc and filter housing. I also "machined" an oring grove onto the outside of the pvc tube. Here is how I did it:

I set up my table saw as follows:
eebVKWI.jpg


Then I proceeded to make my cut about an inch from the tube end. I used a scrap tube to test and after a few trials I had the saw blade to the desired depth. This was all trial and error since the pvc is soo cheap.

wAgewRs.jpg

191qJbe.jpg

Lzq0awq.jpg

hYzsC33.jpg

s6r7krW.jpg


After sanding the grove smooth, I installed an oring. I am not certain the size of the oring. It is from my edgun matador oring set. The one that goes on the reg housing.

K3lfgCm.jpg

zxvvfDm.jpg


After a little silicone grease application, the pvc tube slide smoothly into the filter housing. It's a tight fit but not too tight. I figured one oring is fine to allow air pressure equalization. All the air will now be flowing through the filter media (tampon and dessicant. I ran out of time today. I will test asap and post my result. Thank you all for the great ideas!!!

gabe